Panasonic HVX200A Operating Instructions - Page 47
Pre-recording PRE REC, Interval recording INTERVAL REC, One-shot recording ONE-SHOT REC - hd video camera
 |
UPC - 791871303351
View all Panasonic HVX200A manuals
Add to My Manuals
Save this manual to your list of manuals |
Page 47 highlights
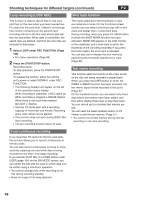
P2 When recording to a P2 card, making the settings in the RECORDING SETUP screen (page 106) enables special recording functions such as Pre-recording, Interval Recording, One Shot Recording, and Loop Recording. This can be used only when the OPERATION TYPE option in the SCENE FILE screen (page 100) is set to VIDEO CAM with the 1080i/60i, 720P/60P, and 480i/60i and 30P recording formats. Pre-recording (PRE REC) This function is used to start recording a certain number of seconds (approx. 3 seconds for HD recordings or approx. 7 seconds for 480i recordings) before actual recording starts. 1 Select ON under PREREC MODE. (Page 106) • For menu operations (Page 96) 2 Press the START/STOP button. Pre-recording starts. • This function does not work during IEEE1394 input recording, transitions from playback to recording, loop recording, interval recording, or one-shot recording. • Immediately after switching from the MCR mode to CAMERA mode, immediately after turning on the camera-recorder's power or immediately after changing the PRE-REC option setting, it may not be possible to record the images and sound before the time mentioned above has elapsed even if the recording has been started straight away. Interval recording (INTERVAL REC) This function is used to repeat a cycle of recording one frame and then going on standby for a set time. 1 Select INTERVAL under REC FUNCTION. (Page 106) • For menu operations (Page 96) 2 Set the time INTERVAL TIME. (Page 106) 3 Press the START/STOP button. The operation of recording one frame and then going on standby for the time that was set under INTERVAL TIME is repeated. To stop operation, press the among the operation buttons. To release the function, either turn off the unit's power or select NORMAL under REC FUNCTION. • The following displays will appear on the left of the operation status display. While recording is underway: I-REC lights up. In temporary standby: I-PAUSE lights up. While recording is stopped: The "I-" of IPAUSE flashes. However, if the duration selected in step 3 is less than 2 seconds, I-REC will flash while recording is underway in accordance with the set time. • The pre-recording function does not work. • No sound is recorded. • All data recorded while this mode is active will be contained in one file. • No guarantees are made for the 1394 output images. One-shot recording (ONE-SHOT REC) This function records a single shot at each unit of time which has been set. 1 Select ONE SHOT under REC FUNCTION. (Page 106) • For menu operations (Page 96) 2 Set the recording time using ONE-SHOT TIME. (Page 106) 3 Press the START/STOP button. Recording continues for the duration set in step 2 and then goes on standby. To stop operation, press the among the operation buttons. To release standby, either turn off the unit's power or select NORMAL under REC FUNCTION. • The following displays will appear on the left of the operation status display. While recording is underway: I-REC lights up. In temporary standby: I-PAUSE lights up. While recording is stopped: The "I-" of IPAUSE flashes. • No other operations are acknowledged during operation. • The pre-recording function does not work. • No sound is recorded. • All data recorded while this mode is active will be contained in one file. • No guarantees are made for the 1394 output images. 47 Shooting
-
 1
1 -
2
-
3
-
4
-
5
-
6
-
7
-
8
-
9
-
10
-
11
-
12
-
13
-
14
-
15
-
16
-
17
-
18
-
19
-
20
-
21
-
22
-
23
-
24
-
25
-
26
-
27
-
28
-
29
-
30
-
31
-
32
-
33
-
34
-
35
-
36
-
37
-
38
-
39
-
40
-
41
-
 42
42 -
 43
43 -
 44
44 -
 45
45 -
 46
46 -
 47
47 -
 48
48 -
 49
49 -
 50
50 -
 51
51 -
 52
52 -
53
-
54
-
55
-
56
-
57
-
58
-
59
-
60
-
61
-
62
-
63
-
64
-
65
-
66
-
67
-
68
-
69
-
70
-
71
-
72
-
73
-
74
-
75
-
76
-
77
-
78
-
79
-
80
-
81
-
82
-
83
-
84
-
85
-
86
-
87
-
88
-
89
-
90
-
91
-
92
-
93
-
94
-
95
-
96
-
97
-
98
-
99
-
100
-
101
-
102
-
103
-
104
-
105
-
106
-
107
-
108
-
109
-
110
-
111
-
112
-
113
-
114
-
115
-
116
-
117
-
118
-
119
-
120
-
121
-
122
-
123
-
124
-
125
-
126
-
127
-
128
-
129
-
130
-
131
-
132
-
133
-
134
 |
 |
