Panasonic HVX200A Operating Instructions - Page 58
Using the Counter - time codes
 |
UPC - 791871303351
View all Panasonic HVX200A manuals
Add to My Manuals
Save this manual to your list of manuals |
Page 58 highlights
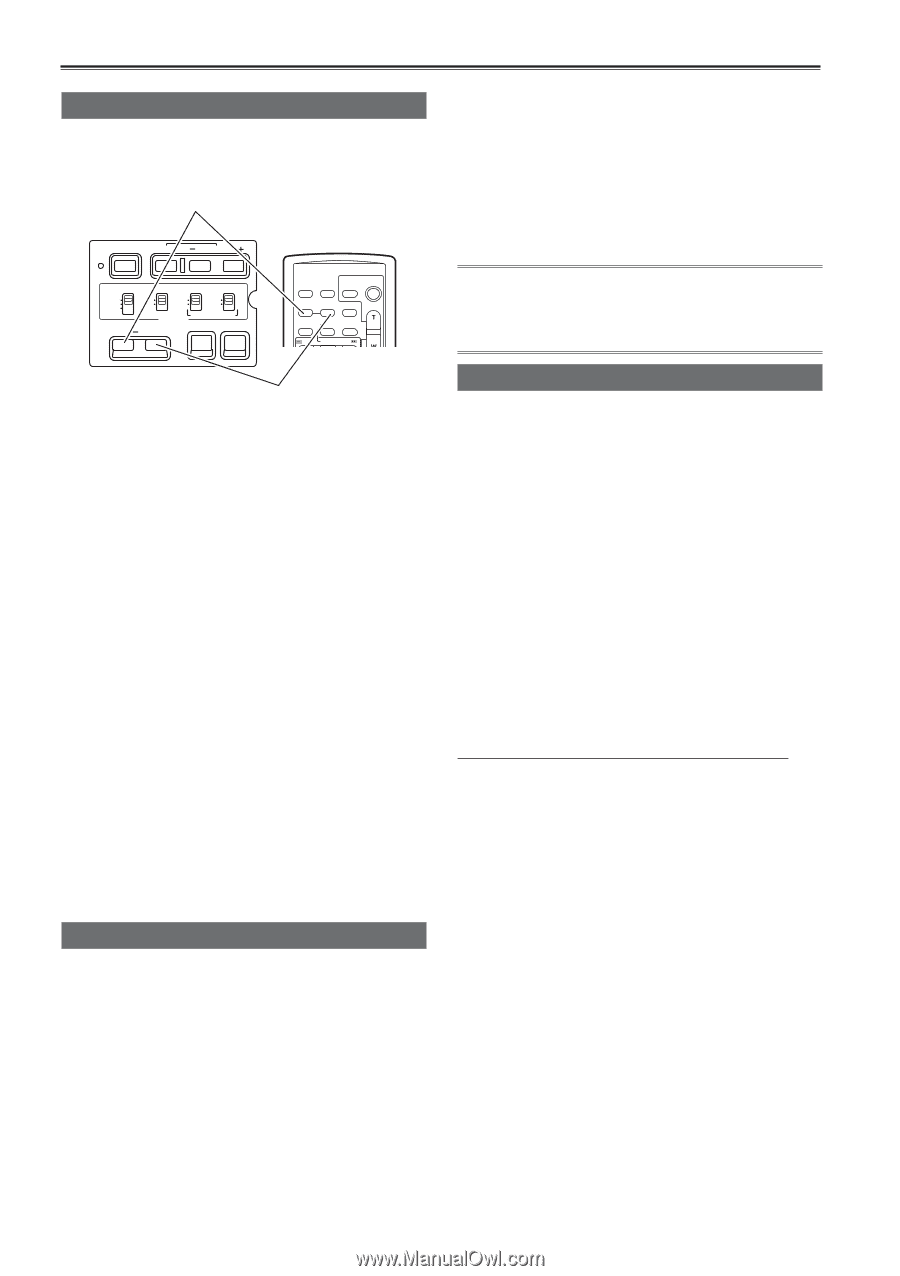
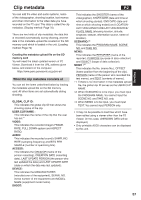
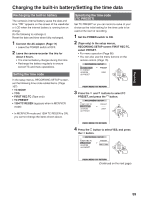
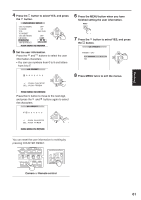
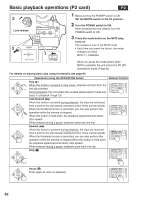
Using the Counter Counter display (P2 card / Tape) You can display a counter that indicates how much time has elapsed during shooting or playback. COUNTER button Camera or Remote control BARS RESET SHUTTER SPEED SEL CH 1 SELECT CH 2 SELECT INPUT 1 INPUT 2 INT(L) INT(R) ON ON INPUT 1 INPUT 2 OFF OFF INPUT 2 AUDIO MIC POWER +48V COUNTER RESET/TC SET ZEBRA OIS OSD START/ DATE/ PHOTO STOP TIME SHOT - VOL + COUNTER RESET TITLE ZOOM MULTI/ P-IN-P REC A.DUB /REW PLAY FF/ COUNTER RESET/TC SET button 1 Press the COUNTER button. Each time you press the button, the display changes as follows. (Page 90) 0 : 00. 00 Counter value In the P2 mode, the counter is not displayed during playback. M 0 : 00. 00 (Tape only) Counter value in memory stop mode TC XX : XX : XX : XX Time code value UB XX XX XX XX User information FR --- Frame rate (30P/24P/24PA) and frame sequence in progressive mode shooting. No display: Data is not displayed. Resetting the counter Press the COUNTER RESET button while the counter is displayed. Memory stop mode (Tape) After shooting or playback, the tape can first be returned to near the pre-programmed position, and then stopped automatically. 1 Press the COUNTER button to display the counter in memory stop mode. 2 At the desired position on the tape, press the COUNTER RESET button to reset the counter. 3 Proceed with playback or shooting. 4 Press the mode button to switch to the VCR mode. (Page 63) 5 When rewind or fast-forward the tape, it stops automatically near where you reset the counter. During dubbing, reset the counter value at the OUT point to stop dubbing with memory stop mode. (Page 81) 1394TC preset mode When shooting using a multi-camera, you can synchronously set the initial values of TC. The camera used for synchronization is the MASTER and the camera being synchronized is the SLAVE. 1 Connect a second camera with a 1394 cable and turn both cameras on. • For connection (Page 78) 2 Put the MASTER camera in CAMERA mode and output a video signal from the 1394 terminal. • Set both cameras to the same recording format. Do the remaining steps on the SLAVE camera. 3 Set the SLAVE camera to MCR/VCR mode and in the setup menus, RECORDING SETUP screen, set FIRST REC TC to PRESET mode so the counter shows the TCG. • You cannot do this if you have selected REGEN. 4 In the setup menus, RECORDING SETUP screen, set 1394 IN PRESET to ON. (Page 108) • 1394TC appears on the screen. 5 Stop or eject the cassette tape. 6 Press the COUNTER RESET/TC SET button. The TCG value is preset with the TC value from the input 1394 signal. 7 Reset the SLAVE camera to CAMERA mode. 58
-
 1
1 -
2
-
3
-
4
-
5
-
6
-
7
-
8
-
9
-
10
-
11
-
12
-
13
-
14
-
15
-
16
-
17
-
18
-
19
-
20
-
21
-
22
-
23
-
24
-
25
-
26
-
27
-
28
-
29
-
30
-
31
-
32
-
33
-
34
-
35
-
36
-
37
-
38
-
39
-
40
-
41
-
42
-
43
-
44
-
45
-
46
-
47
-
48
-
49
-
50
-
51
-
52
-
 53
53 -
 54
54 -
 55
55 -
 56
56 -
 57
57 -
 58
58 -
 59
59 -
 60
60 -
 61
61 -
 62
62 -
 63
63 -
64
-
65
-
66
-
67
-
68
-
69
-
70
-
71
-
72
-
73
-
74
-
75
-
76
-
77
-
78
-
79
-
80
-
81
-
82
-
83
-
84
-
85
-
86
-
87
-
88
-
89
-
90
-
91
-
92
-
93
-
94
-
95
-
96
-
97
-
98
-
99
-
100
-
101
-
102
-
103
-
104
-
105
-
106
-
107
-
108
-
109
-
110
-
111
-
112
-
113
-
114
-
115
-
116
-
117
-
118
-
119
-
120
-
121
-
122
-
123
-
124
-
125
-
126
-
127
-
128
-
129
-
130
-
131
-
132
-
133
-
134
 |
 |