Panasonic HVX200A Operating Instructions - Page 56
Saving scene files and other settings on SD memory cards
 |
UPC - 791871303351
View all Panasonic HVX200A manuals
Add to My Manuals
Save this manual to your list of manuals |
Page 56 highlights
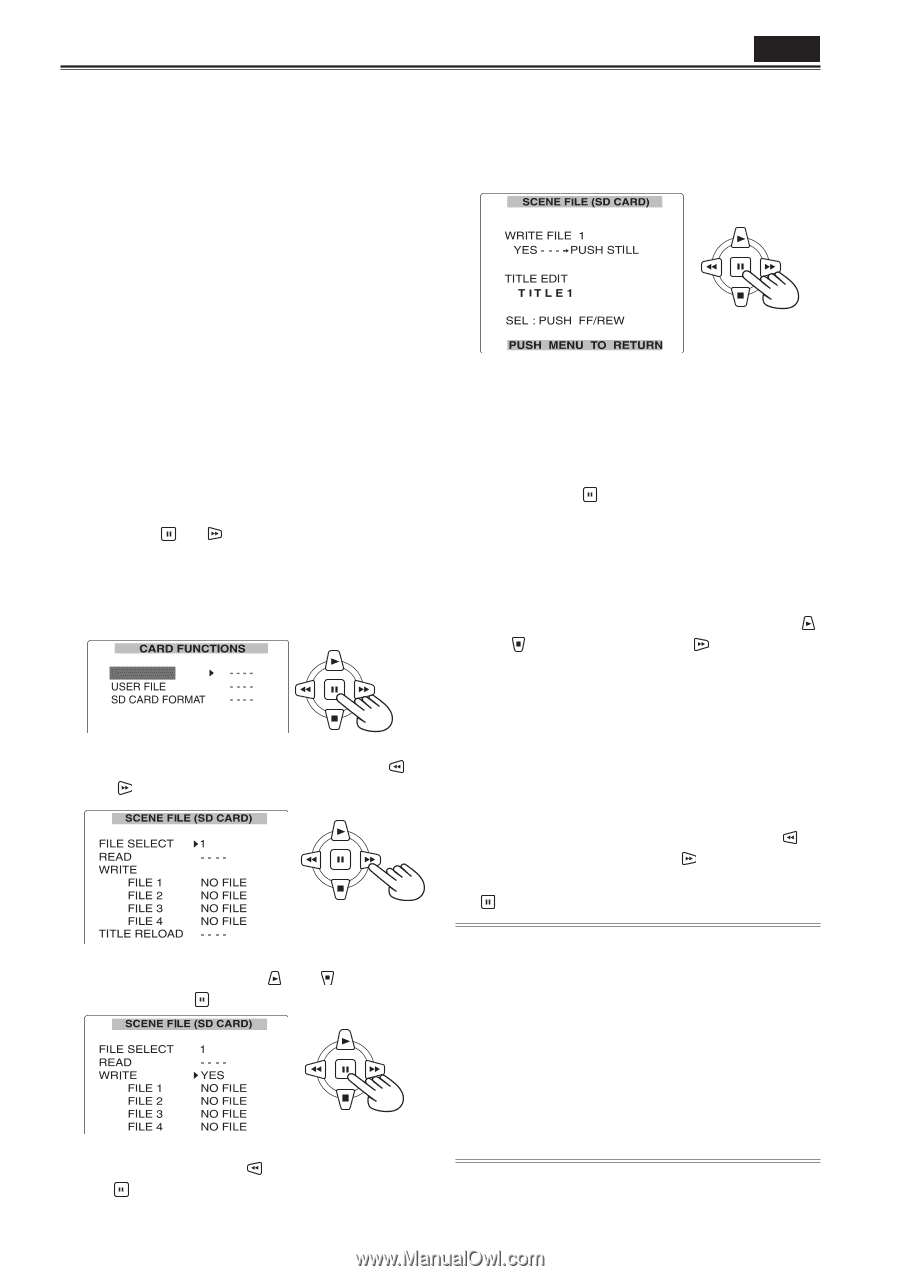
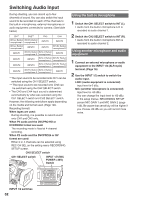
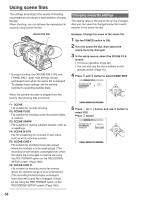
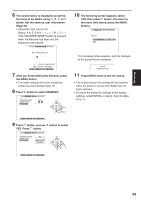
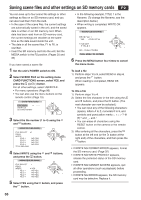
Saving scene files and other settings on SD memory cards P2 You can save up to four scene file settings or other settings as files on an SD memory card, and you can also load them from the card. • In the case of the scene files, the current settings are automatically saved in the unit, and the saved data is written on an SD memory card. When data has been read from an SD memory card, the current settings are rewritten at the same time as the data saved inside the unit. • The data in all the scene files, F1 to F6, is rewritten. • Insert the SD memory card into the unit. Set the MEDIA switch to the P2 position. (Pages 25 and 32) If you have saved a scene file 1 Set the unit's POWER switch to ON. 2 Select SCENE FILE on the setting menu CARD FUNCTIONS screen, select YES, and press the (or ) button. For all other settings, select USER FILE. • For menu operations (Page 96) • You can also use the menu buttons on the remote control. (Page 15) SCENE FILE 3 Select the file number (1 to 4) using the and buttons. • In the following example, TITLE 1 is the filename. (To change the filename, see the description below.) • When writing is completed, WRITE OK appears. 6 Press the MENU button four times to cancel the menu mode. To load a file 1) Perform steps 1 to 3, select READ in step 4, and press the button. When reading is completed, READ OK appears. To title a file 1) Perform steps 1 to 4. 2) Select the first character in the title using the and buttons, and press the button. (The next character can now be selected.) • You can input any of the following characters: (space), letters A to Z, numerals 0 to 9, and symbols and punctuation marks and _-. and / • You can erase all characters using the RESET button on the camera or the remote control. 3) After entering all the characters, press the button at the left end (or the button at the right end) of the characters, and then press the button. 4 Select WRITE using the and buttons, and press the button. 5 Select YES using the button, and press the button. • If WRITE NG FORMAT ERROR appears, format the SD memory card. (Page 32) • If WRITE NG WRITE PROTECT appears, release the protected status of the SD memory card. • If WRITE NG CANNOT ACCESS appears, quit all other operations (such as playback) before proceeding. • If WRITE NG ERROR appears, the SD memory card may be defective. Replace it. 56
-
 1
1 -
2
-
3
-
4
-
5
-
6
-
7
-
8
-
9
-
10
-
11
-
12
-
13
-
14
-
15
-
16
-
17
-
18
-
19
-
20
-
21
-
22
-
23
-
24
-
25
-
26
-
27
-
28
-
29
-
30
-
31
-
32
-
33
-
34
-
35
-
36
-
37
-
38
-
39
-
40
-
41
-
42
-
43
-
44
-
45
-
46
-
47
-
48
-
49
-
50
-
 51
51 -
 52
52 -
 53
53 -
 54
54 -
 55
55 -
 56
56 -
 57
57 -
 58
58 -
 59
59 -
 60
60 -
 61
61 -
62
-
63
-
64
-
65
-
66
-
67
-
68
-
69
-
70
-
71
-
72
-
73
-
74
-
75
-
76
-
77
-
78
-
79
-
80
-
81
-
82
-
83
-
84
-
85
-
86
-
87
-
88
-
89
-
90
-
91
-
92
-
93
-
94
-
95
-
96
-
97
-
98
-
99
-
100
-
101
-
102
-
103
-
104
-
105
-
106
-
107
-
108
-
109
-
110
-
111
-
112
-
113
-
114
-
115
-
116
-
117
-
118
-
119
-
120
-
121
-
122
-
123
-
124
-
125
-
126
-
127
-
128
-
129
-
130
-
131
-
132
-
133
-
134
 |
 |