Panasonic HVX200A Operating Instructions - Page 52
Switching Audio Input - dvcpro hd p2
 |
UPC - 791871303351
View all Panasonic HVX200A manuals
Add to My Manuals
Save this manual to your list of manuals |
Page 52 highlights
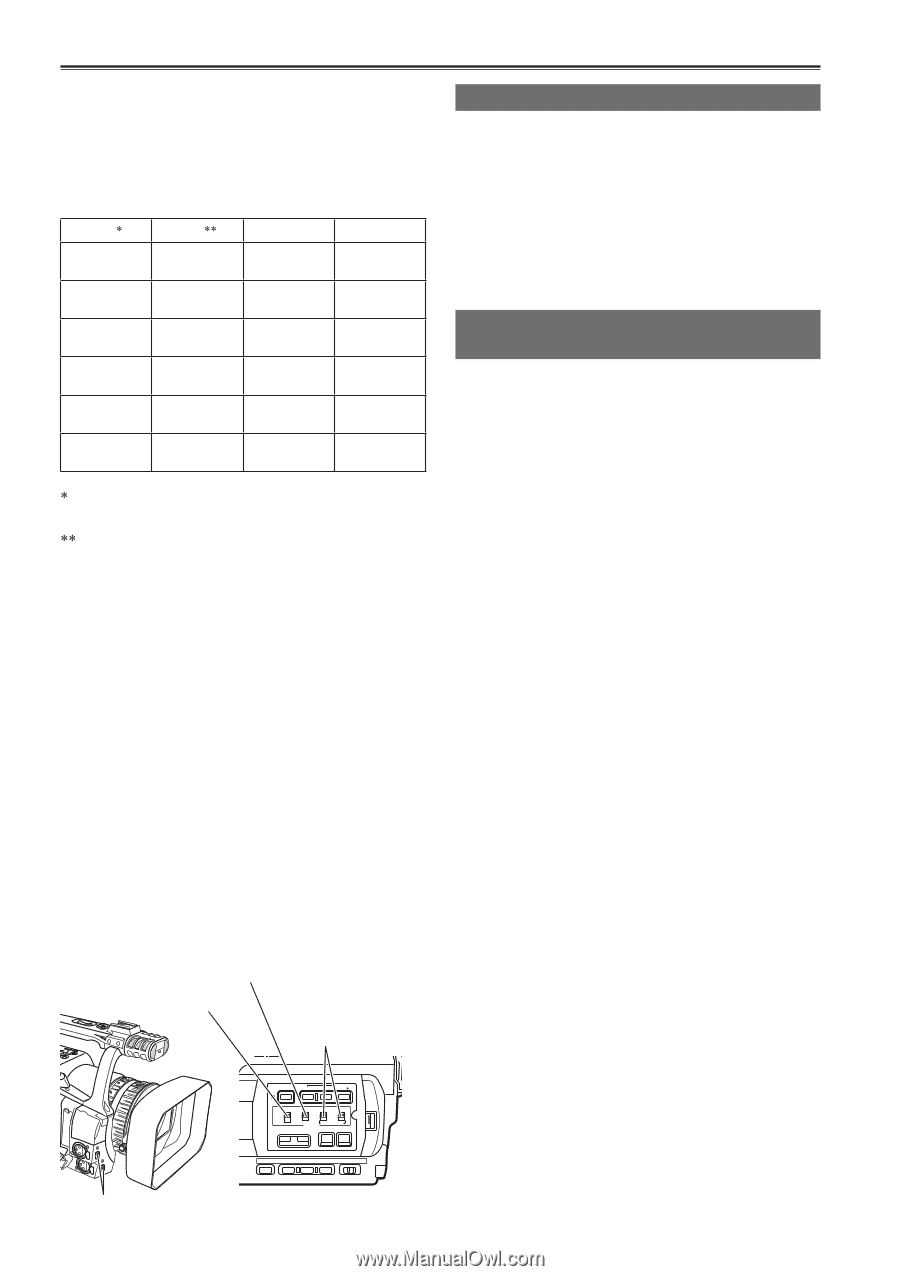
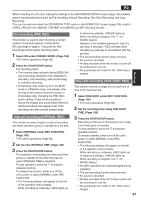
Switching Audio Input During shooting, you can record up to four channels of sound. You can also switch the input sound to be recorded on each of the channels to the built-in microphones, external microphones or audio equipment connected to camera. (See table below) CH1 CH2 CH3 CH4 INT(L): Built-in INT(R): Built-in microphone L microphone R INPUT1 INPUT2 INT(L): Built-in microphone L INPUT2 INPUT1 INT(R): Built-in microphone R INPUT1 INT(R): Built-in INT(L): Built-in microphone R microphone L INPUT2 INPUT1 INPUT2 INT(L): Built-in INT(R): Built-in microphone L microphone R INPUT2 INPUT2 INT(L): Built-in INT(R): Built-in microphone L microphone R INPUT2 INT(R): Built-in INT(L): Built-in microphone R microphone L INPUT1 The input sound to be recorded onto CH1 can be switched using the CH1 SELECT switch. The input sound to be recorded onto CH2 can be switched using the CH2 SELECT switch. • The CH3 and CH4 input sound is determined automatically by what was selected using the CH1 SELECT switch and CH2 SELECT switch. However, the following restrictions apply depending on the media and format used. (Page 129, Recording format) When tapes are used: During shooting, it is possible to record sound onto CH1 and CH2 only. When P2 cards and the DVCPRO HD or DVCPRO50 format are used: The recording mode is fixed at 4-channel recording. When P2 cards and the DVCPRO25 or DV format are used: Either 2 or 4 channels can be selected using REC CH SEL on the setting menu RECORDING SETUP screen. CH2 SELECT switch CH1 SELECT switch INPUT 1/2 (MIC POWER +48V) Switch Using the built-in microphone 1 Switch the CH1 SELECT switch to INT (L). • Audio from the built-in microphone Lch is recorded to audio channel 1. 2 Switch the CH2 SELECT switch to INT (R). • Audio from the built-in microphone Rch is recorded to audio channel 2. Using another microphone and audio equipment 1 Connect an external microphone or audio equipment to the INPUT 1/2 (XLR 3-pin) terminal. (Page 76) 2 Use the INPUT 1/2 switch to switch the audio input. LINE: (audio equipment is connected) Input level is 0 dBu. MIC: (another microphone is connected) Input level is -50 dBu. You can change the input level to -60 dBu in the setup menus, RECORDING SETUP screen MIC GAIN 1 and MIC GAIN 2 (page 106). Be aware that sensitivity will be higher if you choose -60 dBu so you will record more noise. BARS RESET SHUTTER SPEED SEL CH 1 SELECT CH 2 SELECT INPUT 1 INPUT 2 INT(L) INPUT 1 INPUT 2 INT(R) INPUT 2 ON ON OFF OFF AUDIO MIC POWER +48V COUNTER RESET/TC SET ZEBRA OIS INPUT 1/2 switches 52
-
 1
1 -
2
-
3
-
4
-
5
-
6
-
7
-
8
-
9
-
10
-
11
-
12
-
13
-
14
-
15
-
16
-
17
-
18
-
19
-
20
-
21
-
22
-
23
-
24
-
25
-
26
-
27
-
28
-
29
-
30
-
31
-
32
-
33
-
34
-
35
-
36
-
37
-
38
-
39
-
40
-
41
-
42
-
43
-
44
-
45
-
46
-
 47
47 -
 48
48 -
 49
49 -
 50
50 -
 51
51 -
 52
52 -
 53
53 -
 54
54 -
 55
55 -
 56
56 -
 57
57 -
58
-
59
-
60
-
61
-
62
-
63
-
64
-
65
-
66
-
67
-
68
-
69
-
70
-
71
-
72
-
73
-
74
-
75
-
76
-
77
-
78
-
79
-
80
-
81
-
82
-
83
-
84
-
85
-
86
-
87
-
88
-
89
-
90
-
91
-
92
-
93
-
94
-
95
-
96
-
97
-
98
-
99
-
100
-
101
-
102
-
103
-
104
-
105
-
106
-
107
-
108
-
109
-
110
-
111
-
112
-
113
-
114
-
115
-
116
-
117
-
118
-
119
-
120
-
121
-
122
-
123
-
124
-
125
-
126
-
127
-
128
-
129
-
130
-
131
-
132
-
133
-
134
 |
 |