Pioneer PDP-6010FD Owner's Manual - Page 62
Using the Picture Detail, Using Color Temp, Using CTI, Eliminating noise from images - 1080p
 |
View all Pioneer PDP-6010FD manuals
Add to My Manuals
Save this manual to your list of manuals |
Page 62 highlights
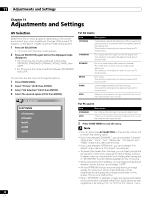
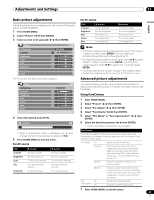
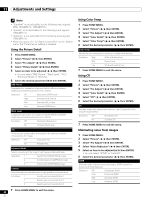
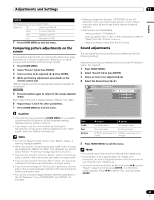
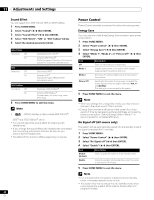
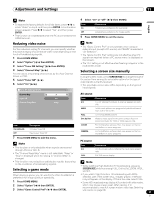
11 Adjustments and Settings Note • "Standard" is not selectable for the following input signals: 480p, 720p@60 Hz, 1080p@60 Hz. • "Smooth" is not selectable for the following input signals: 1080p@60 Hz. • "Advance" is not selectable for the following input signals: 1080p@60 Hz. • When you select "On" for "Game Control Pref" on the "Option" menu, the "PureCinema" setting is disabled. Using the Picture Detail 1 Press HOME MENU. 2 Select "Picture" ( / then ENTER). 3 Select "Pro Adjust" ( / then ENTER). 4 Select "Picture Detail" ( / then ENTER). 5 Select an item to be adjusted ( / then ENTER). • You can select "DRE Picture", "Black Level", "ACL", "Enhancer Mode" or "Gamma". 6 Select the desired parameter ( / then ENTER). DRE Picture Emphasizes the contrast on images so that the difference between brightness and darkness becomes more distinct Selections Off Deactivates DRE Picture High Enhanced DRE Picture Mid Standard DRE Picture Low Moderate DRE Picture Black Level Emphasizes dark portion on images so that the difference between brightness and darkness becomes more distinct Selections Off Deactivates Black Level On Activates Black Level ACL Performs such compensation that results in the optimum contrast characteristics for images Selections Off Deactivates ACL On Activates ACL Enhancer Mode Selects processing of the image's high frequency (detailed) areas Selections 1 Selects Hard (SHARPNESS) image 2 Selects Natural (SHARPNESS) image 3 Selects Soft (SHARPNESS) image Gamma Adjusts the gamma characteristics (image gradation characteristics) Selections 1 Selects gamma characteristics 1 2 Selects gamma characteristics 2 3 Selects gamma characteristics 3 Using Color Temp 1 Press HOME MENU. 2 Select "Picture" ( / then ENTER). 3 Select "Pro Adjust" ( / then ENTER). 4 Select "Color Detail" ( / then ENTER). 5 Select "Color Temp" ( / then ENTER). 6 Select the desired parameter ( / then ENTER). Color Temp Adjusts the color temperature, resulting in a better white balance. Selections High White with bluish tone Mid Natural tone Low White with reddish tone 7 Press HOME MENU to exit the menu. Using CTI 1 Press HOME MENU. 2 Select "Picture" ( / then ENTER). 3 Select "Pro Adjust" ( / then ENTER). 4 Select "Color Detail" ( / then ENTER). 5 Select "CTI" ( / then ENTER). 6 Select the desired parameter ( / then ENTER). CTI Provides images with clearer color contours. The CTI stands for Color Transient Improvement. Selections Off Deactivates CTI On Activates CTI 7 Press HOME MENU to exit the menu. Eliminating noise from images 1 Press HOME MENU. 2 Select "Picture" ( / then ENTER). 3 Select "Pro Adjust" ( / then ENTER). 4 Select "Noise Reduction" ( / then ENTER). 5 Select an item to be adjusted ( / then ENTER). • You can select "3DNR" or "Field NR". 6 Select the desired parameter ( / then ENTER). 3DNR Eliminates video noise for clean crisp images. 3DNR stands for 3dimensional Noise Reduction. Selections Off Deactivates 3DNR High Enhanced 3DNR Mid Standard 3DNR Low Moderate 3DNR 7 Press HOME MENU to exit the menu. 62 En
-
 1
1 -
2
-
3
-
4
-
5
-
6
-
7
-
8
-
9
-
10
-
11
-
12
-
13
-
14
-
15
-
16
-
17
-
18
-
19
-
20
-
21
-
22
-
23
-
24
-
25
-
26
-
27
-
28
-
29
-
30
-
31
-
32
-
33
-
34
-
35
-
36
-
37
-
38
-
39
-
40
-
41
-
42
-
43
-
44
-
45
-
46
-
47
-
48
-
49
-
50
-
51
-
52
-
53
-
54
-
55
-
56
-
 57
57 -
 58
58 -
 59
59 -
 60
60 -
 61
61 -
 62
62 -
 63
63 -
 64
64 -
 65
65 -
 66
66 -
 67
67 -
68
-
69
-
70
-
71
-
72
-
73
-
74
-
75
-
76
-
77
-
78
-
79
-
80
-
81
-
82
-
83
-
84
-
85
-
86
-
87
-
88
-
89
-
90
-
91
-
92
-
93
-
94
-
95
-
96
-
97
-
98
-
99
-
100
-
101
-
102
-
103
-
104
-
105
-
106
-
107
-
108
-
109
-
110
-
111
-
112
-
113
-
114
-
115
-
116
-
117
-
118
-
119
-
120
-
121
-
122
-
123
-
124
-
125
-
126
-
127
-
128
-
129
-
130
-
131
-
132
-
133
-
134
-
135
-
136
-
137
-
138
-
139
-
140
-
141
-
142
-
143
-
144
-
145
-
146
-
147
-
148
-
149
-
150
-
151
-
152
-
153
-
154
-
155
-
156
-
157
-
158
-
159
-
160
-
161
-
162
-
163
-
164
-
165
-
166
-
167
-
168
-
169
-
170
-
171
-
172
-
173
-
174
-
175
-
176
-
177
-
178
-
179
-
180
-
181
-
182
-
183
-
184
-
185
-
186
-
187
-
188
-
189
-
190
-
191
-
192
-
193
-
194
-
195
-
196
-
197
-
198
-
199
-
200
-
201
-
202
-
203
-
204
-
205
-
206
-
207
-
208
-
209
-
210
-
211
-
212
-
213
-
214
-
215
-
216
-
217
-
218
-
219
-
220
-
221
-
222
-
223
-
224
-
225
-
226
-
227
-
228
-
229
-
230
-
231
-
232
-
233
-
234
-
235
-
236
-
237
-
238
-
239
-
240
-
241
-
242
-
243
-
244
-
245
-
246
-
247
-
248
-
249
-
250
-
251
-
252
-
253
-
254
-
255
-
256
-
257
-
258
-
259
-
260
-
261
-
262
-
263
-
264
-
265
-
266
-
267
-
268
-
269
-
270
-
271
-
272
-
273
-
274
-
275
-
276
-
277
-
278
-
279
-
280
-
281
-
282
-
283
-
284
-
285
-
286
-
287
-
288
-
289
-
290
-
291
-
292
-
293
-
294
-
295
-
296
-
297
-
298
 |
 |