Pioneer PDP-6010FD Owner's Manual - Page 63
Comparing picture adjustments on the, screen, Sound adjustments
 |
View all Pioneer PDP-6010FD manuals
Add to My Manuals
Save this manual to your list of manuals |
Page 63 highlights
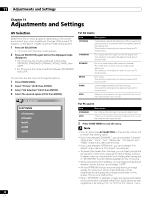
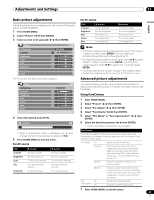
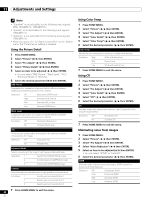
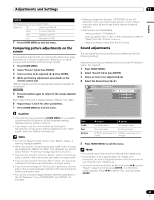
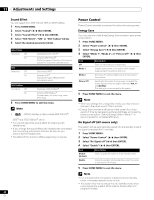
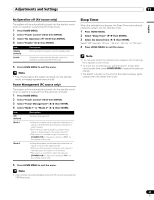
Adjustments and Settings 11 English Field NR Removes glimmer for more natural images Selections Off Deactivates Field NR High Enhanced Field NR Mid Standard Field NR Low Moderate Field NR 7 Press HOME MENU to exit the menu. Comparing picture adjustments on the screen During picture adjustments, you can quickly refer to the image previously set in the same parameter, allowing you to easily compare and select the preferred image quality. 1 Press HOME MENU. 2 Select "Picture" ( / then ENTER). 3 Select an item to be adjusted ( / then ENTER). 4 While performing adjustment, press BLUE on the remote control unit. "Before" displays and the image adjusted last time appears for comparison. Before 5 Press the button again to return to the newly adjusted image. Each press of the button toggles between "Before" and "After". 6 Repeat steps 1 and 5 for other parameters. 7 Press HOME MENU to exit the menu. Caution • If you exit the menu by pressing HOME MENU or no operation is performed for 60 seconds, all the parameter settings displayed last are stored in memory. • If you want to exit the menu without performing the adjustments (or leaving the settings disabled) on the "After" screen, switch to "Before" and then exit. Note • You cannot adjust any item while on the "Before" screen. A warning message appears. • When you switch to another parameter, make sure to change the display from "Before" to "After" first, otherwise you cannot select "Before". A warning message appears if you don't. • If you exit the selection from the "Before" screen, the previous entry is stored in the memory and the button no longer works. • If you exit the selection from the "After" screen, the new entry is stored in the memory and the button no longer works. • If you move and change the "AV Selection" parameter, the new entry in the current parameter is stored in the memory and the button continues to work. • You cannot compare images between different parameters on the "AV Selection" menu ("STANDARD" and "MOVIE", for example). • When you select this function, "OPTIMUM" on the "AV Selection" menu and "Room Light Sensor" on the "Option" menu are set to off and image quality returns to default settings. • This function is not selectable: - when you select "AV Selection", - when you select "Yes" or "No" on the confirmation screen for "Reset" from the "Picture" menu or - when you select a menu from the PC source Sound adjustments You can adjust the sound quality to your preference with the following settings. Adjust the sound to your preference for the chosen AV Selection option. See page 60. 1 Press HOME MENU. 2 Select "Sound" ( / then ENTER). 3 Select an item to be adjusted ( / ). 4 Select the desired level ( / ). Sound STANDARD Treble 2 Bass 0 Balance 0 Reset Sound Effect Item Treble Bass Balance button button For weaker treble For stronger treble For weaker bass For stronger bass Shifts the audio balance to Shifts the audio balance to the left the right 5 Press HOME MENU to exit the menu. Note • You cannot adjust the sound for listening with headphones. • If you perform sound adjustments with headphones connected, the new settings will become effective as soon as you disconnect the headphones. • To restore the factory defaults for all items, press / to select "Reset" in step 3, and then press ENTER. A confirmation screen appears. Press / to select "Yes", and then press ENTER. 63 En
-
 1
1 -
2
-
3
-
4
-
5
-
6
-
7
-
8
-
9
-
10
-
11
-
12
-
13
-
14
-
15
-
16
-
17
-
18
-
19
-
20
-
21
-
22
-
23
-
24
-
25
-
26
-
27
-
28
-
29
-
30
-
31
-
32
-
33
-
34
-
35
-
36
-
37
-
38
-
39
-
40
-
41
-
42
-
43
-
44
-
45
-
46
-
47
-
48
-
49
-
50
-
51
-
52
-
53
-
54
-
55
-
56
-
57
-
 58
58 -
 59
59 -
 60
60 -
 61
61 -
 62
62 -
 63
63 -
 64
64 -
 65
65 -
 66
66 -
 67
67 -
 68
68 -
69
-
70
-
71
-
72
-
73
-
74
-
75
-
76
-
77
-
78
-
79
-
80
-
81
-
82
-
83
-
84
-
85
-
86
-
87
-
88
-
89
-
90
-
91
-
92
-
93
-
94
-
95
-
96
-
97
-
98
-
99
-
100
-
101
-
102
-
103
-
104
-
105
-
106
-
107
-
108
-
109
-
110
-
111
-
112
-
113
-
114
-
115
-
116
-
117
-
118
-
119
-
120
-
121
-
122
-
123
-
124
-
125
-
126
-
127
-
128
-
129
-
130
-
131
-
132
-
133
-
134
-
135
-
136
-
137
-
138
-
139
-
140
-
141
-
142
-
143
-
144
-
145
-
146
-
147
-
148
-
149
-
150
-
151
-
152
-
153
-
154
-
155
-
156
-
157
-
158
-
159
-
160
-
161
-
162
-
163
-
164
-
165
-
166
-
167
-
168
-
169
-
170
-
171
-
172
-
173
-
174
-
175
-
176
-
177
-
178
-
179
-
180
-
181
-
182
-
183
-
184
-
185
-
186
-
187
-
188
-
189
-
190
-
191
-
192
-
193
-
194
-
195
-
196
-
197
-
198
-
199
-
200
-
201
-
202
-
203
-
204
-
205
-
206
-
207
-
208
-
209
-
210
-
211
-
212
-
213
-
214
-
215
-
216
-
217
-
218
-
219
-
220
-
221
-
222
-
223
-
224
-
225
-
226
-
227
-
228
-
229
-
230
-
231
-
232
-
233
-
234
-
235
-
236
-
237
-
238
-
239
-
240
-
241
-
242
-
243
-
244
-
245
-
246
-
247
-
248
-
249
-
250
-
251
-
252
-
253
-
254
-
255
-
256
-
257
-
258
-
259
-
260
-
261
-
262
-
263
-
264
-
265
-
266
-
267
-
268
-
269
-
270
-
271
-
272
-
273
-
274
-
275
-
276
-
277
-
278
-
279
-
280
-
281
-
282
-
283
-
284
-
285
-
286
-
287
-
288
-
289
-
290
-
291
-
292
-
293
-
294
-
295
-
296
-
297
-
298
 |
 |