Samsung GX10 User Manual (ENGLISH) - Page 107
to choose whether to insert
 |
UPC - 044701007098
View all Samsung GX10 manuals
Add to My Manuals
Save this manual to your list of manuals |
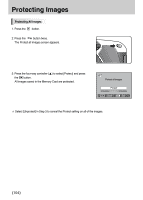
Page 107 highlights
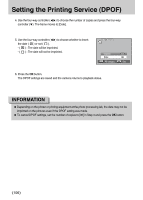
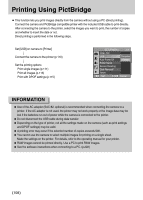
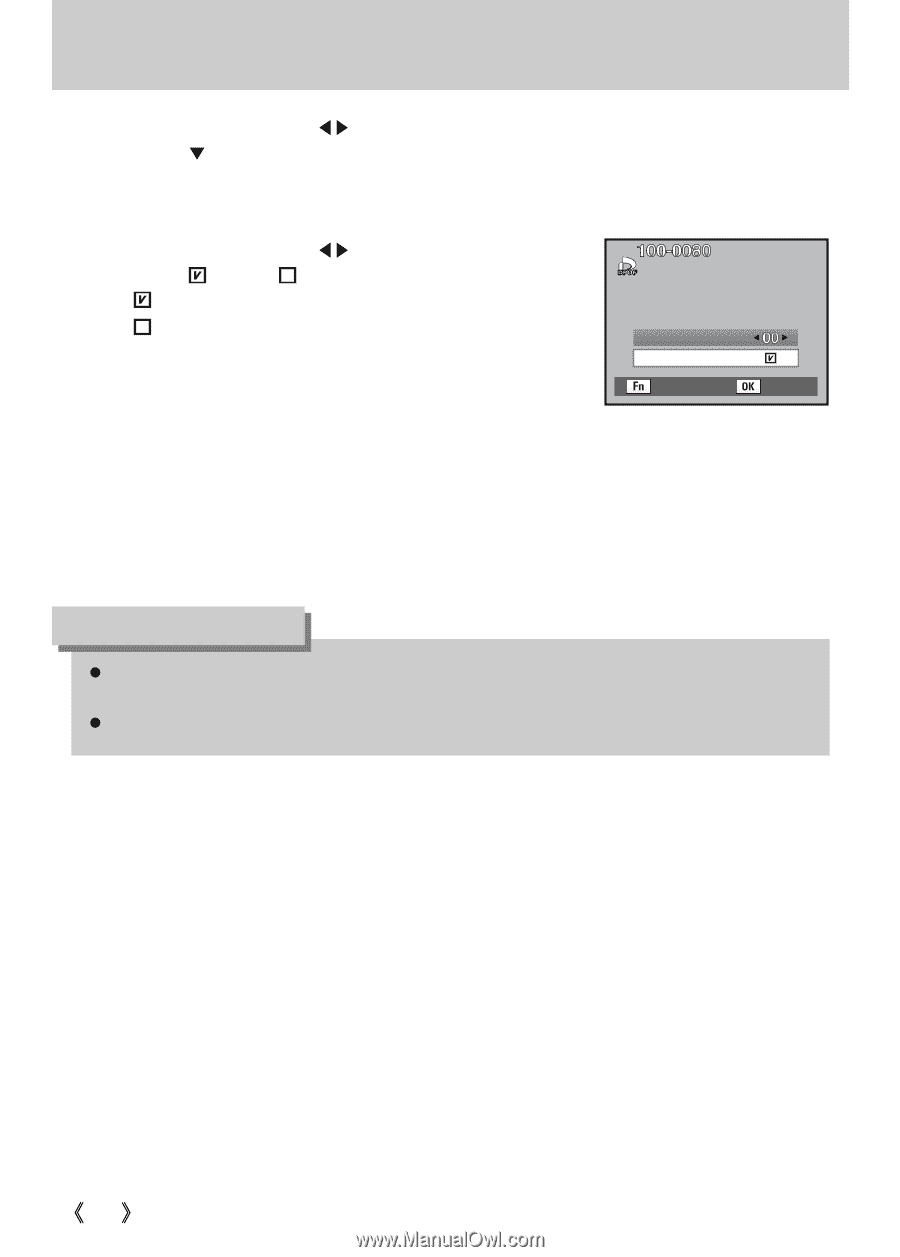
Setting the Printing Service (DPOF) 4. Use the four-way controller (ȜȞ) to choose the number of copies and press the four-way controller (ƌ). The frame moves to [Date]. 5. Use the four-way controller (ȜȞ) to choose whether to insert the date ( ) or not The date will be imprinted. - ( ) : The date will not be imprinted. Copies Date : All images : Set 6. Press the OK button. The DPOF settings are saved and the camera returns to playback status. INFORMATION ƃ Depending on the printer or printing equipment at the photo processing lab, the date may not be imprinted on the pictures even if the DPOF setting was made. ƃ To cancel DPOF settings, set the number of copies to [00] in Step 4 and press the OK button. ŝ106Ş
-
 1
1 -
2
-
3
-
4
-
5
-
6
-
7
-
8
-
9
-
10
-
11
-
12
-
13
-
14
-
15
-
16
-
17
-
18
-
19
-
20
-
21
-
22
-
23
-
24
-
25
-
26
-
27
-
28
-
29
-
30
-
31
-
32
-
33
-
34
-
35
-
36
-
37
-
38
-
39
-
40
-
41
-
42
-
43
-
44
-
45
-
46
-
47
-
48
-
49
-
50
-
51
-
52
-
53
-
54
-
55
-
56
-
57
-
58
-
59
-
60
-
61
-
62
-
63
-
64
-
65
-
66
-
67
-
68
-
69
-
70
-
71
-
72
-
73
-
74
-
75
-
76
-
77
-
78
-
79
-
80
-
81
-
82
-
83
-
84
-
85
-
86
-
87
-
88
-
89
-
90
-
91
-
92
-
93
-
94
-
95
-
96
-
97
-
98
-
99
-
100
-
101
-
 102
102 -
 103
103 -
 104
104 -
 105
105 -
 106
106 -
 107
107 -
 108
108 -
 109
109 -
 110
110 -
 111
111 -
 112
112 -
113
-
114
-
115
-
116
-
117
-
118
-
119
-
120
-
121
-
122
-
123
-
124
-
125
-
126
-
127
-
128
-
129
-
130
-
131
-
132
-
133
-
134
-
135
-
136
-
137
-
138
-
139
-
140
-
141
-
142
-
143
-
144
-
145
-
146
-
147
-
148
-
149
-
150
-
151
-
152
-
153
-
154
-
155
-
156
-
157
-
158
-
159
-
160
-
161
-
162
-
163
-
164
-
165
-
166
-
167
-
168
-
169
-
170
-
171
-
172
-
173
-
174
-
175
-
176
-
177
-
178
-
179
-
180
-
181
-
182
-
183
-
184
-
185
-
186
-
187
-
188
-
189
-
190
-
191
-
192
-
193
-
194
-
195
-
196
-
197
-
198
-
199
-
200
-
201
-
202
-
203
-
204
-
205
-
206
-
207
-
208
-
209
-
210
-
211
-
212
-
213
-
214
-
215
-
216
-
217
-
218
-
219
-
220
-
221
-
222
-
223
-
224
-
225
-
226
-
227
-
228
-
229
-
230
-
231
-
232
-
233
-
234
-
235
-
236
-
237
-
238
-
239
-
240
-
241
-
242
-
243
-
244
-
245
-
246
-
247
-
248
-
249
-
250
-
251
-
252
-
253
-
254
-
255
-
256
-
257
-
258
-
259
-
260
-
261
-
262
 |
 |
106
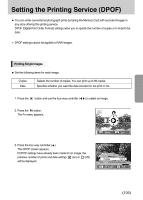
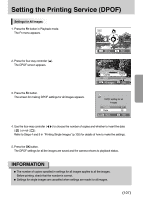
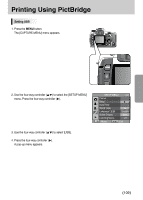
Setting the Printing Service (DPOF)
4. Use the four-way controller (
) to choose the number of copies and press the four-way
controller (
). The frame moves to [Date].
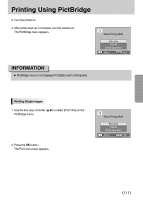
6. Press the
OK
button.
The DPOF settings are saved and the camera returns to playback status.
5. Use the four-way controller (
) to choose whether to insert
the date (
) or not (
).
- (
) : The date will be imprinted.
- (
) : The date will not be imprinted.
Depending on the printer or printing equipment at the photo processing lab, the date may not be
imprinted on the pictures even if the DPOF setting was made.
To cancel DPOF settings, set the number of copies to [00] in Step 4 and press the
OK
button.
INFORMATION
: Set
: All images
Copies
Date