Samsung GX10 User Manual (ENGLISH) - Page 120
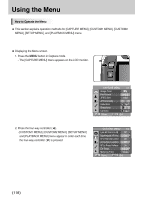
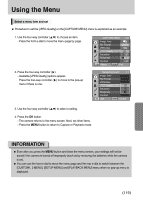
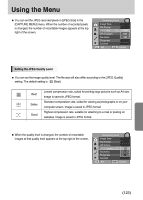
Available [JPEG Quality] options appear.
 |
UPC - 044701007098
View all Samsung GX10 manuals
Add to My Manuals
Save this manual to your list of manuals |
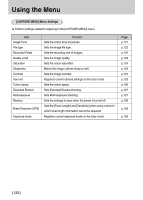
Page 120 highlights
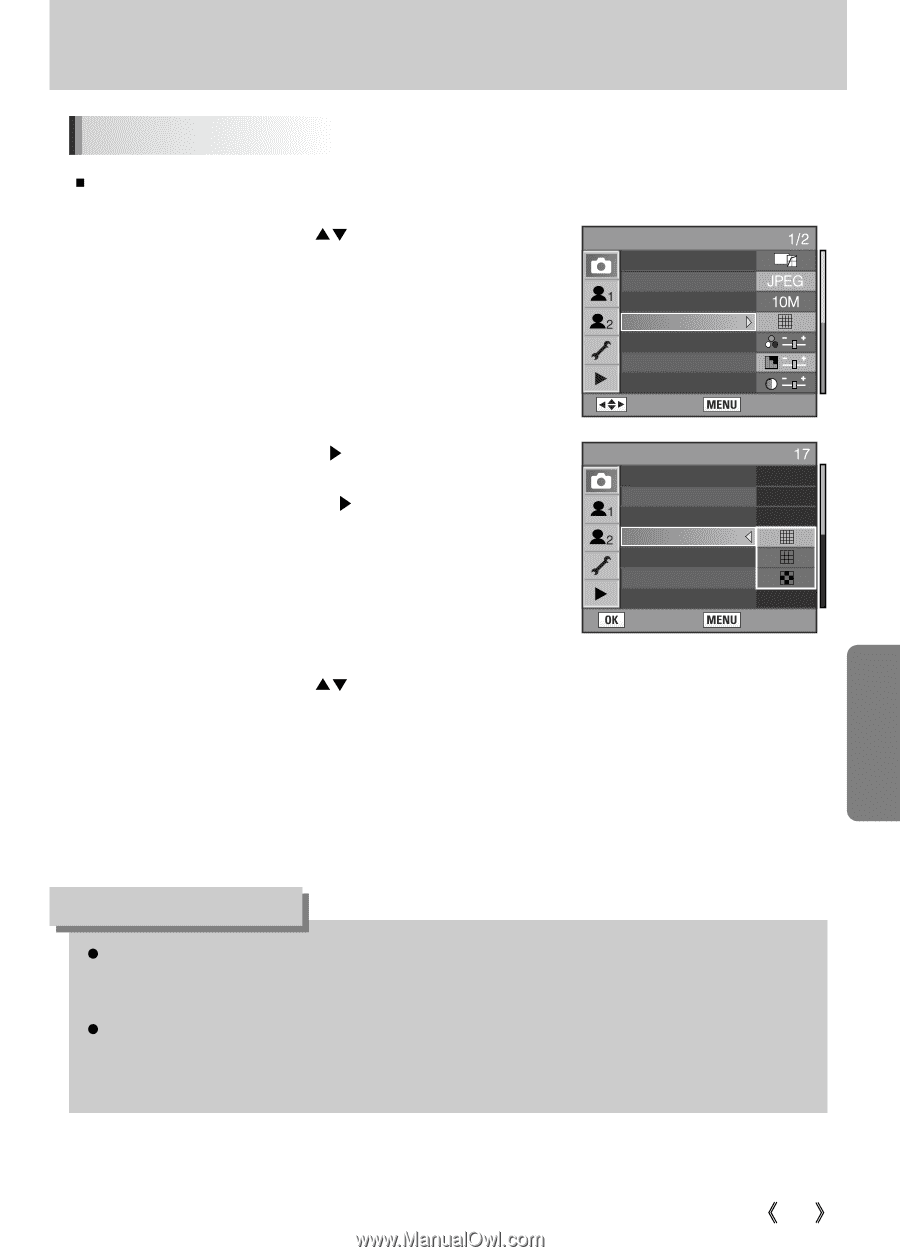
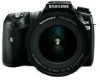
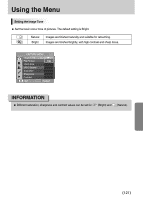
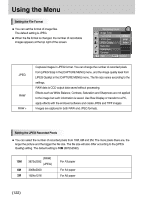
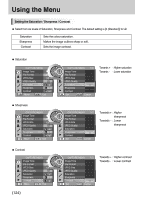
Using the Menu Select a menu item and set ƈ Procedure to set the [JPEG Quality] on the [CAPTURE MENU] menu is explained as an example. 1. Use the four-way controller (Ɗƌ) to choose an item. - Press the front e-dial to move the menu page by page. 2. Press the four-way controller (Ȟ). - Available [JPEG Quality] options appear. Press the four-way controller (Ȟ) to move to the pop-up menu if there is one. CAPTURE MENU Image Tone File Format JPEG Size JPEG Quality Saturation Sharpness Contrast : Move : Exit Remaining Count : Image Tone File Format JPEG Size JPEG Quality Saturation Sharpness Contrast : Set : Cancel 3. Use the four-way controller (Ɗƌ) to select a setting. 4. Press the OK button. - The camera returns to the menu screen. Next, set other items. - Press the MENU button to return to Capture or Playback mode. INFORMATION ƃ Even after you press the MENU button and close the menu screen, your settings will not be saved if the camera is turned off improperly (such as by removing the batteries while the camera is on). ƃ You can use the front e-dial to move the menu page and the rear e-dila to switch between the [CUSTOM1, 2 MENU], [SETUP MENU] and [PLAYBACK MENU] menu when no pop-up menu is displayed. ŝ119Ş
-
 1
1 -
2
-
3
-
4
-
5
-
6
-
7
-
8
-
9
-
10
-
11
-
12
-
13
-
14
-
15
-
16
-
17
-
18
-
19
-
20
-
21
-
22
-
23
-
24
-
25
-
26
-
27
-
28
-
29
-
30
-
31
-
32
-
33
-
34
-
35
-
36
-
37
-
38
-
39
-
40
-
41
-
42
-
43
-
44
-
45
-
46
-
47
-
48
-
49
-
50
-
51
-
52
-
53
-
54
-
55
-
56
-
57
-
58
-
59
-
60
-
61
-
62
-
63
-
64
-
65
-
66
-
67
-
68
-
69
-
70
-
71
-
72
-
73
-
74
-
75
-
76
-
77
-
78
-
79
-
80
-
81
-
82
-
83
-
84
-
85
-
86
-
87
-
88
-
89
-
90
-
91
-
92
-
93
-
94
-
95
-
96
-
97
-
98
-
99
-
100
-
101
-
102
-
103
-
104
-
105
-
106
-
107
-
108
-
109
-
110
-
111
-
112
-
113
-
114
-
 115
115 -
 116
116 -
 117
117 -
 118
118 -
 119
119 -
 120
120 -
 121
121 -
 122
122 -
 123
123 -
 124
124 -
 125
125 -
126
-
127
-
128
-
129
-
130
-
131
-
132
-
133
-
134
-
135
-
136
-
137
-
138
-
139
-
140
-
141
-
142
-
143
-
144
-
145
-
146
-
147
-
148
-
149
-
150
-
151
-
152
-
153
-
154
-
155
-
156
-
157
-
158
-
159
-
160
-
161
-
162
-
163
-
164
-
165
-
166
-
167
-
168
-
169
-
170
-
171
-
172
-
173
-
174
-
175
-
176
-
177
-
178
-
179
-
180
-
181
-
182
-
183
-
184
-
185
-
186
-
187
-
188
-
189
-
190
-
191
-
192
-
193
-
194
-
195
-
196
-
197
-
198
-
199
-
200
-
201
-
202
-
203
-
204
-
205
-
206
-
207
-
208
-
209
-
210
-
211
-
212
-
213
-
214
-
215
-
216
-
217
-
218
-
219
-
220
-
221
-
222
-
223
-
224
-
225
-
226
-
227
-
228
-
229
-
230
-
231
-
232
-
233
-
234
-
235
-
236
-
237
-
238
-
239
-
240
-
241
-
242
-
243
-
244
-
245
-
246
-
247
-
248
-
249
-
250
-
251
-
252
-
253
-
254
-
255
-
256
-
257
-
258
-
259
-
260
-
261
-
262
 |
 |