Samsung SPH-M340 User Manual (user Manual) (ver.f4) (English) - Page 50
Options, Upload to My Pix, MY PIX, Send this picture to email or to a phone, Pictures, Erase, Rename - unlock
 |
View all Samsung SPH-M340 manuals
Add to My Manuals
Save this manual to your list of manuals |
Page 50 highlights
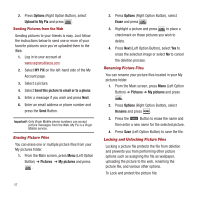
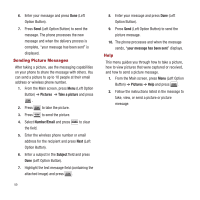
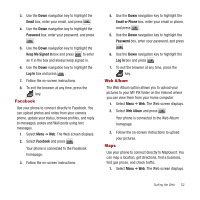
2. Press Options (Right Option Button), select Upload to My Pix and press . Sending Pictures from the Web Sending pictures to your friends is easy. Just follow the instructions below to send one or more of your favorite pictures once you've uploaded them to the Web. 1. Log in to your account at www.virginmobileusa.com. 2. Select MY PIX on the left-hand side of the My Account page. 3. Select a picture. 4. Select Send this picture to email or to a phone. 5. Enter a message if you wish and press Next. 6. Enter an email address or phone number and press the Send Button. Important!: Only Virgin Mobile phone numbers can accept picture messages from the Web. My Pix is a Virgin Mobile service. Erasing Picture Files You can erase one or multiple picture files from your My pictures folder. 1. From the Main screen, press Menu (Left Option Button) ➔ Pictures ➔ My pictures and press . 47 2. Press Options (Right Option Button), select Erase and press . 3. Highlight a picture and press to place a checkmark on those pictures you wish to delete. 4. Press Next (Left Option Button), select Yes to erase the selected image or select No to cancel the deletion process. Renaming Picture Files You can rename your picture files located in your My pictures folder. 1. From the Main screen, press Menu (Left Option Button) ➔ Pictures ➔ My pictures and press . 2. Press Options (Right Option Button), select Rename and press . 3. Press the Button to erase the name and then enter a new name for the selected picture. 4. Press Save (Left Option Button) to save the file. Locking and Unlocking Picture Files Locking a picture file protects the file from deletion and prevents you from performing other picture options such as assigning the file as wallpaper, uploading the picture to the web, renaming the picture file, and various other options. To Lock and protect the picture file:
-
 1
1 -
2
-
3
-
4
-
5
-
6
-
7
-
8
-
9
-
10
-
11
-
12
-
13
-
14
-
15
-
16
-
17
-
18
-
19
-
20
-
21
-
22
-
23
-
24
-
25
-
26
-
27
-
28
-
29
-
30
-
31
-
32
-
33
-
34
-
35
-
36
-
37
-
38
-
39
-
40
-
41
-
42
-
43
-
44
-
 45
45 -
 46
46 -
 47
47 -
 48
48 -
 49
49 -
 50
50 -
 51
51 -
 52
52 -
 53
53 -
 54
54 -
 55
55 -
56
-
57
-
58
-
59
-
60
-
61
-
62
-
63
-
64
-
65
-
66
-
67
-
68
-
69
-
70
-
71
-
72
-
73
-
74
-
75
-
76
-
77
-
78
-
79
-
80
-
81
-
82
-
83
-
84
-
85
-
86
-
87
-
88
-
89
-
90
-
91
-
92
-
93
-
94
-
95
-
96
-
97
-
98
-
99
-
100
 |
 |