Singer One Instruction Manual 14 - Page 46
Darts, Pinces, canette, Pinzas, continuo
 |
View all Singer One manuals
Add to My Manuals
Save this manual to your list of manuals |
Page 46 highlights
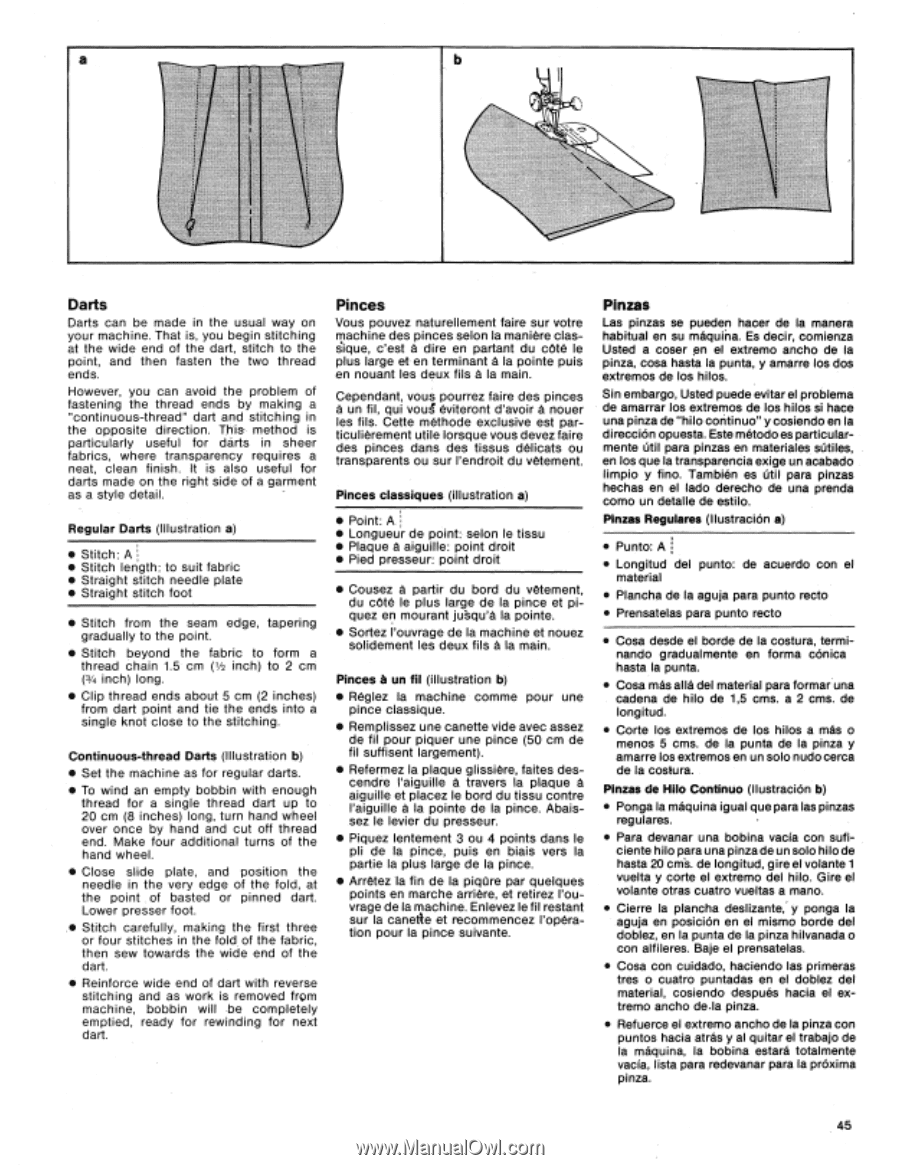
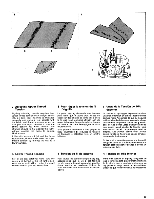
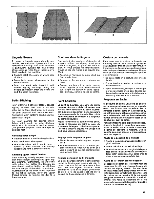
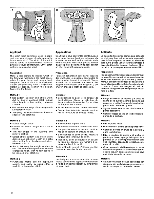
a b Darts Darts can be made in the usual way on your machine. That is, you begin stitching at the wide end of the dart, stitch to the point, and then fasten the two thread ends. However, you can avoid the problem of fastening the thread ends by making a "continuous-thread" dart and stitching in the opposite direction. This method is particularly useful for darts in sheer fabrics, where transparency requires a neat, clean finish. It is also useful for darts made on the right side of a garment as a style detail. Regular Darts (Illustration a) • Stitch: A • Stitch length: to suit fabric • Straight stitch needle plate • Straight stitch foot • Stitch from the seam edge, tapering gradually to the point. • Stitch beyond the fabric to form a thread chain 1.5 cm (1/2 inch) to 2 cm (3/4 inch) long. • Clip thread ends about 5 cm (2 inches) from dart point and tie the ends into a single knot close to the stitching. Continuous-thread Darts (Illustration b) • Set the machine as for regular darts. • To wind an empty bobbin with enough thread for a single thread dart up to 20 cm (8 inches) long, turn hand wheel over once by hand and cut off thread end. Make four additional turns of the hand wheel. • Close slide plate, and position the needle in the very edge of the fold, at the point of basted or pinned dart. Lower presser foot. • Stitch carefully, making the first three or four stitches in the fold, of the fabric, then sew towards the wide end of the dart. • Reinforce wide end of dart with reverse stitching and as work is removed from machine, bobbin will be completely emptied, ready for rewinding for next dart. Pinces Vous pouvez naturellement faire sur votre machine des pinces selon la maniere clasiique, c'est a dire en partant du cOte le plus large et en terminant a la pointe puis en nouant les deux fils a la main. Cependant, vous pourrez faire des pinces a un fil, qui voug eviteront d'avoir a nouer les fils. Cette methode exclusive est particulierement utile lorsque vous devez faire des pinces dans des tissus delicats ou transparents ou sur l'endroit du vetement. Pinces classiques (illustration a) • Point: A • Longueur de point: selon le tissu • Plaque a aiguille: point droit • Pied presseur: point droit • Cousez a partir du bord du vetement, du cote le plus large de la pince et piquez en mourant ju'Squ'a la pointe. • Sortez l'ouvrage de la machine et nouez solidement les deux fils a la main. Pinces a un fil (illustration b) • Reglez la machine comme pour une pince classique. • Remplissez une canette vide avec assez de fil pour piquer une pince (50 cm de fil suffisent largement). • Referrnez Ia plaque glissiere, faites descendre I'aiguille a travers la plaque a aiguille et placez le bord du tissu contre l'aiguille a la pointe de la pince. Abaissez le levier du presseur. • Piquez lentement 3 ou 4 points dans le pli de la pince, puis en biais vers la partie la plus large de la pince. • Arretez la fin de la piq0re par quelques points en marche arriere, et retirez l'ouvrage de la machine. Enlevez le fil restant sur la canette et recommencez ('opera- tion pour la pince suivante. Pinzas Las pinzas se pueden hacer de la manera habitual en su maquina. Es decir, comienza Usted a coser en el extremo ancho de la pinza, cosa hasta la punta, y amarre los dos extremos de los hilos. Sin embargo, Usted puede evitar el problema de amarrar los extremos de los hilos si hace una pinza de "hilo continuo" y cosiendo en la direcciOn opuesta. Este metodo es particularmente Otil para pinzas en materiales sutiles, en los que la transparencia exige un acabado limpio y fino. Tambien es util para pinzas hechas en el lado derecho de una prenda como un detalle de estilo. Pinzas Regulares (IlustraciOn a) • Punto: A • Longitud del punto: de acuerdo con el material • Plancha de la aguja para punto recto • Prensatelas para punto recto • Cosa desde el borde de la costura, terminando gradualmente en forma arnica hasta la punta. • Cosa mas all& del material para formar una cadena de hilo de 1,5 cms. a 2 cms. de longitud. • Corte los extremos de los hilos a mas o menos 5 cms. de la punta de la pinza y amarre los extremos en un solo nudocerca de la costura. Pinzas de Hilo Continuo (IlustraciOn b) • Ponga la maquina igual que para las pinzas regulares. • Para devanar una bobina vacia con suficiente hilo para una pinza de un solo hilo de hasta 20 cm's. de longitud, gire el volante 1 vuelta y corte el extremo del hilo. Gire el volante otras cuatro vueltas a mano. • Cierre la plancha deslizante, y ponga la aguja en posiciOn en el mismo borde del doblez, en la punta de la pinza hilvanada o con alfileres. Baje el prensatelas. • Cosa con cuidado, haciendo las primeras tres o cuatro puntadas en el doblez del material, cosiendo despues hacia el extremo ancho dela pinza. • Refuerce el extremo ancho de la pinza con puntos hacia atras y al guitar el trabajo de la maquina, la bobina estara totalmente vacia, lista para redevanar para la prOxima pinza. 45
-
 1
1 -
2
-
3
-
4
-
5
-
6
-
7
-
8
-
9
-
10
-
11
-
12
-
13
-
14
-
15
-
16
-
17
-
18
-
19
-
20
-
21
-
22
-
23
-
24
-
25
-
26
-
27
-
28
-
29
-
30
-
31
-
32
-
33
-
34
-
35
-
36
-
37
-
38
-
39
-
40
-
 41
41 -
 42
42 -
 43
43 -
 44
44 -
 45
45 -
 46
46 -
 47
47 -
 48
48 -
 49
49 -
 50
50 -
 51
51 -
52
-
53
-
54
-
55
-
56
-
57
-
58
-
59
-
60
-
61
-
62
-
63
-
64
-
65
-
66
-
67
-
68
-
69
-
70
-
71
-
72
-
73
-
74
-
75
-
76
-
77
-
78
-
79
-
80
-
81
-
82
-
83
-
84
-
85
-
86
-
87
-
88
-
89
-
90
 |
 |