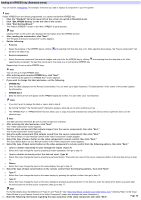
Sony RM-AX4000 AX Remote Editor Ver.1.0 Help - Page 37
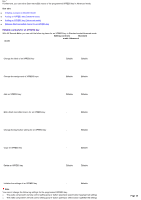
Changing the label of an XPRESS key, XPRESS Nam e
 |
UPC - 027242677036
View all Sony RM-AX4000 manuals
Add to My Manuals
Save this manual to your list of manuals |
Page 37 highlights
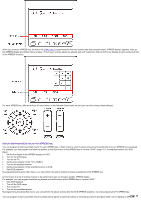
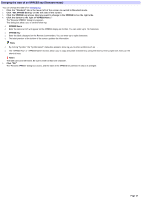
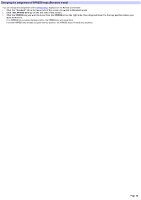
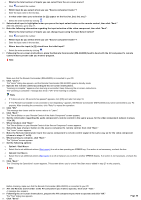
Changing the label of an XPRESS key (Standard mode) You can change the label of an XPRESS key. 1. Click the "Standard" tab in the low er left of the screen to sw itch to Standard m ode. 2. Click "Edit XPRESS Se tting" on the le ft s ide of the s cre e n. 3. Click the XPRESS k e y w hos e labe l you w ant to change in the XPRESS list on the right s ide . 4. Click the button to the right of "XPRESS Nam e ." The "Rename XPRESS" dialog box appears. This dialog box allow s you to set the follow ing: o XPRESS Nam e o Enter the name (w hich w ill appear on the XPRESS display as its title). You can enter up to 12 characters. o XPRESS Key o Enter the label (displayed on the Remote Commander). You can enter up to eight characters. o The label preview at the bottom of the screen updates the information. Hints o By clicking "Symbol," the "Symbol select" dialog box appears, allow ing you to enter symbols such as . o The "XPRESS Key" or "XPRESS Name" text box allow s you to copy and paste characters by using the shortcut menu (right-click menu) or the shortcut keys. Note s The label cannot be left blank. Be sure to enter at least one character. 5. Click "OK." The "Rename XPRESS" dialog box closes, and the label of the XPRESS key selected in step 3 is changed. Page 37
-
 1
1 -
2
-
3
-
4
-
5
-
6
-
7
-
8
-
9
-
10
-
11
-
12
-
13
-
14
-
15
-
16
-
17
-
18
-
19
-
20
-
21
-
22
-
23
-
24
-
25
-
26
-
27
-
28
-
29
-
30
-
31
-
 32
32 -
 33
33 -
 34
34 -
 35
35 -
 36
36 -
 37
37 -
 38
38 -
 39
39 -
 40
40 -
 41
41 -
 42
42 -
43
-
44
-
45
-
46
-
47
-
48
-
49
-
50
-
51
-
52
-
53
-
54
-
55
-
56
-
57
-
58
-
59
-
60
-
61
-
62
-
63
-
64
-
65
-
66
-
67
-
68
-
69
-
70
-
71
-
72
-
73
-
74
-
75
-
76
-
77
-
78
-
79
-
80
-
81
-
82
-
83
-
84
-
85
-
86
-
87
-
88
-
89
-
90
-
91
-
92
-
93
-
94
-
95
-
96
-
97
-
98
-
99
-
100
-
101
-
102
-
103
-
104
-
105
-
106
-
107
-
108
-
109
-
110
-
111
-
112
-
113
-
114
-
115
-
116
-
117
-
118
 |
 |