Sony RM-AX4000 AX Remote Editor Ver.1.0 Help - Page 59
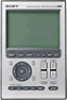
The Emulator appears., in the upper right of the Emulator.
 |
UPC - 027242677036
View all Sony RM-AX4000 manuals
Add to My Manuals
Save this manual to your list of manuals |
Page 59 highlights
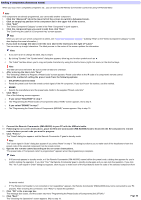
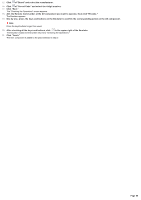
15. Click of "Brand" and select the m anufacturer. 16. Click of "Preset Code" and select the 4-digit num ber. 17. Click "Ne xt." The "Checking the Operations" screen appears. 18. Aim the Re m ote Com m ande r at the AV com pone nt you w ant to ope rate , the n click "Em ulate ." The Emulator appears. 19. One by one , pre s s the k e ys and buttons on the Em ulator to confirm the corre s ponding action on the AV com pone nt. Note Press the keys/buttons longer than usual. 20. Afte r che ck ing all the k e ys and buttons , click in the uppe r right of the Em ulator. The Emulator closes and the screen returns to "Checking the Operations." 21. Click "Finis h." The new component is added to the place selected in step 2. Page 59
-
 1
1 -
2
-
3
-
4
-
5
-
6
-
7
-
8
-
9
-
10
-
11
-
12
-
13
-
14
-
15
-
16
-
17
-
18
-
19
-
20
-
21
-
22
-
23
-
24
-
25
-
26
-
27
-
28
-
29
-
30
-
31
-
32
-
33
-
34
-
35
-
36
-
37
-
38
-
39
-
40
-
41
-
42
-
43
-
44
-
45
-
46
-
47
-
48
-
49
-
50
-
51
-
52
-
53
-
 54
54 -
 55
55 -
 56
56 -
 57
57 -
 58
58 -
 59
59 -
 60
60 -
 61
61 -
 62
62 -
 63
63 -
 64
64 -
65
-
66
-
67
-
68
-
69
-
70
-
71
-
72
-
73
-
74
-
75
-
76
-
77
-
78
-
79
-
80
-
81
-
82
-
83
-
84
-
85
-
86
-
87
-
88
-
89
-
90
-
91
-
92
-
93
-
94
-
95
-
96
-
97
-
98
-
99
-
100
-
101
-
102
-
103
-
104
-
105
-
106
-
107
-
108
-
109
-
110
-
111
-
112
-
113
-
114
-
115
-
116
-
117
-
118
 |
 |

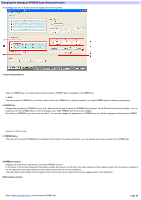
15.
Click
of "Brand" and select the manufacturer.
16.
Click
of "Preset Code" and select the 4-digit number.
17.
Click "Next."
The "Checking the Operations" screen appears.
18.
Aim the Remote Commander at the AV component you want to operate, then click "Emulate."
The Emulator appears.
19.
One by one, press the keys and buttons on the Emulator to confirm the corresponding action on the AV component.
Note
Press the keys/buttons longer than usual.
20.
After checking all the keys and buttons, click
in the upper right of the Emulator.
The Emulator closes and the screen returns to "Checking the Operations."
21.
Click "Finish."
The new component is added to the place selected in step 2.
Page 59