Toshiba 50L3400U User's Guide for 40L3400U and 50L3400U Series TV's - Page 113
MAC Address, Network Connection Test
 |
View all Toshiba 50L3400U manuals
Add to My Manuals
Save this manual to your list of manuals |
Page 113 highlights
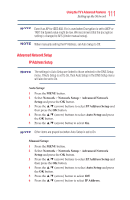
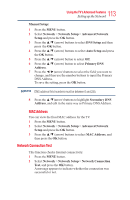
113 Using the TV's Advanced Features Setting up the Network Manual Setup: 1 Press the MENU button. 2 Select Network > Network Setup > Advanced Network Setup and press the OK button. 3 Press the ▲/▼ (arrow) buttons to select DNS Setup and then press the OK button. 4 Press the ▲/▼ (arrow) buttons to select Auto Setup and press the OK button. 5 Press the ▲/▼ (arrow) button to select Off. 6 Press the ▲/▼ (arrow) button to select Primary DNS Address. 7 Press the ◄/►(arrow) buttons to select the field you want to change, and then use the number buttons to input the Primary DNS Address. To save the setting, press the OK button. DNS address field numbers must be between 0 and 255. 8 Press the ▲/▼(arrow) buttons to highlight Secondary DNS Address, and edit in the same way as Primary DNS Address. MAC Address You can view the fixed MAC address for the TV. 1 Press the MENU button. 2 Select Network > Network Setup > Advanced Network Setup and press the OK button. 3 Press the ▲/▼ (arrow) buttons to select MAC Address, and then press the OK button. Network Connection Test This function checks Internet connectivity. 1 Press the MENU button. 2 Select Network > Network Setup > Network Connection Test, and press the OK button. A message appears to indicate whether the connection was successful or not.
-
 1
1 -
2
-
3
-
4
-
5
-
6
-
7
-
8
-
9
-
10
-
11
-
12
-
13
-
14
-
15
-
16
-
17
-
18
-
19
-
20
-
21
-
22
-
23
-
24
-
25
-
26
-
27
-
28
-
29
-
30
-
31
-
32
-
33
-
34
-
35
-
36
-
37
-
38
-
39
-
40
-
41
-
42
-
43
-
44
-
45
-
46
-
47
-
48
-
49
-
50
-
51
-
52
-
53
-
54
-
55
-
56
-
57
-
58
-
59
-
60
-
61
-
62
-
63
-
64
-
65
-
66
-
67
-
68
-
69
-
70
-
71
-
72
-
73
-
74
-
75
-
76
-
77
-
78
-
79
-
80
-
81
-
82
-
83
-
84
-
85
-
86
-
87
-
88
-
89
-
90
-
91
-
92
-
93
-
94
-
95
-
96
-
97
-
98
-
99
-
100
-
101
-
102
-
103
-
104
-
105
-
106
-
107
-
 108
108 -
 109
109 -
 110
110 -
 111
111 -
 112
112 -
 113
113 -
 114
114 -
 115
115 -
 116
116 -
 117
117 -
 118
118 -
119
-
120
-
121
-
122
-
123
-
124
-
125
-
126
-
127
-
128
-
129
-
130
-
131
-
132
-
133
-
134
-
135
-
136
-
137
-
138
-
139
-
140
-
141
-
142
 |
 |
