Toshiba 50L3400U User's Guide for 40L3400U and 50L3400U Series TV's - Page 52
Setting the AV input mode, Setting the time zone
 |
View all Toshiba 50L3400U manuals
Add to My Manuals
Save this manual to your list of manuals |
Page 52 highlights
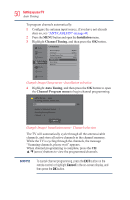
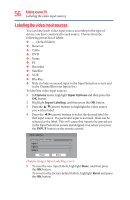
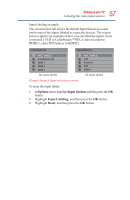
52 SettingupyourTV Setting the tAimVeinzopuntemode To add a channel to the channel memory: v Highlight the checked box next to the channel number you wish to add, and then press the OK button to remove the check. You can also block specific channels so that they cannot be tuned until you unlock them. For information, see "Locking channels" on page 80. To manually add digital sub-channels on a physical channel: v Use the Channel Numbers and the (Dash 100) on the remote control to enter the channel number (for example, 56-1). If the channel is found, the number will be added to the list and the box will be unchecked. If the channel is not found, a message appears. Skipped channels cannot be selected with the CH ▲/▼(arrow) buttons; however, they can be accessed using the number keys on the remote control. Setting the AV input mode This setting determines the configuration of the shared AV input on your TV. You can set this input for either ColorStream HD or Video. Add the following descriptions: To set the AV Input mode: 1 From Options menu, highlight Input Options, and then press the OK button. 2 Press ▲/▼(arrow) buttons to select AV Input, and then press the OK button. 3 Press ▲/▼(arrow) buttons to select Video or ColorStream HD, and then press the OK button to save your new setting. Setting the time zone The Time Zone setup allows you to specify the correct time zone for your region. This feature allows the TV status information to display the correct time zone information for your viewing area. To set the time zone: 1 In the Installation menu, highlight Time Zone, and press the OK button. 2 Press the ▲/▼(arrow) buttons to select the region, and then press the OK button.
-
 1
1 -
2
-
3
-
4
-
5
-
6
-
7
-
8
-
9
-
10
-
11
-
12
-
13
-
14
-
15
-
16
-
17
-
18
-
19
-
20
-
21
-
22
-
23
-
24
-
25
-
26
-
27
-
28
-
29
-
30
-
31
-
32
-
33
-
34
-
35
-
36
-
37
-
38
-
39
-
40
-
41
-
42
-
43
-
44
-
45
-
46
-
 47
47 -
 48
48 -
 49
49 -
 50
50 -
 51
51 -
 52
52 -
 53
53 -
 54
54 -
 55
55 -
 56
56 -
 57
57 -
58
-
59
-
60
-
61
-
62
-
63
-
64
-
65
-
66
-
67
-
68
-
69
-
70
-
71
-
72
-
73
-
74
-
75
-
76
-
77
-
78
-
79
-
80
-
81
-
82
-
83
-
84
-
85
-
86
-
87
-
88
-
89
-
90
-
91
-
92
-
93
-
94
-
95
-
96
-
97
-
98
-
99
-
100
-
101
-
102
-
103
-
104
-
105
-
106
-
107
-
108
-
109
-
110
-
111
-
112
-
113
-
114
-
115
-
116
-
117
-
118
-
119
-
120
-
121
-
122
-
123
-
124
-
125
-
126
-
127
-
128
-
129
-
130
-
131
-
132
-
133
-
134
-
135
-
136
-
137
-
138
-
139
-
140
-
141
-
142
 |
 |
