Western Digital WDBACA0010BBK User Manual - Page 133
Component, HDMI, HDMI Deep Color Mode, Aspect Ratio, Normal, Widescreen
 |
UPC - 718037772370
View all Western Digital WDBACA0010BBK manuals
Add to My Manuals
Save this manual to your list of manuals |
Page 133 highlights
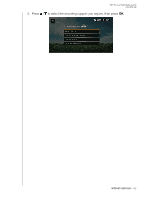
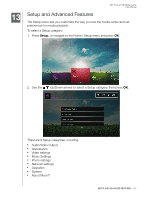
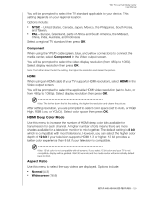
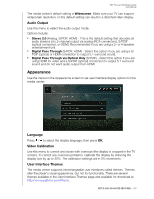
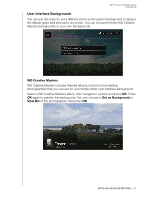
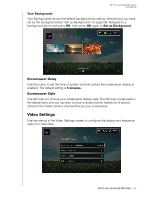
WD TV Live Hub Media Center User Manual You will be prompted to select the TV standard applicable to your device. This setting depends on your regional location. Options include: „ NTSC - United States, Canada, Japan, Mexico, the Philippines, South Korea, and Taiwan. „ PAL - Europe, Greenland, parts of Africa and South America, the Mideast, China, India, Australia, and Indonesia Select a regional TV standard then press OK. Component When using the YPbPr cable (green, blue, and yellow connectors) to connect the media center, select Component in the Video output screen. You will be prompted to select the video display resolution (from 480p to 1080i). Select display resolution then press OK. Note: The further down the list the setting, the higher the resolution and clearer the picture. HDMI When using an HDMI cable (if your TV supports HDMI resolution), select HDMI in the Video output screen. You will be prompted to select the applicable HDMI video resolution (set to Auto, or from 480p to 1080p). Select display resolution then press OK. Note: The further down the list the setting, the higher the resolution and clearer the picture. After setting resolution, you are prompted to select color space (set to Auto, or RGB High, RGB Low, or YCbCr). Select color space then press OK. HDMI Deep Color Mode Use this menu to increase the number of HDMI deep color bits available for transmission for each channel. A higher number of bits means there are more shades available for a television monitor to mix together. The default setting is 8 bit which is compatible with most televisions. However, you can select the higher color depth of 12 bit if your television supports HDMI 1.3 or higher. 12 bit provides a better color experience than 8 bit if your television is compatible. Note: 12 bit color is not compatible with all screens. If you select 12 bit color and your TV is not compatible, display will be garbled. Wait 30 seconds and the media center will automatically default back to 8 bit. Aspect Ratio Use this menu to select the way videos are displayed. Options include: „ Normal (4:3) „ Widescreen (16:9) SETUP AND ADVANCED FEATURES - 129
-
 1
1 -
2
-
3
-
4
-
5
-
6
-
7
-
8
-
9
-
10
-
11
-
12
-
13
-
14
-
15
-
16
-
17
-
18
-
19
-
20
-
21
-
22
-
23
-
24
-
25
-
26
-
27
-
28
-
29
-
30
-
31
-
32
-
33
-
34
-
35
-
36
-
37
-
38
-
39
-
40
-
41
-
42
-
43
-
44
-
45
-
46
-
47
-
48
-
49
-
50
-
51
-
52
-
53
-
54
-
55
-
56
-
57
-
58
-
59
-
60
-
61
-
62
-
63
-
64
-
65
-
66
-
67
-
68
-
69
-
70
-
71
-
72
-
73
-
74
-
75
-
76
-
77
-
78
-
79
-
80
-
81
-
82
-
83
-
84
-
85
-
86
-
87
-
88
-
89
-
90
-
91
-
92
-
93
-
94
-
95
-
96
-
97
-
98
-
99
-
100
-
101
-
102
-
103
-
104
-
105
-
106
-
107
-
108
-
109
-
110
-
111
-
112
-
113
-
114
-
115
-
116
-
117
-
118
-
119
-
120
-
121
-
122
-
123
-
124
-
125
-
126
-
127
-
 128
128 -
 129
129 -
 130
130 -
 131
131 -
 132
132 -
 133
133 -
 134
134 -
 135
135 -
 136
136 -
 137
137 -
 138
138 -
139
-
140
-
141
-
142
-
143
-
144
-
145
-
146
-
147
-
148
-
149
-
150
-
151
-
152
-
153
-
154
-
155
-
156
-
157
-
158
-
159
-
160
-
161
-
162
-
163
-
164
-
165
-
166
-
167
-
168
 |
 |