Xerox 2121MB User Guide - Page 31
Installing the removable parts, Installing the paper tray
 |
UPC - 095205428667
View all Xerox 2121MB manuals
Add to My Manuals
Save this manual to your list of manuals |
Page 31 highlights
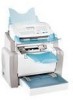
Installing the removable parts Installing your machine This section describes the installation of the machine's removable parts. Installing the paper tray ¾ Line up the tray with the left and right guides and gently push the tray in until it stops (as illustrated below). ¾ Install the tray cover. Installing the paper output tray ¾ With both hands, slightly bend the center part of the tray upwards in order to insert its clips into the slots located on the upper part of the machine. 2-7
-
 1
1 -
2
-
3
-
4
-
5
-
6
-
7
-
8
-
9
-
10
-
11
-
12
-
13
-
14
-
15
-
16
-
17
-
18
-
19
-
20
-
21
-
22
-
23
-
24
-
25
-
 26
26 -
 27
27 -
 28
28 -
 29
29 -
 30
30 -
 31
31 -
 32
32 -
 33
33 -
 34
34 -
 35
35 -
 36
36 -
37
-
38
-
39
-
40
-
41
-
42
-
43
-
44
-
45
-
46
-
47
-
48
-
49
-
50
-
51
-
52
-
53
-
54
-
55
-
56
-
57
-
58
-
59
-
60
-
61
-
62
-
63
-
64
-
65
-
66
-
67
-
68
-
69
-
70
-
71
-
72
-
73
-
74
-
75
-
76
-
77
-
78
-
79
-
80
-
81
-
82
-
83
-
84
-
85
-
86
-
87
-
88
-
89
-
90
-
91
-
92
-
93
-
94
-
95
-
96
-
97
-
98
-
99
-
100
-
101
-
102
-
103
-
104
-
105
-
106
-
107
-
108
-
109
-
110
-
111
-
112
-
113
-
114
-
115
-
116
-
117
-
118
-
119
-
120
-
121
-
122
-
123
-
124
-
125
-
126
-
127
-
128
-
129
-
130
-
131
-
132
-
133
-
134
-
135
-
136
-
137
-
138
-
139
-
140
-
141
-
142
-
143
-
144
-
145
-
146
 |
 |

Installing your machine
2-7
Installing the removable parts
This section describes the installation of the machine's removable parts.
Installing the paper tray
Line up the tray with the left and right guides and gently push the tray in until it stops
(as illustrated below).
Install the tray cover.
Installing the paper output tray
With both hands, slightly bend the center part of the tray upwards in order to insert
its clips into the slots located on the upper part of the machine.