Yamaha CLP-480 Owner's Manual - Page 13
Music rest, After you use the instrument, press
 |
View all Yamaha CLP-480 manuals
Add to My Manuals
Save this manual to your list of manuals |
Page 13 highlights
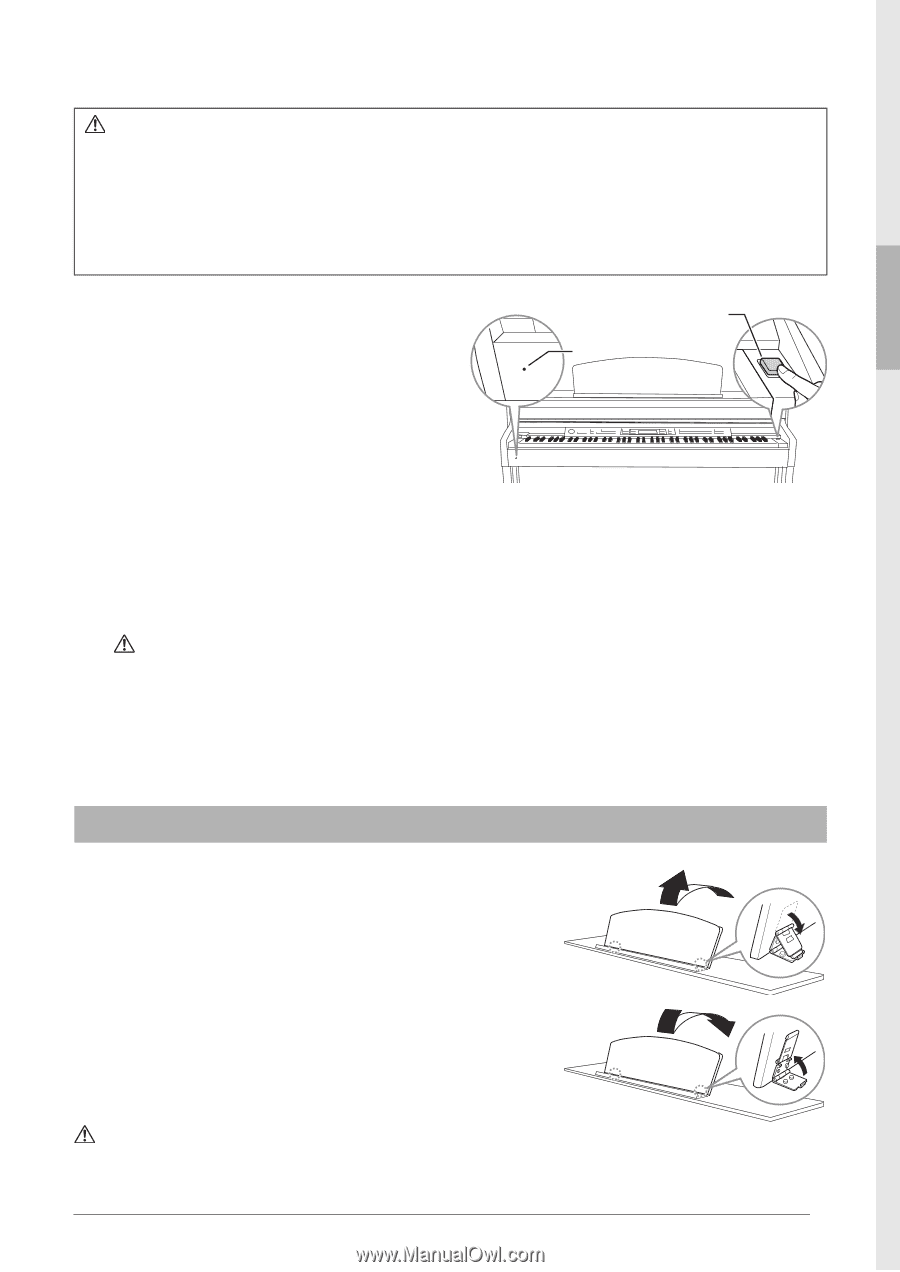
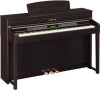
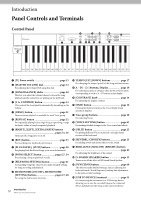
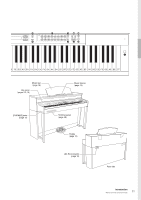
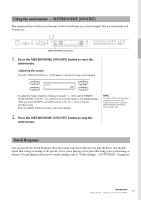
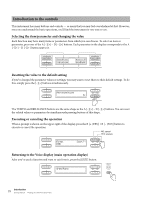
CAUTION • Do not place objects such as a piece of metal or paper on top of the key cover. Small objects placed on the key cover may fall inside the unit when the cover is opened and may be nearly impossible to remove. This could cause electric shock, short circuit, fire or other serious damage to the instrument. • Hold the cover with both hands when opening or closing it. Do not release it until it is fully opened or closed. Be careful to avoid catching fingers (yours or others, especially children's) between the cover and the unit. NOTICE Disconnect the optional USB storage device connected to the [USB TO DEVICE] terminal before closing the key cover. Closing the cover with the device still connected may damage the device. 3. Press the [1] power switch to turn the power on. The display located in the center of the front panel and the power indicator located below the left end of the keyboard lights up. Power switch The power indicator lights up. 4. Use the [MASTER VOLUME] dial to adjust the volume. While playing the keyboard, adjust the volume level. For details, refer to "Setting the volume - [MASTER VOLUME]" on page 14. 5. After you use the instrument, press the [1] power switch to turn the power off. The display and the power indicator are turned off. CAUTION Even when the instrument is turned off, electricity is still flowing to the instrument at the minimum level. When you are not using the instrument for a long time or during electrical storms, make sure you unplug the AC power plug from the wall AC outlet. 6. Close the key cover. Slide the cover toward you and gently lower the cover over the keys. Music rest To raise the music rest: 1. Pull the music rest up and toward yourself as far as it will go. 2. Flip down the two metal supports at the left and right on the rear of the music rest. 3. Lower the music rest so that it rests on the metal supports. To lower the music rest: 1. Pull the music rest toward yourself as far as it will go. 2. Raise the two metal supports (at the rear of the music rest). 3. Gently lower the music rest backward until it is all the way down. CAUTION Do not try to use the music rest in a half-raised position. Also, when raising or lowering the music rest, do not release your hands from the music rest until it is all the way up or down. Introduction 13 Getting Started - Playing the Clavinova as a Piano
-
 1
1 -
2
-
3
-
4
-
5
-
6
-
7
-
 8
8 -
 9
9 -
 10
10 -
 11
11 -
 12
12 -
 13
13 -
 14
14 -
 15
15 -
 16
16 -
 17
17 -
 18
18 -
19
-
20
-
21
-
22
-
23
-
24
-
25
-
26
-
27
-
28
-
29
-
30
-
31
-
32
-
33
-
34
-
35
-
36
-
37
-
38
-
39
-
40
-
41
-
42
-
43
-
44
-
45
-
46
-
47
-
48
-
49
-
50
-
51
-
52
-
53
-
54
-
55
-
56
-
57
-
58
-
59
-
60
-
61
-
62
-
63
-
64
-
65
-
66
-
67
-
68
-
69
-
70
-
71
-
72
-
73
-
74
-
75
-
76
-
77
-
78
-
79
-
80
-
81
-
82
-
83
-
84
-
85
-
86
-
87
-
88
-
89
-
90
-
91
-
92
-
93
-
94
-
95
-
96
 |
 |