Yamaha CLP-480 Owner's Manual - Page 35
Press the [REC] button to call up the Record mode., Start recording.
 |
View all Yamaha CLP-480 manuals
Add to My Manuals
Save this manual to your list of manuals |
Page 35 highlights
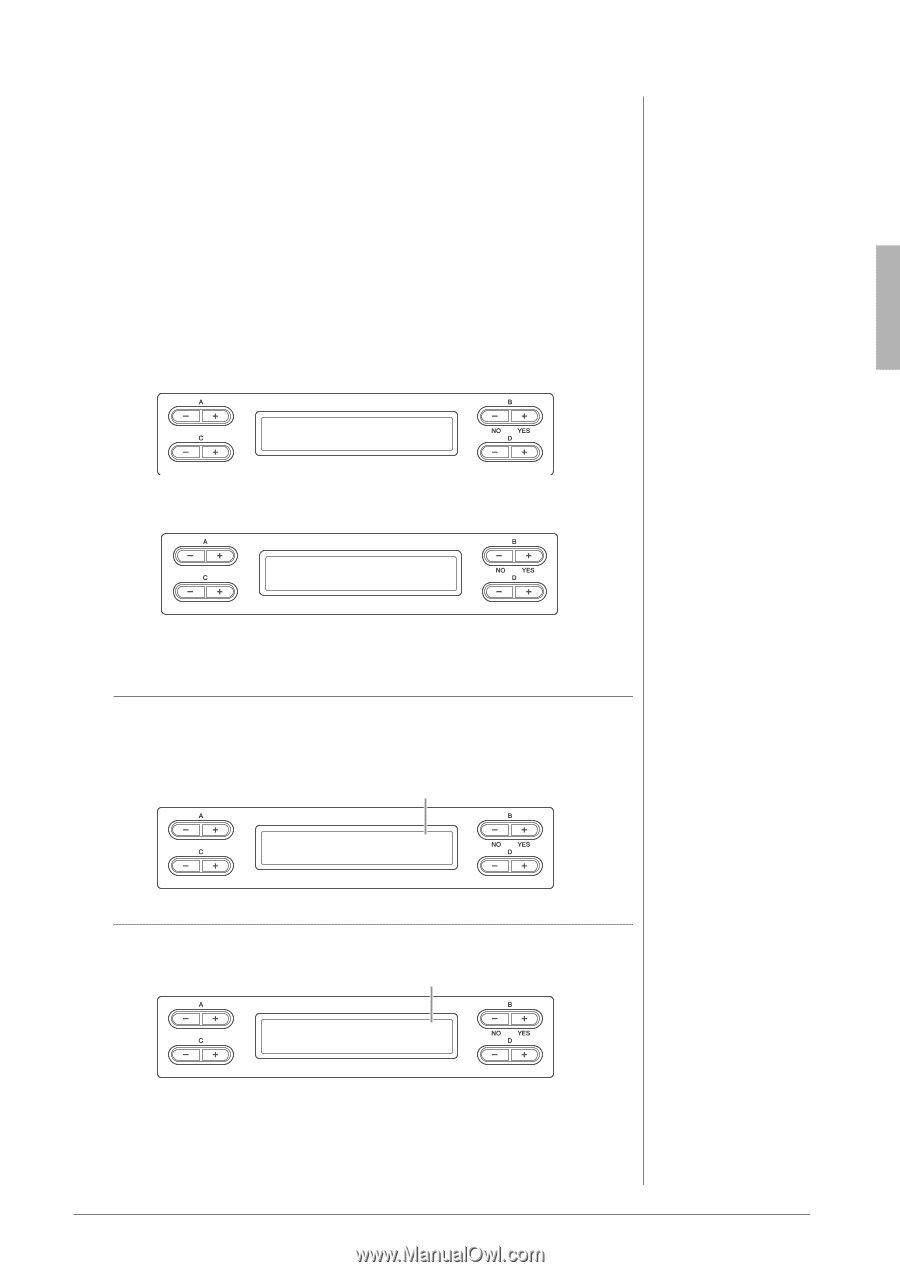
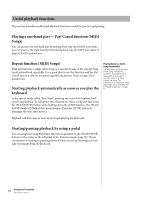
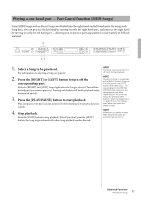
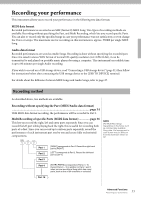
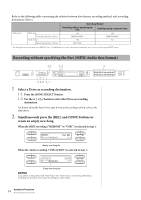
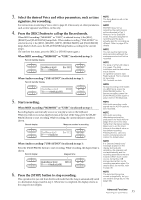
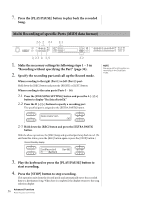
3. Select the desired Voice and other parameters, such as time signature, for recording. For instructions on selecting a Voice, refer to page 20. If necessary, set other parameters, such as time signature and effects, in this step. 4. Press the [REC] button to call up the Record mode. When MIDI recording ("MEMORY" or "USB1") is selected in step 1, the [REC], [RIGHT] and [PLAY/PAUSE] lamps flash. When Audio recording ("USB AUDIO") is selected in step 1, the [REC], [RIGHT], [LEFT], [EXTRA PARTS] and [PLAY/PAUSE] lamps flash. In both cases, the [PLAY/PAUSE] lamp flashes according to the current tempo. (To exit from this status, press the [REC] or [STOP] button again.) When MIDI recording ("MEMORY" or "USB1") is selected in step 1: Record standby display SongRecording M_____ : NewSong Bar 001 When Audio recording ("USB AUDIO") is selected in step 1: Record standby display AudioRecording 00:00 A_____ : NewAudio001 5. Start recording. When MIDI recording ("MEMORY" or "USB1") is selected in step 1: Recording begins automatically as soon as you play a note on the keyboard. When you wish to record an empty section at the start of the Song, press the [PLAY/ PAUSE] button to start recording. While recording, the current measure number is shown. Record display Measure number in recording SongRecording M_____ : NewSong Bar 012 When Audio recording ("USB AUDIO") is selected in step 1: Press the [PLAY/PAUSE] button to start recording. While recording, the elapsed time is shown. Record display Elapsed time AudioRecording 00:12 A_____ : NewAudio001 6. Press the [STOP] button to stop recording. This operation lets you exit from the Record mode then the Song is automatically saved to a destination Song created in step 2. When Save is completed, the display returns to the song selection display. NOTE The Song Balance will not be recorded. NOTE With MIDI data format recording, the performance will be recorded to Part 1. However, in the Dual/Split mode, the parts assigned for recording and the parts actually used for recording are different. Refer to page 40 for details. NOTE You can use the metronome while recording although the metronome sound will not be recorded. NOTE The lamp of a Part with data is lit in green. The lamp indications and the data status are as follows. On (green): Contains data Flashing (red): Part is enabled for recording Off: Contains no data NOTE To stop recording in the middle of a MIDI Song, press the [PLAY/PAUSE] button. To resume recording, press the [PLAY/PAUSE] button again or play a note on the keyboard. NOTE With Audio recording, audio signals via the AUX In jack are also recorded. NOTE With Audio recording, distorted sound may be produced if the Voice Volume (page 61) is set to the value higher than the default setting. Make sure to set the Voice Volume to the default value or less before recording. Pressing the D [-] and [+] buttons simultaneously will restore the default value. NOTE If a "Device (media) busy" message appears on the display during Audio recording, the operation will end automatically and the recording data before the end is saved. When such a case occurs, format the USB storage device then try the recording operation again. For details about the Format, refer to page 46. NOTE The recorded Songs are named automatically, but you can rename Songs as you like (page 43). 35 Advanced Functions Recording your performance
-
 1
1 -
2
-
3
-
4
-
5
-
6
-
7
-
8
-
9
-
10
-
11
-
12
-
13
-
14
-
15
-
16
-
17
-
18
-
19
-
20
-
21
-
22
-
23
-
24
-
25
-
26
-
27
-
28
-
29
-
 30
30 -
 31
31 -
 32
32 -
 33
33 -
 34
34 -
 35
35 -
 36
36 -
 37
37 -
 38
38 -
 39
39 -
 40
40 -
41
-
42
-
43
-
44
-
45
-
46
-
47
-
48
-
49
-
50
-
51
-
52
-
53
-
54
-
55
-
56
-
57
-
58
-
59
-
60
-
61
-
62
-
63
-
64
-
65
-
66
-
67
-
68
-
69
-
70
-
71
-
72
-
73
-
74
-
75
-
76
-
77
-
78
-
79
-
80
-
81
-
82
-
83
-
84
-
85
-
86
-
87
-
88
-
89
-
90
-
91
-
92
-
93
-
94
-
95
-
96
 |
 |