Yamaha CLP-480 Owner's Manual - Page 36
Multi Recording of specific Parts (MIDI data format
 |
View all Yamaha CLP-480 manuals
Add to My Manuals
Save this manual to your list of manuals |
Page 36 highlights
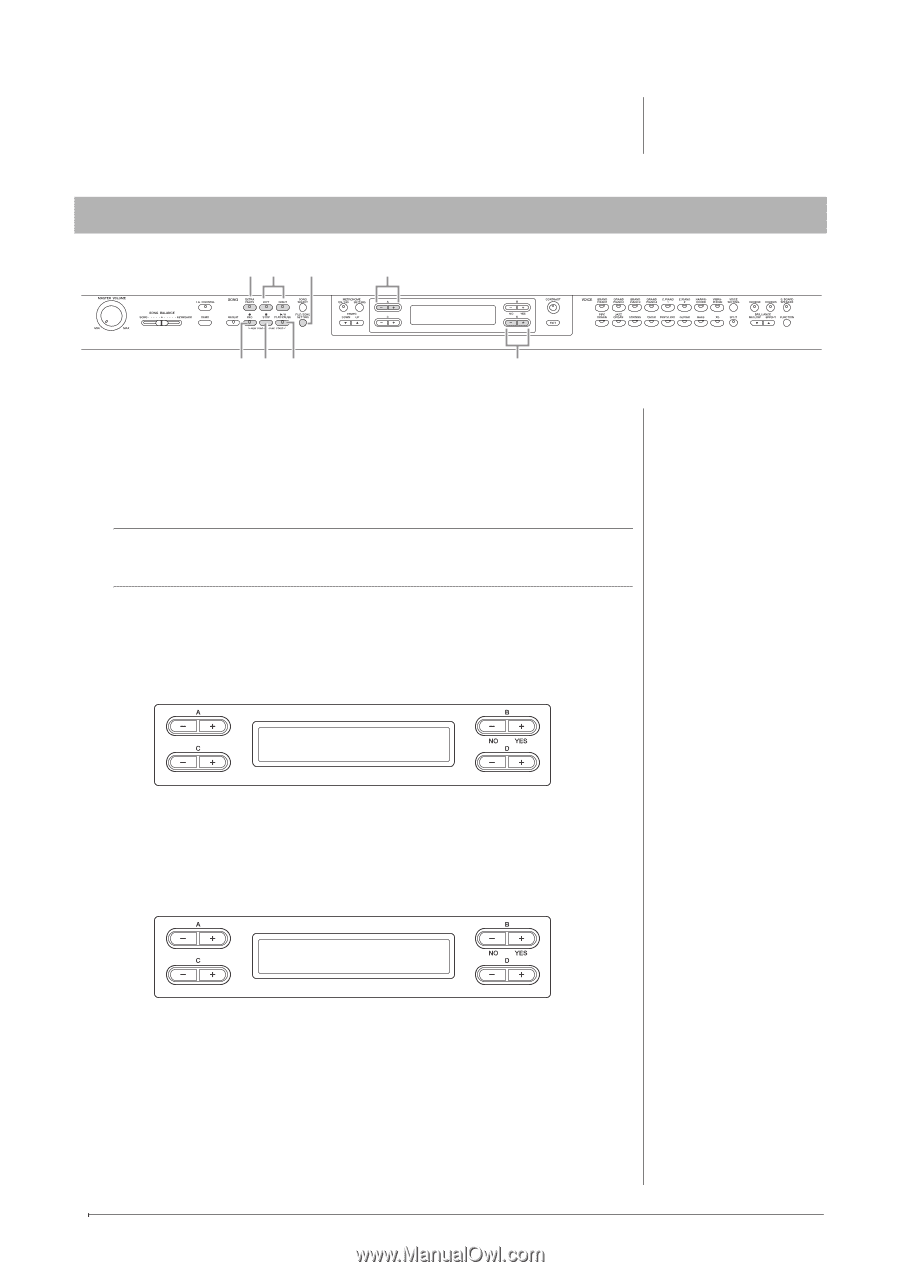
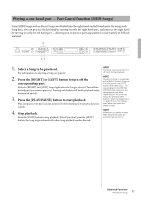
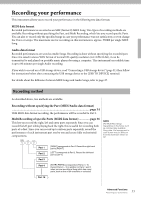
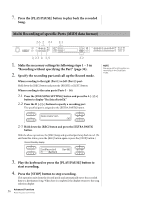
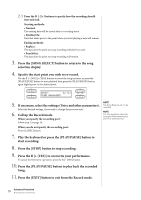
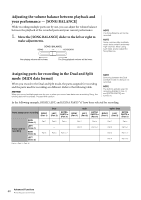
7. Press the [PLAY/PAUSE] button to play back the recorded Song. Multi Recording of specific Parts (MIDI data format) 2-3 2 2-1 2-1 2, 2-3 4 3, 5 2-2 1. Make the necessary settings by following steps 1 - 3 in "Recording without specifying the Part" (page 34). 2. Specify the recording part and call up the Record mode. When recording to the right (Part 1) or left (Part 2) part: Hold down the [REC] button and press the [RIGHT] or [LEFT] button. When recording to the extra parts (Parts 3 - 16): 2-1 Press the [FILE/SONG SETTING] button and press the A [-]/[+] button to display "RecExtraPartsCh." 2-2 Press the D [-]/[+] buttons to specify a recording part. The specified part is assigned to the [EXTRA PARTS] button. NOTE See page 40 for information on recording in the Dual/Split mode. RecExtraPartsCh Ch5 2-3 Hold down the [REC] button and press the [EXTRA PARTS] button. With the above operations, the [REC] lamp and specified part lamp flash in red. (To exit from this status, press the [REC] button again or press the [STOP] button.) Record Standby display SongRecording M_____ : NewSong Bar 001 3. Play the keyboard or press the [PLAY/PAUSE] button to start recording. 4. Press the [STOP] button to stop recording. This operation exits from the Record mode and automatically saves the recorded data to a destination Song. When Save is completed, the display returns to the song selection display. 36 Advanced Functions Recording your performance
-
 1
1 -
2
-
3
-
4
-
5
-
6
-
7
-
8
-
9
-
10
-
11
-
12
-
13
-
14
-
15
-
16
-
17
-
18
-
19
-
20
-
21
-
22
-
23
-
24
-
25
-
26
-
27
-
28
-
29
-
30
-
 31
31 -
 32
32 -
 33
33 -
 34
34 -
 35
35 -
 36
36 -
 37
37 -
 38
38 -
 39
39 -
 40
40 -
 41
41 -
42
-
43
-
44
-
45
-
46
-
47
-
48
-
49
-
50
-
51
-
52
-
53
-
54
-
55
-
56
-
57
-
58
-
59
-
60
-
61
-
62
-
63
-
64
-
65
-
66
-
67
-
68
-
69
-
70
-
71
-
72
-
73
-
74
-
75
-
76
-
77
-
78
-
79
-
80
-
81
-
82
-
83
-
84
-
85
-
86
-
87
-
88
-
89
-
90
-
91
-
92
-
93
-
94
-
95
-
96
 |
 |