3Ware 7000-2 User Guide - Page 125
3Ware 7000-2 - Escalade RAID Controller Manual
 |
UPC - 693494700022
View all 3Ware 7000-2 manuals
Add to My Manuals
Save this manual to your list of manuals |
Page 125 highlights
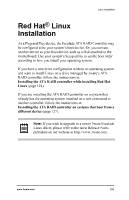
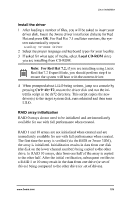
Linux Installation Install the driver 1 After loading a number of files, you will be asked to insert your driver disk. Insert the 3ware driver installation diskette for Red Hat and press OK. For Red Hat 7.1 and later versions, the system automatically reports: Loading 3w-xxxx driver 2 Select the proper language and keyboard types for your locality. 3 If asked for what type of media, select Local CD-ROM since you are installing from CD-ROM. Note: For Red Hat 7.2, if you are installing using Linux Red Hat 7.2 Expert Mode, you should perform step 4 to ensure the system will boot with the current driver. 4 When prompted about LILO being written, jump to a console by pressing Ctrl+Alt+F2, mount the driver disk and run the initrd.fix script in the rh72 directory. This script copies the new driver(s) to the target system disk, runs mkinitrd and then runs LILO. RAID array initialization RAID 0 arrays do not need to be initialized and are immediately available for use with full performance when created. RAID 1 and 10 arrays are not initialized when created and are immediately available for use with full performance when created. The first time the array is verified (via the BIOS or 3ware 3DM), the array is initialized. Initialization results in data from one disk (the disk on the lower channel number) being copied to the other drive. In RAID 10 arrays, data from one half of the array is copied to the other half. After the initial verification, subsequent verifies to a RAID 1 or 10 array result in the data from one drive (or set of drives) being compared to the other drive (or set of drives). www.3ware.com 125
-
 1
1 -
2
-
3
-
4
-
5
-
6
-
7
-
8
-
9
-
10
-
11
-
12
-
13
-
14
-
15
-
16
-
17
-
18
-
19
-
20
-
21
-
22
-
23
-
24
-
25
-
26
-
27
-
28
-
29
-
30
-
31
-
32
-
33
-
34
-
35
-
36
-
37
-
38
-
39
-
40
-
41
-
42
-
43
-
44
-
45
-
46
-
47
-
48
-
49
-
50
-
51
-
52
-
53
-
54
-
55
-
56
-
57
-
58
-
59
-
60
-
61
-
62
-
63
-
64
-
65
-
66
-
67
-
68
-
69
-
70
-
71
-
72
-
73
-
74
-
75
-
76
-
77
-
78
-
79
-
80
-
81
-
82
-
83
-
84
-
85
-
86
-
87
-
88
-
89
-
90
-
91
-
92
-
93
-
94
-
95
-
96
-
97
-
98
-
99
-
100
-
101
-
102
-
103
-
104
-
105
-
106
-
107
-
108
-
109
-
110
-
111
-
112
-
113
-
114
-
115
-
116
-
117
-
118
-
119
-
 120
120 -
 121
121 -
 122
122 -
 123
123 -
 124
124 -
 125
125 -
 126
126 -
 127
127 -
 128
128 -
 129
129 -
 130
130 -
131
-
132
-
133
-
134
-
135
-
136
-
137
-
138
-
139
-
140
-
141
-
142
-
143
-
144
-
145
-
146
-
147
-
148
-
149
-
150
-
151
-
152
-
153
-
154
-
155
-
156
-
157
-
158
-
159
-
160
-
161
-
162
-
163
-
164
-
165
-
166
-
167
-
168
-
169
-
170
-
171
-
172
-
173
-
174
-
175
-
176
-
177
-
178
-
179
-
180
-
181
-
182
-
183
-
184
-
185
-
186
-
187
-
188
-
189
-
190
-
191
-
192
-
193
-
194
-
195
-
196
 |
 |