3Ware 7000-2 User Guide - Page 55
3Ware 7000-2 - Escalade RAID Controller Manual
 |
UPC - 693494700022
View all 3Ware 7000-2 manuals
Add to My Manuals
Save this manual to your list of manuals |
Page 55 highlights
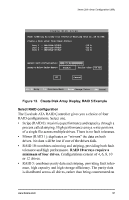
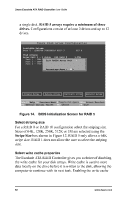
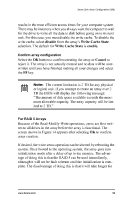
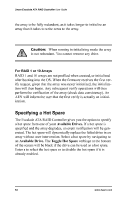
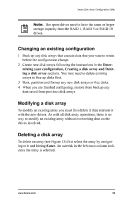
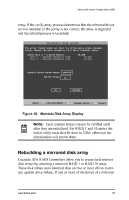
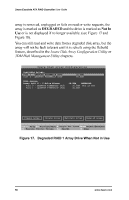
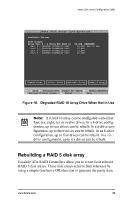
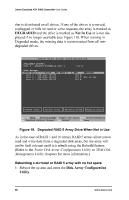
3ware Disk Array Configuration Utility Note: Hot spare drives need to have the same or larger storage capacity than the RAID 1, RAID 5 or RAID 10 drives. Changing an existing configuration 1 Back up any disk arrays that contain data that you want to retain before the configuration change. 2 Create new disk arrays following the instructions in the Determining your configuration, Creating a disk array and Deleting a disk array sections. You may need to delete existing arrays to free up disks first. 3 Boot, partition and format any new disk arrays or free disks. 4 When you are finished configuring, restore from backup any data saved from previous disk arrays Modifying a disk array To modify an existing array you must first delete it then recreate it with the new drives. As with all disk array operations, there is no way to modify an existing array without overwriting data on the drives involved. Deleting a disk array To delete an array (see Figure 15) first select the array by navigating to it and hitting Enter. An asterisk in the left most column indicates the array is selected. www.3ware.com 55
-
 1
1 -
2
-
3
-
4
-
5
-
6
-
7
-
8
-
9
-
10
-
11
-
12
-
13
-
14
-
15
-
16
-
17
-
18
-
19
-
20
-
21
-
22
-
23
-
24
-
25
-
26
-
27
-
28
-
29
-
30
-
31
-
32
-
33
-
34
-
35
-
36
-
37
-
38
-
39
-
40
-
41
-
42
-
43
-
44
-
45
-
46
-
47
-
48
-
49
-
 50
50 -
 51
51 -
 52
52 -
 53
53 -
 54
54 -
 55
55 -
 56
56 -
 57
57 -
 58
58 -
 59
59 -
 60
60 -
61
-
62
-
63
-
64
-
65
-
66
-
67
-
68
-
69
-
70
-
71
-
72
-
73
-
74
-
75
-
76
-
77
-
78
-
79
-
80
-
81
-
82
-
83
-
84
-
85
-
86
-
87
-
88
-
89
-
90
-
91
-
92
-
93
-
94
-
95
-
96
-
97
-
98
-
99
-
100
-
101
-
102
-
103
-
104
-
105
-
106
-
107
-
108
-
109
-
110
-
111
-
112
-
113
-
114
-
115
-
116
-
117
-
118
-
119
-
120
-
121
-
122
-
123
-
124
-
125
-
126
-
127
-
128
-
129
-
130
-
131
-
132
-
133
-
134
-
135
-
136
-
137
-
138
-
139
-
140
-
141
-
142
-
143
-
144
-
145
-
146
-
147
-
148
-
149
-
150
-
151
-
152
-
153
-
154
-
155
-
156
-
157
-
158
-
159
-
160
-
161
-
162
-
163
-
164
-
165
-
166
-
167
-
168
-
169
-
170
-
171
-
172
-
173
-
174
-
175
-
176
-
177
-
178
-
179
-
180
-
181
-
182
-
183
-
184
-
185
-
186
-
187
-
188
-
189
-
190
-
191
-
192
-
193
-
194
-
195
-
196
 |
 |