Brother International ADS-2500We Users Guide - Page 130
Select your machine from Print & Fax or Print & Scan, Combine into single document, Image Correction
 |
View all Brother International ADS-2500We manuals
Add to My Manuals
Save this manual to your list of manuals |
Page 130 highlights
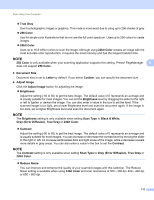
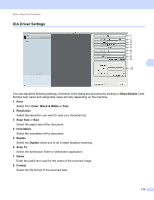
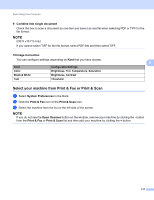
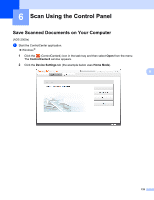
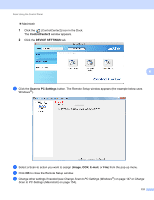
Scan Using Your Computer 9 Combine into single document Check this box to scan a document as one item and save it as one file when selecting PDF or TIFF for the file format. NOTE (OS X v10.7.5 only) If you cannot select TIFF for the file format, select PDF first and then select TIFF. 10 Image Correction You can configure settings depending on Kind that you have chosen. 5 Kind Configurable Settings Color Brightness, Tint, Temperature, Saturation Black & White Brightness, Contrast Text Threshold Select your machine from Print & Fax or Print & Scan 5 1 Select System Preferences in the Dock. 2 Click the Print & Fax icon or the Print & Scan icon. 3 Select the machine from the list on the left side of the screen. NOTE If you do not see the Open Scanner button on the window, remove your machine by clicking the - button from the Print & Fax or Print & Scan list and then add your machine by clicking the + button. 117
-
 1
1 -
2
-
3
-
4
-
5
-
6
-
7
-
8
-
9
-
10
-
11
-
12
-
13
-
14
-
15
-
16
-
17
-
18
-
19
-
20
-
21
-
22
-
23
-
24
-
25
-
26
-
27
-
28
-
29
-
30
-
31
-
32
-
33
-
34
-
35
-
36
-
37
-
38
-
39
-
40
-
41
-
42
-
43
-
44
-
45
-
46
-
47
-
48
-
49
-
50
-
51
-
52
-
53
-
54
-
55
-
56
-
57
-
58
-
59
-
60
-
61
-
62
-
63
-
64
-
65
-
66
-
67
-
68
-
69
-
70
-
71
-
72
-
73
-
74
-
75
-
76
-
77
-
78
-
79
-
80
-
81
-
82
-
83
-
84
-
85
-
86
-
87
-
88
-
89
-
90
-
91
-
92
-
93
-
94
-
95
-
96
-
97
-
98
-
99
-
100
-
101
-
102
-
103
-
104
-
105
-
106
-
107
-
108
-
109
-
110
-
111
-
112
-
113
-
114
-
115
-
116
-
117
-
118
-
119
-
120
-
121
-
122
-
123
-
124
-
 125
125 -
 126
126 -
 127
127 -
 128
128 -
 129
129 -
 130
130 -
 131
131 -
 132
132 -
 133
133 -
 134
134 -
 135
135 -
136
-
137
-
138
-
139
-
140
-
141
-
142
-
143
-
144
-
145
-
146
-
147
-
148
-
149
-
150
-
151
-
152
-
153
-
154
-
155
-
156
-
157
-
158
-
159
-
160
-
161
-
162
-
163
-
164
-
165
-
166
-
167
-
168
-
169
-
170
-
171
-
172
-
173
-
174
-
175
-
176
-
177
-
178
-
179
-
180
-
181
-
182
-
183
-
184
-
185
-
186
-
187
-
188
-
189
-
190
-
191
-
192
-
193
-
194
-
195
-
196
-
197
-
198
-
199
-
200
-
201
-
202
-
203
-
204
-
205
-
206
-
207
-
208
-
209
-
210
-
211
-
212
-
213
-
214
-
215
-
216
-
217
-
218
-
219
-
220
-
221
-
222
-
223
-
224
-
225
-
226
-
227
-
228
-
229
-
230
-
231
-
232
-
233
-
234
-
235
-
236
-
237
 |
 |
