Brother International ADS-2500We Users Guide - Page 205
Troubleshooting, Identify Your Problem, Error and Maintenance Messages
 |
View all Brother International ADS-2500We manuals
Add to My Manuals
Save this manual to your list of manuals |
Page 205 highlights
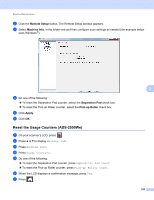
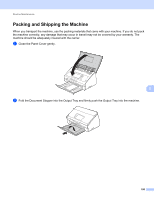
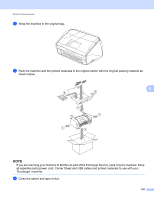
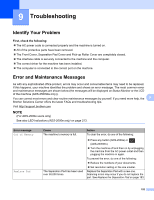
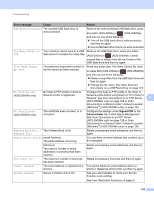
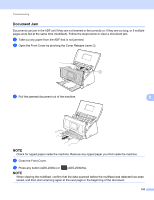
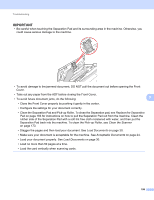
9 Troubleshooting 9 Identify Your Problem 9 First, check the following: 9 The AC power code is connected properly and the machine is turned on. All of the protective parts have been removed. The Front Cover, Separation Pad Cover and Pick-up Roller Cover are completely closed. The interface cable is securely connected to the machine and the computer. The correct driver for the machine has been installed. The computer is connected to the correct port on the machine. Error and Maintenance Messages 9 As with any sophisticated office product, errors may occur and consumable items may need to be replaced. If this happens, your machine identifies the problem and shows an error message. The most common error and maintenance messages are shown below (the messages will be displayed on Status Monitor or the LCD of the machine (ADS-2500We only)). You can correct most errors and clear routine maintenance messages by yourself. If you need more help, the 9 Brother Solutions Center offers the latest FAQs and troubleshooting tips. Visit http://support.brother.com NOTE (For ADS-2000e users only) See also LED Indications (ADS-2000e only) on page 213. Error message Out of Memory Replace Pad Cause The machine's memory is full. Action To clear the error, do one of the following: The Separation Pad has been used over 50,000 times. Press any button (ADS-2000e) or (ADS-2500We). Turn the machine off and then on by unplugging the machine from the AC power outlet and then plugging the machine in again. To prevent the error, do one of the following: Reduce the numbers of your documents. Set resolution setting or file size smaller. Replace the Separation Pad with a new one. Scanning errors may occur if you do not replace the part. See Replace the Separation Pad on page 183. 192
-
 1
1 -
2
-
3
-
4
-
5
-
6
-
7
-
8
-
9
-
10
-
11
-
12
-
13
-
14
-
15
-
16
-
17
-
18
-
19
-
20
-
21
-
22
-
23
-
24
-
25
-
26
-
27
-
28
-
29
-
30
-
31
-
32
-
33
-
34
-
35
-
36
-
37
-
38
-
39
-
40
-
41
-
42
-
43
-
44
-
45
-
46
-
47
-
48
-
49
-
50
-
51
-
52
-
53
-
54
-
55
-
56
-
57
-
58
-
59
-
60
-
61
-
62
-
63
-
64
-
65
-
66
-
67
-
68
-
69
-
70
-
71
-
72
-
73
-
74
-
75
-
76
-
77
-
78
-
79
-
80
-
81
-
82
-
83
-
84
-
85
-
86
-
87
-
88
-
89
-
90
-
91
-
92
-
93
-
94
-
95
-
96
-
97
-
98
-
99
-
100
-
101
-
102
-
103
-
104
-
105
-
106
-
107
-
108
-
109
-
110
-
111
-
112
-
113
-
114
-
115
-
116
-
117
-
118
-
119
-
120
-
121
-
122
-
123
-
124
-
125
-
126
-
127
-
128
-
129
-
130
-
131
-
132
-
133
-
134
-
135
-
136
-
137
-
138
-
139
-
140
-
141
-
142
-
143
-
144
-
145
-
146
-
147
-
148
-
149
-
150
-
151
-
152
-
153
-
154
-
155
-
156
-
157
-
158
-
159
-
160
-
161
-
162
-
163
-
164
-
165
-
166
-
167
-
168
-
169
-
170
-
171
-
172
-
173
-
174
-
175
-
176
-
177
-
178
-
179
-
180
-
181
-
182
-
183
-
184
-
185
-
186
-
187
-
188
-
189
-
190
-
191
-
192
-
193
-
194
-
195
-
196
-
197
-
198
-
199
-
 200
200 -
 201
201 -
 202
202 -
 203
203 -
 204
204 -
 205
205 -
 206
206 -
 207
207 -
 208
208 -
 209
209 -
 210
210 -
211
-
212
-
213
-
214
-
215
-
216
-
217
-
218
-
219
-
220
-
221
-
222
-
223
-
224
-
225
-
226
-
227
-
228
-
229
-
230
-
231
-
232
-
233
-
234
-
235
-
236
-
237
 |
 |