Brother International MFC-9700 Users Manual - English - Page 9
Quick Reference Guide, Sending Faxes, Receiving Faxes - scanner
 |
View all Brother International MFC-9700 manuals
Add to My Manuals
Save this manual to your list of manuals |
Page 9 highlights
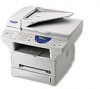
Quick Reference Guide Sending Faxes Automatic Transmission 1 Place the original face up in the ADF, or face down on the scanner glass. 2 Enter the fax number using One Touch, Speed Dial, Search or the dial pad. 3 Press Fax Start. Sending a Cover Page 1 Place the original face up in the ADF, or face down on the scanner glass. 2 Press Menu, 2, 2, 8. 3 When NEXT FAX ONLY appears, press Set. 4 Press or to select ON (or OFF), and then press Set. 5 Press or to select a comment, and then press Set. 6 Enter two digits to indicate the number of pages being sent, and then press Set. 7 Press 1 to select additional settings -OR-Press 2 if you are ready to fax. 8 Enter the fax number. 9 Press Fax Start. Real Time Transmission You can send faxes in real time. 1 Place the original face up in the ADF, or face down on the scanner glass. 2 Press Menu, 2, 2, 6. 3 Press or to select ON (or OFF), and then press Set-OR- For the next transmission only, press or to select NEXT FAX ONLY, and then press Set. 4 For the next fax only, press or to select ON (or OFF), and then press Set. 5 Press 1 to select additional settings -OR-Press 2 to fax. 6 Enter the fax number. 7 Press Fax Start. Receiving Faxes Select Receive Mode There are three Receive modes: FAX ONLY, EXT. TEL /TAD and MANUAL. Press Receive Mode until the LCD shows your selection. After two seconds the LCD returns to the Data and Time prompt and shows the new Receive mode. Brother fax-back system : In USA: 1-800-521-2846 Brother Global Web Site : http://www.brother.com Frequently Asked Questions (FAQs) and Product Support: http://solutions.brother.com Brother Accessories & Supplies : In USA: 1-888-879-3232 (voice) 1-800-947-1445 (fax) http://www.brothermall.com In Canada: 1-877-BROTHER (voice) Q U I C K R E F E R E N C E G U I D E vii
-
 1
1 -
2
-
3
-
 4
4 -
 5
5 -
 6
6 -
 7
7 -
 8
8 -
 9
9 -
 10
10 -
 11
11 -
 12
12 -
 13
13 -
 14
14 -
15
-
16
-
17
-
18
-
19
-
20
-
21
-
22
-
23
-
24
-
25
-
26
-
27
-
28
-
29
-
30
-
31
-
32
-
33
-
34
-
35
-
36
-
37
-
38
-
39
-
40
-
41
-
42
-
43
-
44
-
45
-
46
-
47
-
48
-
49
-
50
-
51
-
52
-
53
-
54
-
55
-
56
-
57
-
58
-
59
-
60
-
61
-
62
-
63
-
64
-
65
-
66
-
67
-
68
-
69
-
70
-
71
-
72
-
73
-
74
-
75
-
76
-
77
-
78
-
79
-
80
-
81
-
82
-
83
-
84
-
85
-
86
-
87
-
88
-
89
-
90
-
91
-
92
-
93
-
94
-
95
-
96
-
97
-
98
-
99
-
100
-
101
-
102
-
103
-
104
-
105
-
106
-
107
-
108
-
109
-
110
-
111
-
112
-
113
-
114
-
115
-
116
-
117
-
118
-
119
-
120
-
121
-
122
-
123
-
124
-
125
-
126
-
127
-
128
-
129
-
130
-
131
-
132
-
133
-
134
-
135
-
136
-
137
-
138
-
139
-
140
-
141
-
142
-
143
-
144
-
145
-
146
-
147
-
148
-
149
-
150
-
151
-
152
-
153
-
154
-
155
-
156
-
157
-
158
-
159
-
160
-
161
-
162
-
163
-
164
-
165
-
166
-
167
-
168
-
169
-
170
-
171
-
172
-
173
-
174
-
175
-
176
-
177
-
178
-
179
-
180
-
181
-
182
-
183
-
184
-
185
-
186
-
187
-
188
-
189
-
190
-
191
-
192
-
193
-
194
-
195
-
196
-
197
-
198
-
199
-
200
-
201
-
202
-
203
-
204
-
205
-
206
-
207
-
208
-
209
-
210
-
211
-
212
-
213
-
214
-
215
-
216
-
217
-
218
-
219
-
220
-
221
-
222
-
223
-
224
-
225
-
226
-
227
-
228
 |
 |
