Dell Broadcom NetXtreme Family of Adapters Broadcom NetXtreme II Network Adapt - Page 185
Configuring LiveLink for a Smart Load Balancing and Failover and SLB Auto-Fallback Disable Team
 |
View all Dell Broadcom NetXtreme Family of Adapters manuals
Add to My Manuals
Save this manual to your list of manuals |
Page 185 highlights
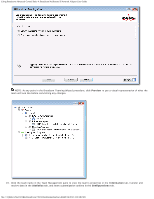
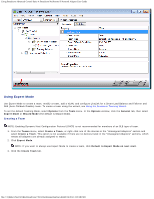
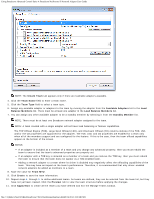
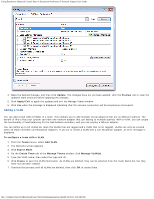
Using Broadcom Advanced Control Suite 4: Broadcom NetXtreme II Network Adapter User Guide 8. Click Yes when the message is displayed indicating that the network connection will be temporarily interrupted. NOTE: To maintain optimum adapter performance, your system should have 64 MB of system memory for each of the eight VLANs created per adapter. Viewing VLAN Properties and Statistics and Running VLAN Tests To view VLAN properties and statistics and to run VLAN tests 1. Select one of the listed VLANs. 2. Click the Information tab to view the properties of the VLAN adapter. 3. Click the Statistics tab to view the statistics for the VLAN adapter. 4. Click the Diagnostics tab to run a network test on the VLAN adapter. Deleting a VLAN The procedure below applies when you are in Expert Mode. To delete a VLAN 1. Select the VLAN to delete. 2. From the Teams menu, select Remove VLAN. 3. Click Apply. 4. Click Yes when the message is displayed indicating that the network connection will be temporarily interrupted. NOTE: If you delete a team, any VLANs configured for that team are also deleted. Configuring LiveLink for a Smart Load Balancing and Failover and SLB (Auto-Fallback Disable) Team LiveLink is a feature of BASP that is available for the Smart Load Balancing (SLB) and SLB (Auto-Fallback Disable) type of teaming. The purpose of LiveLink is to detect link loss beyond the switch and to route traffic only through team members that have a live link. Read the following notes before you attempt to configure LiveLink. NOTES: Before you begin configuring LiveLink™, review the description of LiveLink. Also verify that each probe target you plan to specify is available and working. If the IP address of the probe target changes for any reason, LiveLink must be reconfigured. If the MAC address of the probe target changes for any reason, you must restart the team (see "Troubleshooting"). file:///T|/htdocs/NETWORK/BroadCom/71921/NetXtremeII/en/bacs.htm[9/26/2012 3:29:48 PM]
-
 1
1 -
2
-
3
-
4
-
5
-
6
-
7
-
8
-
9
-
10
-
11
-
12
-
13
-
14
-
15
-
16
-
17
-
18
-
19
-
20
-
21
-
22
-
23
-
24
-
25
-
26
-
27
-
28
-
29
-
30
-
31
-
32
-
33
-
34
-
35
-
36
-
37
-
38
-
39
-
40
-
41
-
42
-
43
-
44
-
45
-
46
-
47
-
48
-
49
-
50
-
51
-
52
-
53
-
54
-
55
-
56
-
57
-
58
-
59
-
60
-
61
-
62
-
63
-
64
-
65
-
66
-
67
-
68
-
69
-
70
-
71
-
72
-
73
-
74
-
75
-
76
-
77
-
78
-
79
-
80
-
81
-
82
-
83
-
84
-
85
-
86
-
87
-
88
-
89
-
90
-
91
-
92
-
93
-
94
-
95
-
96
-
97
-
98
-
99
-
100
-
101
-
102
-
103
-
104
-
105
-
106
-
107
-
108
-
109
-
110
-
111
-
112
-
113
-
114
-
115
-
116
-
117
-
118
-
119
-
120
-
121
-
122
-
123
-
124
-
125
-
126
-
127
-
128
-
129
-
130
-
131
-
132
-
133
-
134
-
135
-
136
-
137
-
138
-
139
-
140
-
141
-
142
-
143
-
144
-
145
-
146
-
147
-
148
-
149
-
150
-
151
-
152
-
153
-
154
-
155
-
156
-
157
-
158
-
159
-
160
-
161
-
162
-
163
-
164
-
165
-
166
-
167
-
168
-
169
-
170
-
171
-
172
-
173
-
174
-
175
-
176
-
177
-
178
-
179
-
 180
180 -
 181
181 -
 182
182 -
 183
183 -
 184
184 -
 185
185 -
 186
186 -
 187
187 -
 188
188 -
 189
189 -
 190
190 -
191
-
192
-
193
-
194
-
195
-
196
-
197
-
198
-
199
-
200
-
201
-
202
-
203
-
204
-
205
-
206
-
207
-
208
-
209
-
210
-
211
-
212
-
213
-
214
-
215
-
216
-
217
-
218
-
219
-
220
-
221
-
222
-
223
-
224
 |
 |
