Epson C3500 Technical Reference Guide - Page 198
Replacing the Printer, nging, tting
 |
View all Epson C3500 manuals
Add to My Manuals
Save this manual to your list of manuals |
Page 198 highlights
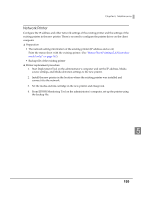
Replacing the Printer If the printer needs replacement because of a failure or other reason, it cannot be used by simply replacing the printers. This explains the methods for replacing the printer without changing the application on the client computer. Local Printer Replace the printer using the USB Replacement Service. The USB Replacement Service is a program that detects when a new printer is connected, changes the properties information of the printer driver registered in Windows, and automatically changes the output port. When this is installed as a resident program on the client computer, it is not necessary to configure settings in the application, printer driver, or OS. However, printer settings are required. ❏ Preparation • Install the USB Replacement Service on the client computer. • Backup file of the existing printer ❏ Printer replacement procedure 1. Start Deployment Tool on the administrator's computer and set the Media source settings and Media detection settings to the new printer. 2. Remove the existing printer from the client computer. Connect the new printer and power on the printer. The USB Replacement Service will detect the connection of the new printer and set a new printer port for the existing printer driver. 3. Set the media and ink cartridge in the new printer and charge ink. 4. Set up the new printer with the existing printer settings using the backup file of the existing printer. 198
-
 1
1 -
2
-
3
-
4
-
5
-
6
-
7
-
8
-
9
-
10
-
11
-
12
-
13
-
14
-
15
-
16
-
17
-
18
-
19
-
20
-
21
-
22
-
23
-
24
-
25
-
26
-
27
-
28
-
29
-
30
-
31
-
32
-
33
-
34
-
35
-
36
-
37
-
38
-
39
-
40
-
41
-
42
-
43
-
44
-
45
-
46
-
47
-
48
-
49
-
50
-
51
-
52
-
53
-
54
-
55
-
56
-
57
-
58
-
59
-
60
-
61
-
62
-
63
-
64
-
65
-
66
-
67
-
68
-
69
-
70
-
71
-
72
-
73
-
74
-
75
-
76
-
77
-
78
-
79
-
80
-
81
-
82
-
83
-
84
-
85
-
86
-
87
-
88
-
89
-
90
-
91
-
92
-
93
-
94
-
95
-
96
-
97
-
98
-
99
-
100
-
101
-
102
-
103
-
104
-
105
-
106
-
107
-
108
-
109
-
110
-
111
-
112
-
113
-
114
-
115
-
116
-
117
-
118
-
119
-
120
-
121
-
122
-
123
-
124
-
125
-
126
-
127
-
128
-
129
-
130
-
131
-
132
-
133
-
134
-
135
-
136
-
137
-
138
-
139
-
140
-
141
-
142
-
143
-
144
-
145
-
146
-
147
-
148
-
149
-
150
-
151
-
152
-
153
-
154
-
155
-
156
-
157
-
158
-
159
-
160
-
161
-
162
-
163
-
164
-
165
-
166
-
167
-
168
-
169
-
170
-
171
-
172
-
173
-
174
-
175
-
176
-
177
-
178
-
179
-
180
-
181
-
182
-
183
-
184
-
185
-
186
-
187
-
188
-
189
-
190
-
191
-
192
-
 193
193 -
 194
194 -
 195
195 -
 196
196 -
 197
197 -
 198
198 -
 199
199 -
 200
200 -
 201
201 -
 202
202 -
 203
203 -
204
-
205
-
206
-
207
-
208
-
209
-
210
-
211
-
212
-
213
-
214
-
215
-
216
-
217
-
218
-
219
-
220
-
221
-
222
-
223
-
224
-
225
-
226
-
227
-
228
-
229
-
230
-
231
-
232
-
233
-
234
-
235
-
236
-
237
-
238
-
239
-
240
 |
 |
