Epson NX User Manual - Page 130
Formatting a Hard Disk, Starting the Program
 |
View all Epson NX manuals
Add to My Manuals
Save this manual to your list of manuals |
Page 130 highlights
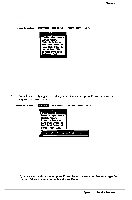
Formatting a Had Disk Formatting a Hard Disk This section describes how to low-level (or physically) format a hard disk. This procedure should not be confused with the logical format performed by the operating system. The physical formatting of a hard disk is a separate step that is usually done at the factory by the disk manufacturer. If the computer came with a factory-installed hard disk, or if you installed an optional IDE hard disk from Epson, it has already been physically formatted. You need only follow the instructions in the operating system manual to prepare the hard disk for use. You may need to use the procedure in this section to physically format a hard disk if you installed a non-Epson hard disk in the computer that has never received the low-level format and did not come with its own format utility. If you installed a hard disk that came with its own format utility, use that program to physically format the disk. Caution Physically formatting a hard disk erases any data it contains. Be sure to back up any data on the hard disk before you format it. In addition to destroying all the data on the hard disk, formatting removes any partitions and logical formatting defined on the disk by the operating system. After you physically format a new or used hard disk, you need to logically format the disk again using the operating system. Starting the Program Follow these steps to start the hard disk formatting program: 1 Insert the Reference diskette in drive A and start the system. 2 Type HDFMTALL and press Enter. You see the Hard Disk Format Menu: 1 - Format 2 - Destructive surface analysis 3 - Non-destructive surface analysis 0 - Exit The option you choose depends on whether you are formatting a new disk or reformatting a used disk. The options work as follows: cl Format first scans the disk for defective (bad) tracks (if it has no defective track table) and lets you decide which tracks to mark as bad. Then it formats the disk and marks the bad tracks so they are never used to store data. 0 D e s t r u c t i v e surface analysis tests the entire disk for read/write errors or unflagged bad tracks and updates the defective track table. Because this option writes and reads data on the disk, it destroys all data on any track that produces an error. YOU cannot run this test on a disk that has never been formatted. cl Non-destructive surface analysis checks the disk for unflagged bad tracks without destroying data. You cannot run this test on a disk that has never been formatted. B-24 Epson NX Service Manual
-
 1
1 -
2
-
3
-
4
-
5
-
6
-
7
-
8
-
9
-
10
-
11
-
12
-
13
-
14
-
15
-
16
-
17
-
18
-
19
-
20
-
21
-
22
-
23
-
24
-
25
-
26
-
27
-
28
-
29
-
30
-
31
-
32
-
33
-
34
-
35
-
36
-
37
-
38
-
39
-
40
-
41
-
42
-
43
-
44
-
45
-
46
-
47
-
48
-
49
-
50
-
51
-
52
-
53
-
54
-
55
-
56
-
57
-
58
-
59
-
60
-
61
-
62
-
63
-
64
-
65
-
66
-
67
-
68
-
69
-
70
-
71
-
72
-
73
-
74
-
75
-
76
-
77
-
78
-
79
-
80
-
81
-
82
-
83
-
84
-
85
-
86
-
87
-
88
-
89
-
90
-
91
-
92
-
93
-
94
-
95
-
96
-
97
-
98
-
99
-
100
-
101
-
102
-
103
-
104
-
105
-
106
-
107
-
108
-
109
-
110
-
111
-
112
-
113
-
114
-
115
-
116
-
117
-
118
-
119
-
120
-
121
-
122
-
123
-
124
-
 125
125 -
 126
126 -
 127
127 -
 128
128 -
 129
129 -
 130
130 -
 131
131 -
 132
132 -
 133
133 -
 134
134 -
 135
135 -
136
-
137
-
138
-
139
-
140
-
141
-
142
-
143
-
144
-
145
-
146
-
147
-
148
-
149
-
150
-
151
-
152
-
153
-
154
 |
 |