Epson NX User Manual - Page 67
See cable, Attaching Drive Cables
 |
View all Epson NX manuals
Add to My Manuals
Save this manual to your list of manuals |
Page 67 highlights
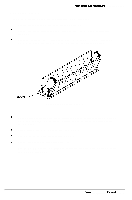
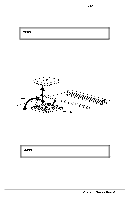
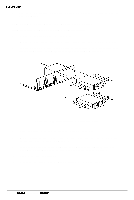
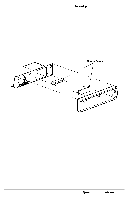
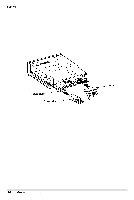
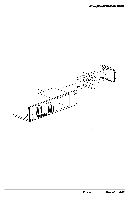
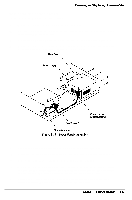
System Unit 6 If you are installing a diskette or tape drive in the lower drive bay, locate the diskette drive cable; one end is connected to the upper diskette drive and the other end is connected to the FDD interface connector (CN7). Use the middle conneCtor to connect the second drive. If installing a hard disk drive in the lower drive bay, locate the HDD cable; one end may be connected to an already installed hard disk drive located in the vertical position outside of the main drive bays and the other end is connected to the HDD interface connector (CN6). Use the middle connector to connect the second drive if one end is already connected to a hard drive or leave the middle connector free and use the end connector if no other HDD drive is present. 7 Ensure that the connector is aligned properly and fits properly onto the drive interface. See Figure 3- 11. Drive cable Figure 3-11 Attaching Drive Cables 8 Locate one of the power supply cable connectors that lead from the power supply behind the horizontal bays. The cables are labeled PA, PB, PC, and PD; plug the appropriate size connector that is free to the power supply socket in the drive (see Figure 3- 11). 9 Replace the cover (see page 3-4). 10 Reconfigure the system with the SETUP utility before using the computer. 3-14 Epson NX Service Manual
-
 1
1 -
2
-
3
-
4
-
5
-
6
-
7
-
8
-
9
-
10
-
11
-
12
-
13
-
14
-
15
-
16
-
17
-
18
-
19
-
20
-
21
-
22
-
23
-
24
-
25
-
26
-
27
-
28
-
29
-
30
-
31
-
32
-
33
-
34
-
35
-
36
-
37
-
38
-
39
-
40
-
41
-
42
-
43
-
44
-
45
-
46
-
47
-
48
-
49
-
50
-
51
-
52
-
53
-
54
-
55
-
56
-
57
-
58
-
59
-
60
-
61
-
 62
62 -
 63
63 -
 64
64 -
 65
65 -
 66
66 -
 67
67 -
 68
68 -
 69
69 -
 70
70 -
 71
71 -
 72
72 -
73
-
74
-
75
-
76
-
77
-
78
-
79
-
80
-
81
-
82
-
83
-
84
-
85
-
86
-
87
-
88
-
89
-
90
-
91
-
92
-
93
-
94
-
95
-
96
-
97
-
98
-
99
-
100
-
101
-
102
-
103
-
104
-
105
-
106
-
107
-
108
-
109
-
110
-
111
-
112
-
113
-
114
-
115
-
116
-
117
-
118
-
119
-
120
-
121
-
122
-
123
-
124
-
125
-
126
-
127
-
128
-
129
-
130
-
131
-
132
-
133
-
134
-
135
-
136
-
137
-
138
-
139
-
140
-
141
-
142
-
143
-
144
-
145
-
146
-
147
-
148
-
149
-
150
-
151
-
152
-
153
-
154
 |
 |
