Epson NX User Manual - Page 64
Installing Another Processor, Removing/Installing the Processor
 |
View all Epson NX manuals
Add to My Manuals
Save this manual to your list of manuals |
Page 64 highlights
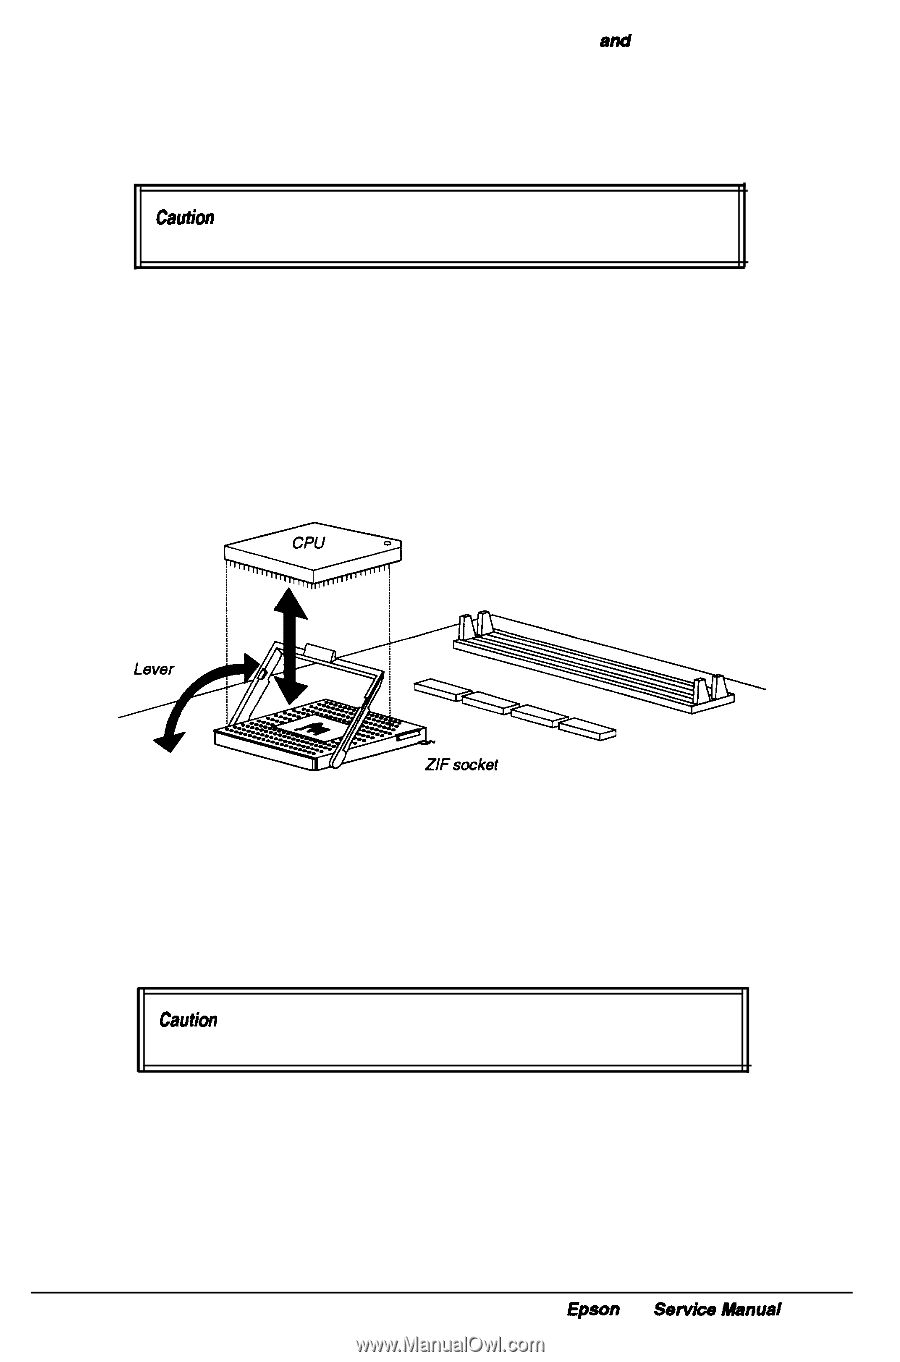
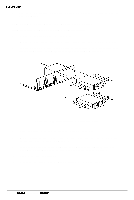
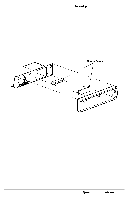
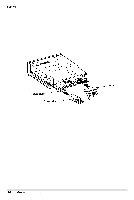
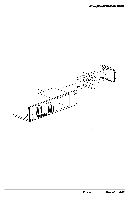
Removing and Replacing Subassemblies Installing Another Processor You can install a future Intel OverDrive processor in the Epson NX system, when it becomes available. Caution You must observe strict anti-static procedures to avoid damaging the CPU as you install or remove it. Follow these steps to install the CPU in socket U5: 1 Remove the cover (see page 3-2) and any option card that may be in the way of accessing the socket (see page 3-5). Remove any attached heat sink. 2 Raise the lever up and over the ZIF socket (see Figure 3-8). This will release the pressure holding the legs of the CPU in the socket. 3 Gently lift the CPU out of the socket and place it in an anti-static bag for protection. Figure 3-8 Removing/Installing the Processor 4 Locate the orientation dot in one corner of the new CPU and turn the CPU so that the dot is in the position shown in Figure 3-8. Be sure the dot is aligned with the corner that has a " 1" printed on the system board. Caution If you insert the CPU in the wrong position, you could permanently damage it. 5 Gently lower the CPU into the ZIF socket and raise the lever up over the socket so that it locks in place. Examine the CPU to be sure it is inserted all the way into the socket and is secure. 6 Attach a heat sink to the top of the CPU. 7 Replace any option card removed and the cover. Epson NX Service Manual 3-11
-
 1
1 -
2
-
3
-
4
-
5
-
6
-
7
-
8
-
9
-
10
-
11
-
12
-
13
-
14
-
15
-
16
-
17
-
18
-
19
-
20
-
21
-
22
-
23
-
24
-
25
-
26
-
27
-
28
-
29
-
30
-
31
-
32
-
33
-
34
-
35
-
36
-
37
-
38
-
39
-
40
-
41
-
42
-
43
-
44
-
45
-
46
-
47
-
48
-
49
-
50
-
51
-
52
-
53
-
54
-
55
-
56
-
57
-
58
-
 59
59 -
 60
60 -
 61
61 -
 62
62 -
 63
63 -
 64
64 -
 65
65 -
 66
66 -
 67
67 -
 68
68 -
 69
69 -
70
-
71
-
72
-
73
-
74
-
75
-
76
-
77
-
78
-
79
-
80
-
81
-
82
-
83
-
84
-
85
-
86
-
87
-
88
-
89
-
90
-
91
-
92
-
93
-
94
-
95
-
96
-
97
-
98
-
99
-
100
-
101
-
102
-
103
-
104
-
105
-
106
-
107
-
108
-
109
-
110
-
111
-
112
-
113
-
114
-
115
-
116
-
117
-
118
-
119
-
120
-
121
-
122
-
123
-
124
-
125
-
126
-
127
-
128
-
129
-
130
-
131
-
132
-
133
-
134
-
135
-
136
-
137
-
138
-
139
-
140
-
141
-
142
-
143
-
144
-
145
-
146
-
147
-
148
-
149
-
150
-
151
-
152
-
153
-
154
 |
 |