Epson PowerLite Pro G5350 Operation Guide - EasyMP - Page 70
Programs or All Programs - EPSON, Projector - EMP SlideMaker2.
 |
View all Epson PowerLite Pro G5350 manuals
Add to My Manuals
Save this manual to your list of manuals |
Page 70 highlights
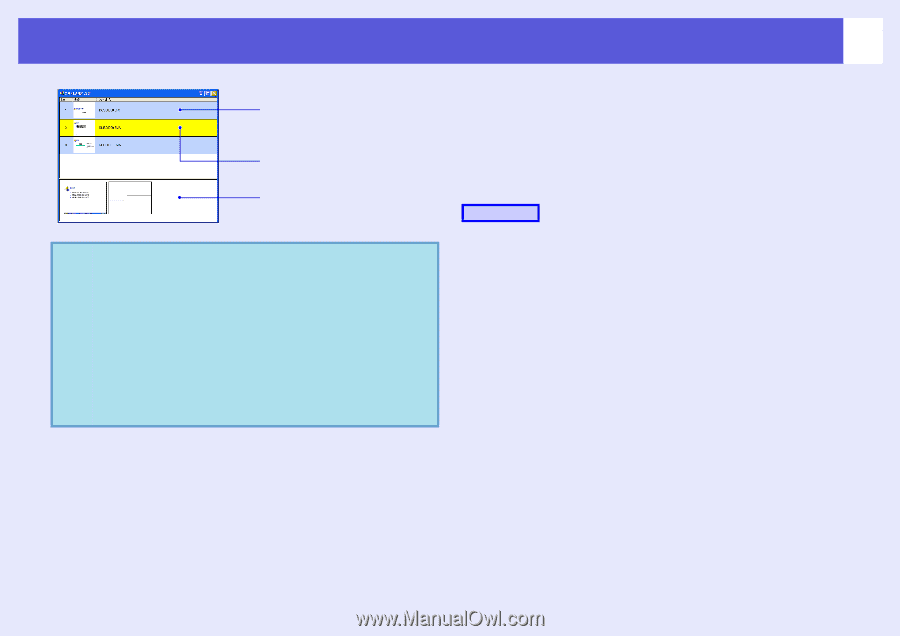
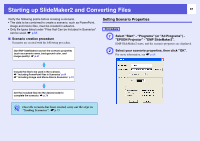
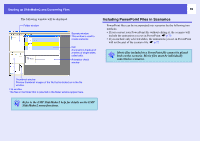
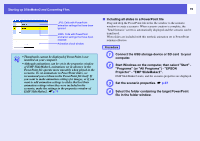
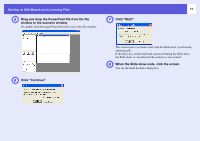
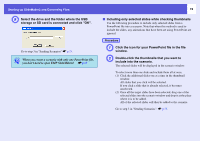
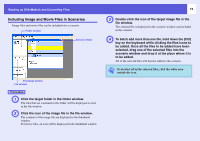
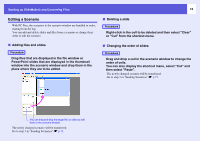
Starting up SlideMaker2 and Converting Files .JPG: Cells with PowerPoint animation settings that have been ignored .EMA: Cells with PowerPoint animation settings that have been retained Animation check window q • Thumbnails cannot be displayed if PowerPoint is not installed on your computer. • Although animations can be set in the properties window of EMP SlideMaker2, animations set in advance in the PowerPoint file operate more smoothly when played in the scenario. To set animations in PowerPoint slides, we recommend you set them in the PowerPoint file itself. If you want to make animation settings for images, or if you want to add animation settings to slides that lost their animation settings when they were included in the scenario, make the settings in the properties window of EMP SlideMaker2. s p.79 70 f Including all slides in a PowerPoint file Drag and drop the PowerPoint file in the file window to the scenario window to create a scenario. When scenario creation is complete, the "Send Scenario" screen is automatically displayed and the scenario can be transferred. When slides are included with this method, animation set in PowerPoint remains effective. Procedure A Connect the USB storage device or SD card to your computer. B Start Windows on the computer, then select "Start" "Programs" (or "All Programs") - "EPSON Projector" - "EMP SlideMaker2". EMP SlideMaker2 starts, and the scenario properties are displayed. C Set the scenario properties. s p.67 D Select the folder containing the target PowerPoint file in the folder window.
-
 1
1 -
2
-
3
-
4
-
5
-
6
-
7
-
8
-
9
-
10
-
11
-
12
-
13
-
14
-
15
-
16
-
17
-
18
-
19
-
20
-
21
-
22
-
23
-
24
-
25
-
26
-
27
-
28
-
29
-
30
-
31
-
32
-
33
-
34
-
35
-
36
-
37
-
38
-
39
-
40
-
41
-
42
-
43
-
44
-
45
-
46
-
47
-
48
-
49
-
50
-
51
-
52
-
53
-
54
-
55
-
56
-
57
-
58
-
59
-
60
-
61
-
62
-
63
-
64
-
 65
65 -
 66
66 -
 67
67 -
 68
68 -
 69
69 -
 70
70 -
 71
71 -
 72
72 -
 73
73 -
 74
74 -
 75
75 -
76
-
77
-
78
-
79
-
80
-
81
-
82
-
83
-
84
-
85
-
86
-
87
-
88
-
89
-
90
-
91
-
92
-
93
-
94
-
95
-
96
-
97
-
98
-
99
-
100
-
101
-
102
-
103
-
104
 |
 |