Epson R340 Printer Basics - Page 13
If you leave a card in the printer, images will be read from the card instead of your camera - print cd
 |
UPC - 010343855632
View all Epson R340 manuals
Add to My Manuals
Save this manual to your list of manuals |
Page 13 highlights
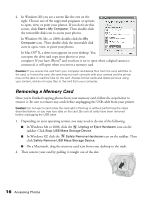
Tip: When you connect a CD drive, you can also print photos from Picture CDs that you get from your photo lab. When you connect a digital camera or storage device, the printer treats it like a memory card. Follow these steps to connect it: 1. Remove any memory cards from the printer. If you leave a card in the printer, images will be read from the card instead of your camera or storage device. 2. Connect the USB cable from your camera or storage device to the EXT I/F USB port on the front of the printer. Some digital cameras require a special USB cable; if so, be sure to use the one that came with the camera. 3. Turn on the printer and your camera or storage device. After a moment, the printer reads and counts the number of images. When it's done, your images are available for printing (see page 17). Note: If you used the Stylus Photo R340 to back up your images on a Zip disk, CD, or another storage device (see page 14), they're stored in folders (001, 002, etc.). Use the u and d buttons on the printer's control panel to highlight the folder you want to open, then press OK to open it. Connecting External Devices 13
-
 1
1 -
2
-
3
-
4
-
5
-
6
-
7
-
 8
8 -
 9
9 -
 10
10 -
 11
11 -
 12
12 -
 13
13 -
 14
14 -
 15
15 -
 16
16 -
 17
17 -
 18
18 -
19
-
20
-
21
-
22
-
23
-
24
-
25
-
26
-
27
-
28
-
29
-
30
-
31
-
32
-
33
-
34
-
35
-
36
-
37
-
38
-
39
-
40
-
41
-
42
-
43
-
44
-
45
-
46
-
47
-
48
-
49
-
50
-
51
-
52
-
53
-
54
-
55
-
56
-
57
-
58
-
59
-
60
-
61
-
62
-
63
-
64
-
65
-
66
-
67
-
68
-
69
-
70
-
71
-
72
-
73
-
74
-
75
-
76
-
77
-
78
-
79
-
80
-
81
 |
 |
