Epson R340 Printer Basics - Page 22
Touching Up Your Photos, Automatically Adjusting Your Photos - stylus photo printer
 |
UPC - 010343855632
View all Epson R340 manuals
Add to My Manuals
Save this manual to your list of manuals |
Page 22 highlights
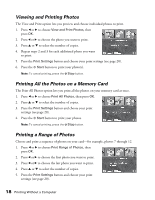
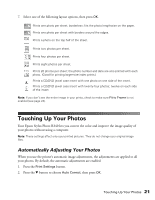
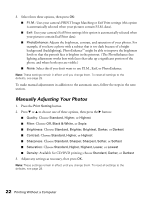
7. Select one of the following layout options, then press OK. Prints one photo per sheet, borderless; fits the photo lengthwise on the paper. Prints one photo per sheet with borders around the edges. Prints a photo on the top half of the sheet. Prints two photos per sheet. Prints four photos per sheet. Prints eight photos per sheet. Prints 20 photos per sheet; the photo number and date are also printed with each photo. (Good for printing larger-size index prints.) Prints a CD/DVD jewel case insert with one photo on one side of the insert. Prints a CD/DVD jewel case insert with twenty-four photos; twelve on each side of the insert. Note: If you don't see the entire image in your prints, check to make sure Fit to Frame is not enabled (see page 24). Touching Up Your Photos Your Epson Stylus Photo R340 lets you correct the color and improve the image quality of your photos without using a computer. Note: These settings affect only your printed pictures. They do not change your original image files. Automatically Adjusting Your Photos When you use the printer's automatic image adjustments, the adjustments are applied to all your photos. By default, the automatic adjustments are enabled. 1. Press the Print Settings button. 2. Press the d button to choose Auto Correct, then press OK. Touching Up Your Photos 21
-
 1
1 -
2
-
3
-
4
-
5
-
6
-
7
-
8
-
9
-
10
-
11
-
12
-
13
-
14
-
15
-
16
-
 17
17 -
 18
18 -
 19
19 -
 20
20 -
 21
21 -
 22
22 -
 23
23 -
 24
24 -
 25
25 -
 26
26 -
 27
27 -
28
-
29
-
30
-
31
-
32
-
33
-
34
-
35
-
36
-
37
-
38
-
39
-
40
-
41
-
42
-
43
-
44
-
45
-
46
-
47
-
48
-
49
-
50
-
51
-
52
-
53
-
54
-
55
-
56
-
57
-
58
-
59
-
60
-
61
-
62
-
63
-
64
-
65
-
66
-
67
-
68
-
69
-
70
-
71
-
72
-
73
-
74
-
75
-
76
-
77
-
78
-
79
-
80
-
81
 |
 |
