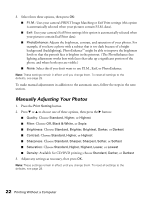
Epson R340 Printer Basics - Page 24
Cropping and Sizing Your Photos, Cropping with the Zoom Buttons, Borderless Expansion - stylus photo parts
 |
UPC - 010343855632
View all Epson R340 manuals
Add to My Manuals
Save this manual to your list of manuals |
Page 24 highlights
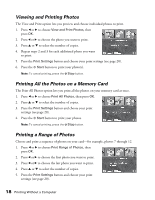
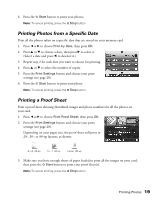
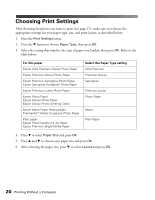
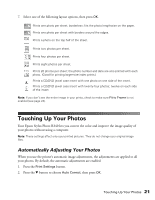
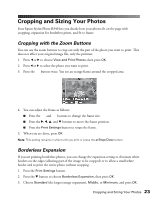
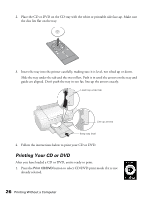
Cropping and Sizing Your Photos Your Epson Stylus Photo R340 lets you decide how your photos fit on the page with cropping, expansion for borderless prints, and fit to frame. Cropping with the Zoom Buttons You can use the zoom buttons to crop out only the part of the photo you want to print. This does not affect your original image file, only the printout. 1. Press l or r to choose View and Print Photos, then press OK. 2. Press l or r to select the photo you want to print. 3. Press the button twice. You see an orange frame around the cropped area. 4. You can adjust the frame as follows: ■ Press the and buttons to change the frame size. ■ Press the r, l, u, and d buttons to move the frame position. ■ Press the Print Settings button to rotate the frame. 5. When you are done, press OK. Note: This setting remains in effect until you print or press the y Stop/Clear button. Borderless Expansion If you are printing borderless photos, you can change the expansion setting to eliminate white borders on the edges (allowing part of the image to be cropped) or to allow a small white border and to print the entire photo without cropping. 1. Press the Print Settings button. 2. Press the d button to choose Borderless Expansion, then press OK. 3. Choose Standard (the largest image expansion), Middle, or Minimum, and press OK. Cropping and Sizing Your Photos 23
-
 1
1 -
2
-
3
-
4
-
5
-
6
-
7
-
8
-
9
-
10
-
11
-
12
-
13
-
14
-
15
-
16
-
17
-
18
-
 19
19 -
 20
20 -
 21
21 -
 22
22 -
 23
23 -
 24
24 -
 25
25 -
 26
26 -
 27
27 -
 28
28 -
 29
29 -
30
-
31
-
32
-
33
-
34
-
35
-
36
-
37
-
38
-
39
-
40
-
41
-
42
-
43
-
44
-
45
-
46
-
47
-
48
-
49
-
50
-
51
-
52
-
53
-
54
-
55
-
56
-
57
-
58
-
59
-
60
-
61
-
62
-
63
-
64
-
65
-
66
-
67
-
68
-
69
-
70
-
71
-
72
-
73
-
74
-
75
-
76
-
77
-
78
-
79
-
80
-
81
 |
 |