Epson R340 Printer Basics - Page 33
From the File menu, select, to close the Setup window. - stylus photo windows 7
 |
UPC - 010343855632
View all Epson R340 manuals
Add to My Manuals
Save this manual to your list of manuals |
Page 33 highlights
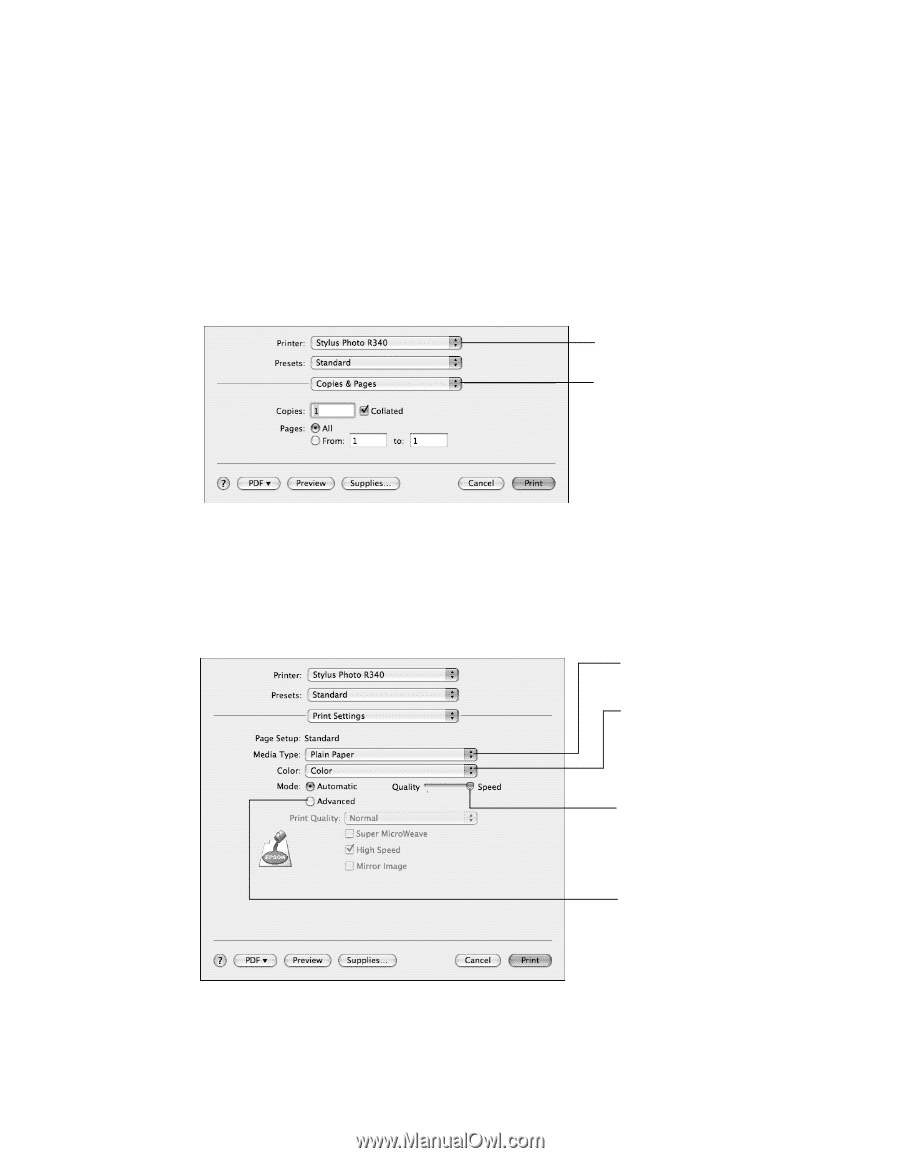
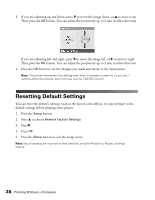
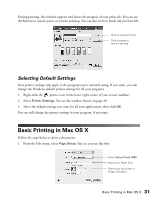
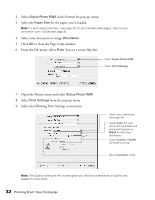
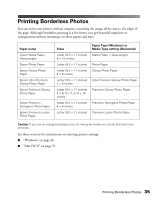
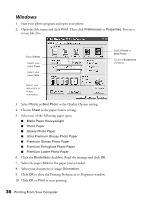
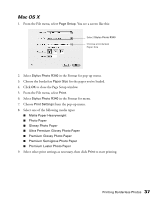
2. Select Stylus Photo R340 in the Format for pop-up menu. 3. Select the Paper Size for the paper you've loaded. Note: To print without borders, see page 35. To print double-sided pages, refer to your on-screen User's Guide (see page 8). 4. Select your document or image Orientation. 5. Click OK to close the Page Setup window. 6. From the File menu, select Print. You see a screen like this: Select Stylus Photo R340 Select Print Settings 7. Open the Printer menu and select Stylus Photo R340. 8. Select Print Settings from the pop-up menu. 9. Select the following Print Settings as necessary: Select your media type (see page 34) Select Color (for color documents and black and white photographs) or Black for black text documents Select Quality or Speed (for faster printing) Select Automatic mode Note: The Quality setting on this screen gives you the best combination of quality and speed for most prints. 32 Printing From Your Computer
-
 1
1 -
2
-
3
-
4
-
5
-
6
-
7
-
8
-
9
-
10
-
11
-
12
-
13
-
14
-
15
-
16
-
17
-
18
-
19
-
20
-
21
-
22
-
23
-
24
-
25
-
26
-
27
-
 28
28 -
 29
29 -
 30
30 -
 31
31 -
 32
32 -
 33
33 -
 34
34 -
 35
35 -
 36
36 -
 37
37 -
 38
38 -
39
-
40
-
41
-
42
-
43
-
44
-
45
-
46
-
47
-
48
-
49
-
50
-
51
-
52
-
53
-
54
-
55
-
56
-
57
-
58
-
59
-
60
-
61
-
62
-
63
-
64
-
65
-
66
-
67
-
68
-
69
-
70
-
71
-
72
-
73
-
74
-
75
-
76
-
77
-
78
-
79
-
80
-
81
 |
 |