Epson R340 Printer Basics - Page 51
Aligning the Print Head, Cleaning the Printer
 |
UPC - 010343855632
View all Epson R340 manuals
Add to My Manuals
Save this manual to your list of manuals |
Page 51 highlights
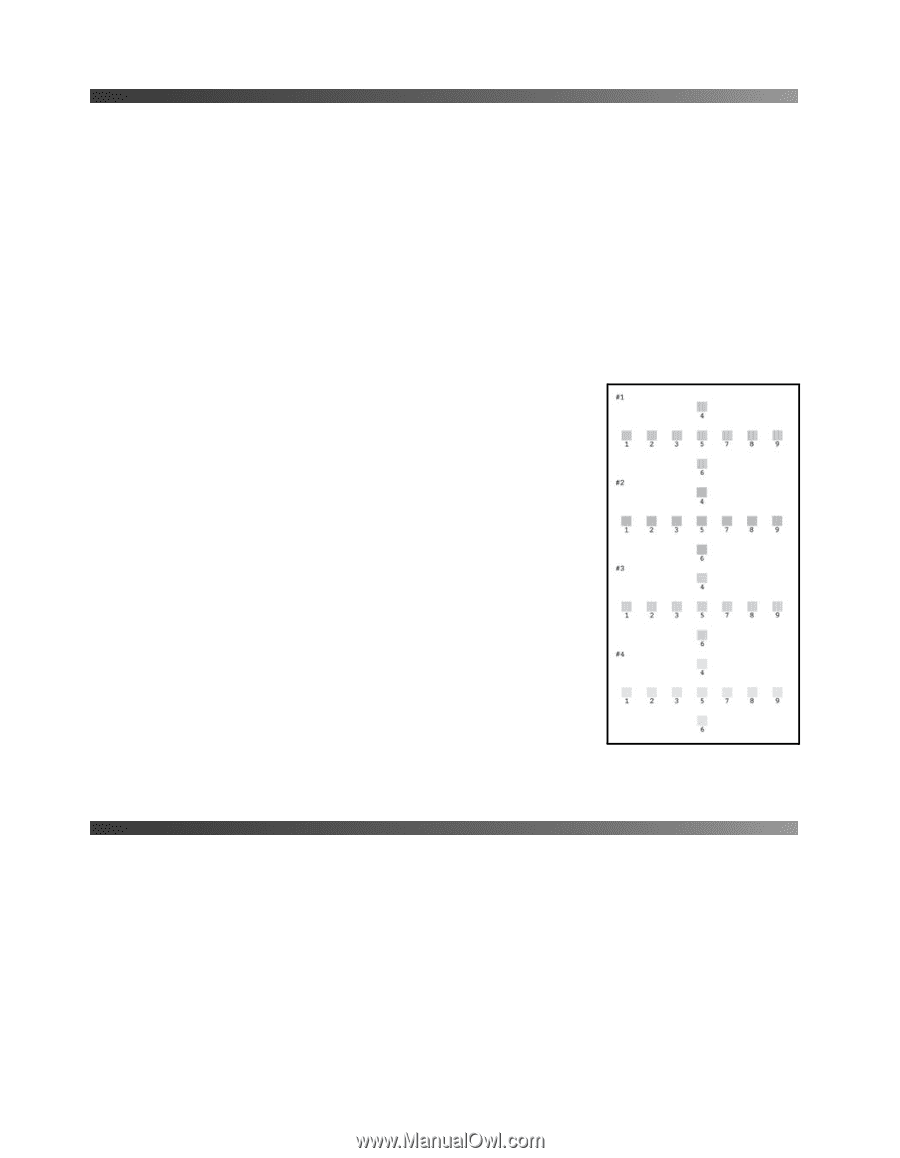
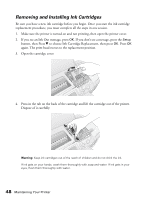
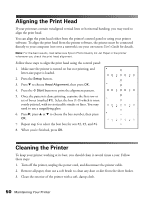
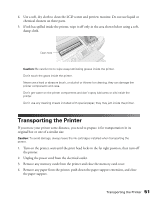
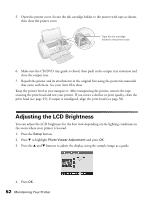
Aligning the Print Head If your printouts contain misaligned vertical lines or horizontal banding, you may need to align the print head. You can align the print head either from the printer's control panel or using your printer software. To align the print head from the printer software, the printer must be connected directly to your computer (not over a network); see your on-screen User's Guide for details. Note: For the best results, load letter-size Epson Photo Quality Ink Jet Paper in the printer whenever you check the print head alignment. Follow these steps to align the print head using the control panel: 1. Make sure the printer is turned on but not printing, and letter-size paper is loaded. 2. Press the Setup button. 3. Press d to choose Head Alignment, then press OK. 4. Press the x Start button to print the alignment pattern. 5. Once the pattern is done printing, examine the first row or set of boxes (marked #1). Select the box (1-9) which is most evenly printed, with no noticeable streaks or lines. You may need to use a magnifying glass. 6. Press r, press u or d to choose the box number, then press OK. 7. Repeat step 6 to select the best box for sets #2, #3, and #4. 8. When you're finished, press OK. Cleaning the Printer To keep your printer working at its best, you should clean it several times a year. Follow these steps: 1. Turn off the printer, unplug the power cord, and disconnect the printer cable. 2. Remove all paper, then use a soft brush to clean any dust or dirt from the sheet feeder. 3. Clean the exterior of the printer with a soft, damp cloth. 50 Maintaining Your Printer
-
 1
1 -
2
-
3
-
4
-
5
-
6
-
7
-
8
-
9
-
10
-
11
-
12
-
13
-
14
-
15
-
16
-
17
-
18
-
19
-
20
-
21
-
22
-
23
-
24
-
25
-
26
-
27
-
28
-
29
-
30
-
31
-
32
-
33
-
34
-
35
-
36
-
37
-
38
-
39
-
40
-
41
-
42
-
43
-
44
-
45
-
 46
46 -
 47
47 -
 48
48 -
 49
49 -
 50
50 -
 51
51 -
 52
52 -
 53
53 -
 54
54 -
 55
55 -
 56
56 -
57
-
58
-
59
-
60
-
61
-
62
-
63
-
64
-
65
-
66
-
67
-
68
-
69
-
70
-
71
-
72
-
73
-
74
-
75
-
76
-
77
-
78
-
79
-
80
-
81
 |
 |