Fujitsu Fi-5110EOX2 Operating Guide - Page 42
Flow of Operations, Preparation
 |
View all Fujitsu Fi-5110EOX2 manuals
Add to My Manuals
Save this manual to your list of manuals |
Page 42 highlights
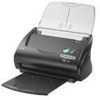
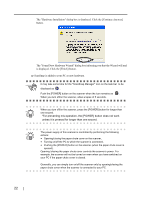
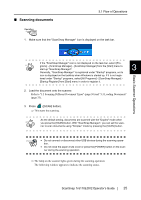
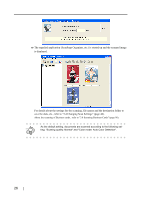
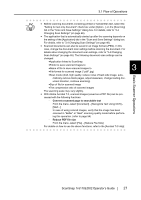
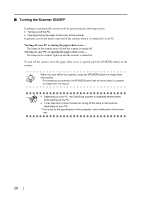
3.1 Flow of Operations This section describes the flow of operations starting with the scanning of documents on ScanSnap to the saving of scanned images in PDF format. ■ Preparation Operation 1. Make sure that the AC cable is connected to the scanner. 2. Make sure that the scanner is correctly connected to your PC. You can connect the scanner to your computer after turning it on. When the HINT scanner is already connected to your PC, you do not need to reconnect it. 3. Turn on your PC. ⇒ The "ScanSnap Manager" icon appears when Windows is started up. 4. Open the paper chute cover. Paper chute cover [POWER] button ⇒ The scanner is turned on and the "ScanSnap Manager" icon will change from S to S . If the scanner is not automatically turned on even when the paper chute cover HINT is opened, push the [POWER] button on the scanner. 24
-
 1
1 -
2
-
3
-
4
-
5
-
6
-
7
-
8
-
9
-
10
-
11
-
12
-
13
-
14
-
15
-
16
-
17
-
18
-
19
-
20
-
21
-
22
-
23
-
24
-
25
-
26
-
27
-
28
-
29
-
30
-
31
-
32
-
33
-
34
-
35
-
36
-
 37
37 -
 38
38 -
 39
39 -
 40
40 -
 41
41 -
 42
42 -
 43
43 -
 44
44 -
 45
45 -
 46
46 -
 47
47 -
48
-
49
-
50
-
51
-
52
-
53
-
54
-
55
-
56
-
57
-
58
-
59
-
60
-
61
-
62
-
63
-
64
-
65
-
66
-
67
-
68
-
69
-
70
-
71
-
72
-
73
-
74
-
75
-
76
-
77
-
78
-
79
-
80
-
81
-
82
-
83
-
84
-
85
-
86
-
87
-
88
-
89
-
90
-
91
-
92
-
93
-
94
-
95
-
96
-
97
-
98
-
99
-
100
-
101
-
102
-
103
-
104
-
105
-
106
-
107
-
108
-
109
-
110
-
111
-
112
-
113
-
114
-
115
-
116
-
117
-
118
-
119
-
120
-
121
-
122
-
123
-
124
-
125
-
126
-
127
-
128
-
129
-
130
-
131
-
132
-
133
-
134
-
135
-
136
-
137
-
138
-
139
-
140
-
141
-
142
-
143
-
144
-
145
-
146
-
147
-
148
-
149
-
150
-
151
-
152
-
153
-
154
-
155
-
156
-
157
-
158
-
159
-
160
-
161
-
162
-
163
-
164
-
165
-
166
-
167
-
168
-
169
-
170
-
171
-
172
-
173
-
174
-
175
-
176
-
177
-
178
-
179
-
180
-
181
 |
 |
