Garmin Forerunner 955 Solar Owners Manual - Page 63
Creating a PacePro Plan on Your Watch, Power Guide, Creating and Using a Power Guide
 |
View all Garmin Forerunner 955 Solar manuals
Add to My Manuals
Save this manual to your list of manuals |
Page 63 highlights
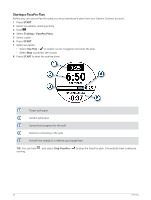
Creating a PacePro Plan on Your Watch Before you can create a PacePro plan on your watch, you must create a course and load it to your watch (Creating a Course on Garmin Connect, page 67). 1 From the watch face, select START. 2 Select an outdoor running activity. 3 Hold . 4 Select Navigation > Courses. 5 Select a course. 6 Select PacePro > Create New. 7 Select an option: • Select Goal Pace, and enter your target pace. • Select Goal Time, and enter your target time. The device displays your custom pace band. TIP: You can press DOWN and to preview the splits. 8 Select START. 9 Select an option: • Select Use Plan > to enable course navigation and start the plan. • Select Map to preview the course. Power Guide You can create and use a power strategy to plan your effort on a course. Your Forerunner device uses your FTP, the course elevation, and the projected time it will take you to complete the course to create a customized power guide. One of the most important steps in planning a successful power guide strategy is choosing your effort level. Putting a harder effort into the course will increase the power recommendations, while choosing an easier effort will reduce them (Creating and Using a Power Guide, page 55). The primary goal of a power guide is to help you complete the course based on what is known about your ability, not to achieve a specific target time. You can adjust the effort level during your ride. Power guides are always associated with a course and cannot be used with workouts or segments. You can view and edit your strategy in the Garmin Connect app and sync it with compatible Garmin devices. This feature requires a power meter, which must be paired with your device (Pairing Your Wireless Sensors, page 74). Creating and Using a Power Guide Before you can create a power guide, you must pair a power meter with your watch (Pairing Your Wireless Sensors, page 74). You must also have a course loaded to your watch (Creating a Course on Garmin Connect, page 67). You can also create a power guide in the Garmin Connect app. 1 Press START. 2 Select an outdoor biking activity. 3 Hold . 4 Select Training > Power Guide > Create New. 5 Select a course (Courses, page 66). 6 Select a riding position. 7 Select a gear weight. 8 Press START, and select Use Plan. TIP: You can preview the map, elevation plot, effort, settings, and splits. You can also adjust the effort, terrain, riding position, and gear weight before you start riding. Training 55
-
 1
1 -
2
-
3
-
4
-
5
-
6
-
7
-
8
-
9
-
10
-
11
-
12
-
13
-
14
-
15
-
16
-
17
-
18
-
19
-
20
-
21
-
22
-
23
-
24
-
25
-
26
-
27
-
28
-
29
-
30
-
31
-
32
-
33
-
34
-
35
-
36
-
37
-
38
-
39
-
40
-
41
-
42
-
43
-
44
-
45
-
46
-
47
-
48
-
49
-
50
-
51
-
52
-
53
-
54
-
55
-
56
-
57
-
 58
58 -
 59
59 -
 60
60 -
 61
61 -
 62
62 -
 63
63 -
 64
64 -
 65
65 -
 66
66 -
 67
67 -
 68
68 -
69
-
70
-
71
-
72
-
73
-
74
-
75
-
76
-
77
-
78
-
79
-
80
-
81
-
82
-
83
-
84
-
85
-
86
-
87
-
88
-
89
-
90
-
91
-
92
-
93
-
94
-
95
-
96
-
97
-
98
-
99
-
100
-
101
-
102
-
103
-
104
-
105
-
106
-
107
-
108
-
109
-
110
-
111
-
112
-
113
-
114
-
115
-
116
-
117
-
118
-
119
-
120
-
121
-
122
-
123
-
124
-
125
-
126
-
127
-
128
-
129
-
130
-
131
-
132
-
133
-
134
-
135
-
136
-
137
-
138
-
139
-
140
-
141
-
142
-
143
-
144
-
145
-
146
 |
 |