Gateway NV-53A Service Guide - Page 63
removed in, Attach the bracket to the new optical drive and secure it with the screw
 |
View all Gateway NV-53A manuals
Add to My Manuals
Save this manual to your list of manuals |
Page 63 highlights
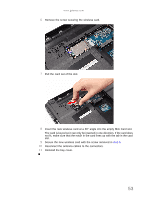
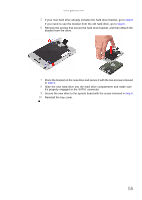
www.gateway.com 5 If your new optical drive already has it's own bracket and bezel, go to step 10. If you need to use the bracket and bezel from the old optical drive, perform steps 6-9 as necessary. 6 Detach the bezel from the old optical drive. 7 Remove the screw that secures the optical drive bracket, and then detach the bracket from the drive. 8 Attach the bezel to the new optical drive. 9 Attach the bracket to the new optical drive and secure it with the screw removed in step 7. 10 Slide the new optical drive into the drive bay and make sure it's properly engaged to the ODD1 connector. 11 Secure the new drive to the system board with the screw removed in step 3. 12 Reinstall the bay cover. 57
-
 1
1 -
2
-
3
-
4
-
5
-
6
-
7
-
8
-
9
-
10
-
11
-
12
-
13
-
14
-
15
-
16
-
17
-
18
-
19
-
20
-
21
-
22
-
23
-
24
-
25
-
26
-
27
-
28
-
29
-
30
-
31
-
32
-
33
-
34
-
35
-
36
-
37
-
38
-
39
-
40
-
41
-
42
-
43
-
44
-
45
-
46
-
47
-
48
-
49
-
50
-
51
-
52
-
53
-
54
-
55
-
56
-
57
-
 58
58 -
 59
59 -
 60
60 -
 61
61 -
 62
62 -
 63
63 -
 64
64 -
 65
65 -
 66
66 -
 67
67 -
 68
68 -
69
-
70
-
71
-
72
-
73
-
74
-
75
-
76
-
77
-
78
-
79
-
80
-
81
-
82
-
83
-
84
-
85
-
86
-
87
-
88
-
89
-
90
-
91
-
92
-
93
-
94
-
95
-
96
-
97
-
98
-
99
-
100
-
101
-
102
-
103
-
104
-
105
-
106
-
107
-
108
-
109
-
110
-
111
-
112
-
113
-
114
-
115
-
116
-
117
-
118
-
119
-
120
-
121
-
122
-
123
-
124
-
125
-
126
-
127
-
128
-
129
-
130
-
131
-
132
-
133
-
134
-
135
-
136
-
137
-
138
-
139
-
140
-
141
-
142
-
143
-
144
-
145
-
146
-
147
-
148
-
149
-
150
-
151
-
152
-
153
-
154
-
155
-
156
-
157
-
158
-
159
-
160
-
161
-
162
-
163
-
164
-
165
-
166
-
167
-
168
 |
 |
www.gateway.com
57
5
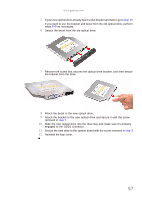
If your new optical drive already has it’s own bracket and bezel, go to
step 10
.
If you need to use the bracket and bezel from the old optical drive, perform
steps
6
–
9
as necessary.
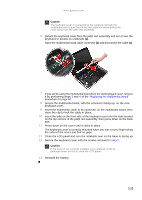
6
Detach the bezel from the old optical drive.
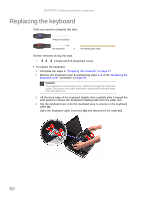
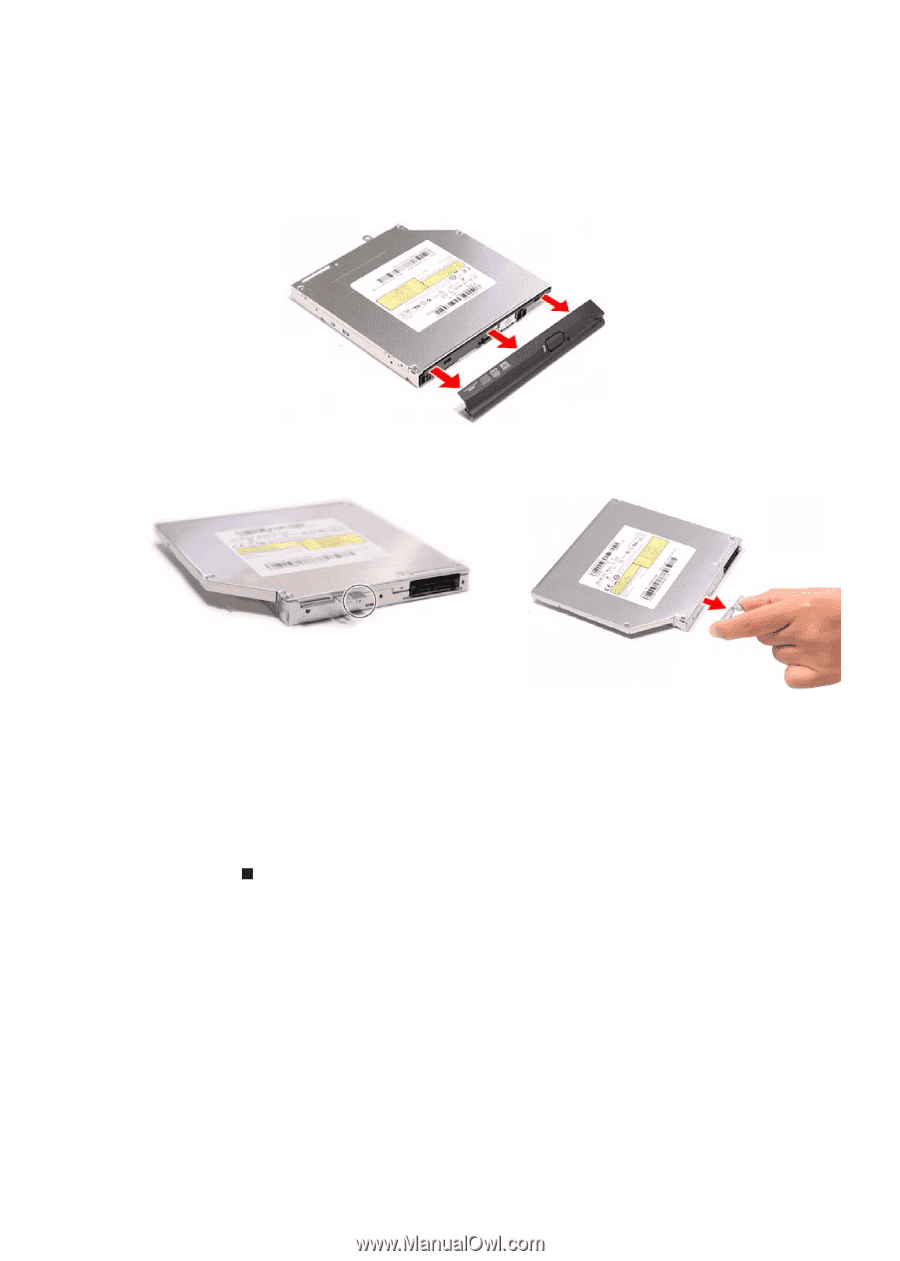
7
Remove the screw that secures the optical drive bracket, and then detach
the bracket from the drive.
8
Attach the bezel to the new optical drive.
9
Attach the bracket to the new optical drive and secure it with the screw
removed in
step 7
.
10
Slide the new optical drive into the drive bay and make sure it’s properly
engaged to the ODD1 connector.
11
Secure the new drive to the system board with the screw removed in
step 3
.
12
Reinstall the bay cover.