HP Vectra VL 5/xxx HP Vectra VL 5/xxX Series 3 PC - User’s Guide - Page 16
Configuring Power Management in Windows
 |
View all HP Vectra VL 5/xxx manuals
Add to My Manuals
Save this manual to your list of manuals |
Page 16 highlights
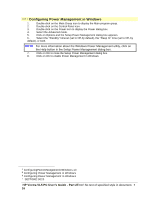
# $ K + Configuring Power Management in Windows 1. Double-click on the Main Group icon to display the Main program group. 2. Double-click on the Control Panel icon. 3. Double-click on the Power icon to display the Power dialog box. 4. Select the Advanced mode. 5. Click on Options and the Setup Power Management dialog box appears. 6. Select the "Standby" timeout (set to Off, by default), the "Sleep At" time (set to Off, by default), or both. NOTE 7. 8. For more information about the Windows Power Management utility, click on the Help button in the Setup Power Management dialog box. Click on OK to close the Setup Power Management dialog box. Click on OK to enable Power Management in Windows. # ConfiguringPowerManagementinWindows.13 $ Configuring Power Management in Windows K Configuring Power Management in Windows + SECTION2:0020 HP Vectra VL5 PC User's Guide - Part 2Error! No text of specified style in document. • 16
-
 1
1 -
2
-
3
-
4
-
5
-
6
-
7
-
8
-
9
-
10
-
 11
11 -
 12
12 -
 13
13 -
 14
14 -
 15
15 -
 16
16 -
 17
17 -
 18
18 -
 19
19 -
 20
20 -
 21
21 -
22
-
23
-
24
-
25
-
26
-
27
-
28
-
29
-
30
-
31
-
32
-
33
-
34
-
35
-
36
-
37
-
38
-
39
-
40
-
41
-
42
-
43
-
44
-
45
-
46
-
47
-
48
-
49
-
50
-
51
-
52
-
53
-
54
-
55
-
56
-
57
-
58
-
59
-
60
-
61
-
62
-
63
-
64
-
65
-
66
-
67
-
68
-
69
-
70
-
71
-
72
-
73
-
74
-
75
-
76
-
77
-
78
-
79
-
80
-
81
-
82
-
83
-
84
-
85
-
86
-
87
-
88
-
89
-
90
-
91
-
92
-
93
-
94
-
95
-
96
-
97
-
98
-
99
-
100
-
101
-
102
-
103
-
104
-
105
-
106
-
107
-
108
-
109
-
110
-
111
-
112
 |
 |