HP Vectra VL 5/xxx HP Vectra VL 5/xxX Series 3 PC - User’s Guide - Page 38
Installing an IDE Hard Disk Drive in the Bottom Shelf
 |
View all HP Vectra VL 5/xxx manuals
Add to My Manuals
Save this manual to your list of manuals |
Page 38 highlights
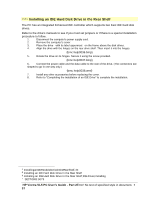
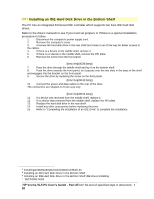
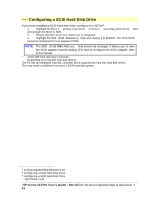
# $ K + Installing an IDE Hard Disk Drive in the Bottom Shelf The PC has an integrated Enhanced IDE controller which supports two Fast IDE hard disk drives. Refer to the drive's manuals to see if you must set jumpers or if there is a special installation procedure to follow. 1. Disconnect the computer's power supply cord. 2. Remove the computer's cover. 3. Unscrew the hard disk drive in the rear shelf and rotate it out of the way for better access to the cables. 4. If there is a device in the middle shelf, remove it. 5. If there is no device in the middle shelf, remove the RFI plate. 6. Remove the screw from the front panel. {bmc help0039.bmp} 7. Pass the drive through the middle shelf and lay it on the bottom shelf. 8. Push the drive towards the front panel, so it passes over the two slots in the base of the shelf and engages into the bracket on the front panel. 9. Secure the drive by replacing the screw on the front panel. {bmc help0040.bmp} 10. Connect the power and data cables to the rear of the drive. The connectors are shaped to fit one way only. {bmc help0041.bmp} 11. If a device was removed from the middle shelf, replace it. 12. If no device was removed from the middle shelf, replace the RFI plate. 13. Replace the hard disk drive in the rear shelf. 14. Install any other accessories before replacing thecover. 15. Refer to "Completing the Installation of an IDE Drive" to complete the installation. # InstallinganIDEHardDiskDriveintheBottomShelf.35 $ Installing an IDE Hard Disk Drive in the Bottom Shelf K Installing an IDE Hard Disk Drive in the Bottom Shelf;IDE drives;installing + SECTION3:0080 HP Vectra VL5 PC User's Guide - Part 2Error! No text of specified style in document. • 38
-
 1
1 -
2
-
3
-
4
-
5
-
6
-
7
-
8
-
9
-
10
-
11
-
12
-
13
-
14
-
15
-
16
-
17
-
18
-
19
-
20
-
21
-
22
-
23
-
24
-
25
-
26
-
27
-
28
-
29
-
30
-
31
-
32
-
 33
33 -
 34
34 -
 35
35 -
 36
36 -
 37
37 -
 38
38 -
 39
39 -
 40
40 -
 41
41 -
 42
42 -
 43
43 -
44
-
45
-
46
-
47
-
48
-
49
-
50
-
51
-
52
-
53
-
54
-
55
-
56
-
57
-
58
-
59
-
60
-
61
-
62
-
63
-
64
-
65
-
66
-
67
-
68
-
69
-
70
-
71
-
72
-
73
-
74
-
75
-
76
-
77
-
78
-
79
-
80
-
81
-
82
-
83
-
84
-
85
-
86
-
87
-
88
-
89
-
90
-
91
-
92
-
93
-
94
-
95
-
96
-
97
-
98
-
99
-
100
-
101
-
102
-
103
-
104
-
105
-
106
-
107
-
108
-
109
-
110
-
111
-
112
 |
 |