HP d640 HP D640 High-Volume Printer - Installation Manual (Printer and Accesso - Page 85
Procedure 12: Setting the Date and Time, Online, Printing, Configuration, Comms
 |
View all HP d640 manuals
Add to My Manuals
Save this manual to your list of manuals |
Page 85 highlights
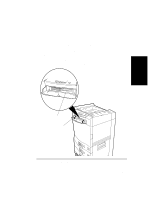
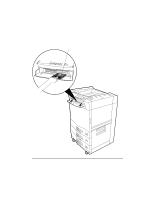
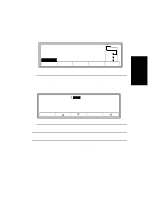
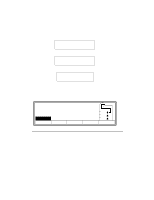
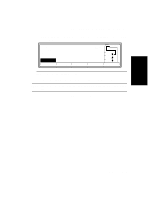
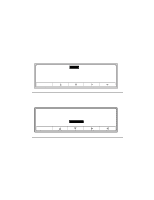
Procedure 12: Setting the Date and Time Procedure 12: Setting the Date and Time The D640 prints the current date and time on test patterns and reports (such as the Ripple Test Pattern and the Maintenance Report). When you unpack the printer, the date and time still has the factory settings. Set the date and time to the current values, following these steps: 1. At the Main Screen (shown in Figure 2-73), press Menu. You will see the screen in Figure 2-80. Menu Printing Configuration PCL Comms Maintenance Online Figure 2-80 Menu 2. Use the down arrow to highlight Maintenance, as shown in Figure 2-81. Online Online Menu Printing Configuration PCL Comms Maintenance Figure 2-81 Maintenance Selected 3. Press the right arrow to highlight the Maintenance screen, shown in Figure 2-82. 2-76 Installation
-
 1
1 -
2
-
3
-
4
-
5
-
6
-
7
-
8
-
9
-
10
-
11
-
12
-
13
-
14
-
15
-
16
-
17
-
18
-
19
-
20
-
21
-
22
-
23
-
24
-
25
-
26
-
27
-
28
-
29
-
30
-
31
-
32
-
33
-
34
-
35
-
36
-
37
-
38
-
39
-
40
-
41
-
42
-
43
-
44
-
45
-
46
-
47
-
48
-
49
-
50
-
51
-
52
-
53
-
54
-
55
-
56
-
57
-
58
-
59
-
60
-
61
-
62
-
63
-
64
-
65
-
66
-
67
-
68
-
69
-
70
-
71
-
72
-
73
-
74
-
75
-
76
-
77
-
78
-
79
-
 80
80 -
 81
81 -
 82
82 -
 83
83 -
 84
84 -
 85
85 -
 86
86 -
 87
87 -
 88
88 -
 89
89 -
 90
90 -
91
-
92
-
93
-
94
-
95
-
96
-
97
-
98
-
99
-
100
-
101
-
102
-
103
-
104
-
105
-
106
-
107
-
108
-
109
-
110
-
111
-
112
-
113
-
114
-
115
-
116
-
117
-
118
-
119
-
120
-
121
-
122
-
123
-
124
-
125
-
126
-
127
-
128
-
129
-
130
-
131
-
132
-
133
-
134
-
135
-
136
-
137
-
138
-
139
-
140
-
141
-
142
-
143
-
144
-
145
-
146
-
147
-
148
-
149
-
150
-
151
-
152
-
153
-
154
-
155
-
156
-
157
-
158
-
159
-
160
-
161
-
162
-
163
-
164
-
165
-
166
-
167
-
168
-
169
-
170
-
171
-
172
-
173
-
174
-
175
-
176
-
177
-
178
-
179
-
180
-
181
-
182
-
183
-
184
-
185
-
186
-
187
-
188
-
189
-
190
-
191
-
192
-
193
-
194
-
195
-
196
-
197
-
198
-
199
-
200
-
201
-
202
-
203
-
204
-
205
-
206
-
207
-
208
-
209
-
210
 |
 |
