Kyocera TASKalfa 620 620/820 Operation Guide (Advanced) - Page 149
Hard Disk Management
 |
View all Kyocera TASKalfa 620 manuals
Add to My Manuals
Save this manual to your list of manuals |
Page 149 highlights
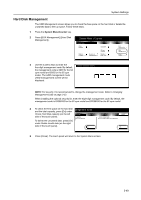
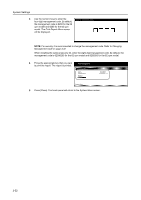
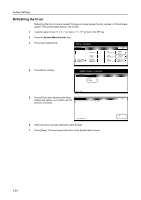
System Settings Hard Disk Management The HDD Management screen allows you to check the free space on the hard disk or delete the unwanted data to free up space. Follow these steps. 1 Press the System Menu/Counter key. 2 Press [BOX Management] ([Hard Disk Management]). System Menu / Counter System Menu Copy D e fau l t Mach i n e D e fau l t D o cu m e n t Man ag e m e n t Language MP tray S e tti n g Re g i ste r Orig. Size Job Acco u n ti n g BOX Man ag e m e n t P ri n t Re p o rt 3 Use the numeric keys to enter the four-digit management code. By default, Enter the administrator numbe.r the management code is 6200 for the 62 cpm model and 8200 for the 82 cpm model. The HDD management mode (HDD management) screen will be displayed. NOTE: For security, it is recommended to change the management code. Refer to Changing Management Code on page 3-32. When installing the optional security kit, enter the eight-digit management code. By default, the management code is 62006200 for the 62 cpm model and 82008200 for the 82 cpm model. 4 To check the free space on the hard disk management mode and the total capacity, press [On] under Check Hard Disk capacity (on the left ment mode side of the touch panel). isk capacity space and capacity To delete the unwanted data, press [On] sk. under Delete invalid data (on the right side of the touch panel). On Delete invalid data Delete invalid data in the Hard Dis.k Close On 5 Press [Close]. The touch panel will return to the System Menu screen. 3-49
-
 1
1 -
2
-
3
-
4
-
5
-
6
-
7
-
8
-
9
-
10
-
11
-
12
-
13
-
14
-
15
-
16
-
17
-
18
-
19
-
20
-
21
-
22
-
23
-
24
-
25
-
26
-
27
-
28
-
29
-
30
-
31
-
32
-
33
-
34
-
35
-
36
-
37
-
38
-
39
-
40
-
41
-
42
-
43
-
44
-
45
-
46
-
47
-
48
-
49
-
50
-
51
-
52
-
53
-
54
-
55
-
56
-
57
-
58
-
59
-
60
-
61
-
62
-
63
-
64
-
65
-
66
-
67
-
68
-
69
-
70
-
71
-
72
-
73
-
74
-
75
-
76
-
77
-
78
-
79
-
80
-
81
-
82
-
83
-
84
-
85
-
86
-
87
-
88
-
89
-
90
-
91
-
92
-
93
-
94
-
95
-
96
-
97
-
98
-
99
-
100
-
101
-
102
-
103
-
104
-
105
-
106
-
107
-
108
-
109
-
110
-
111
-
112
-
113
-
114
-
115
-
116
-
117
-
118
-
119
-
120
-
121
-
122
-
123
-
124
-
125
-
126
-
127
-
128
-
129
-
130
-
131
-
132
-
133
-
134
-
135
-
136
-
137
-
138
-
139
-
140
-
141
-
142
-
143
-
 144
144 -
 145
145 -
 146
146 -
 147
147 -
 148
148 -
 149
149 -
 150
150 -
 151
151 -
 152
152 -
 153
153 -
 154
154 -
155
-
156
-
157
-
158
-
159
-
160
-
161
-
162
-
163
-
164
-
165
-
166
-
167
-
168
-
169
-
170
-
171
-
172
-
173
-
174
-
175
-
176
-
177
-
178
-
179
-
180
-
181
-
182
-
183
-
184
-
185
-
186
-
187
-
188
-
189
-
190
-
191
-
192
-
193
-
194
-
195
-
196
-
197
-
198
-
199
-
200
-
201
-
202
-
203
-
204
-
205
-
206
-
207
-
208
-
209
-
210
-
211
-
212
 |
 |
