Netgear R6250 User Manual - Page 106
IPv6 Pass Through, IPv6 Fixed, Use This Interface ID
 |
View all Netgear R6250 manuals
Add to My Manuals
Save this manual to your list of manuals |
Page 106 highlights
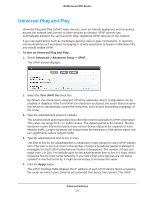
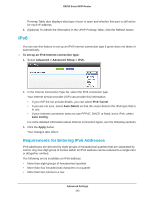
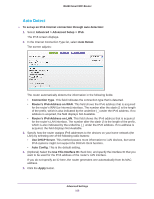
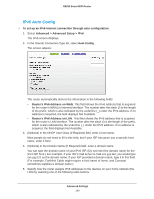
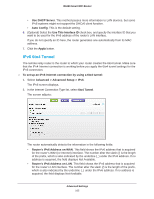
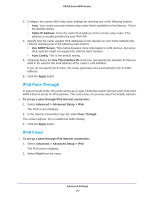
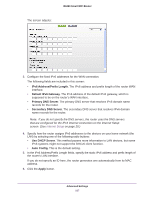
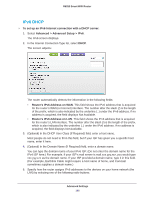
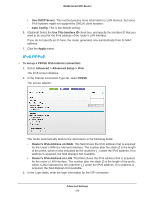
R6250 Smart WiFi Router 3. Configure the remote 6to4 relay router settings by selecting one of the following buttons: • Auto. Your router uses any remote relay router that is available on the Internet. This is the default setting. • Static IP Address. Enter the static IPv4 address of the remote relay router. This address is usually provided by your IPv6 ISP. 4. Specify how the router assigns IPv6 addresses to the devices on your home network (the LAN) by selecting one of the following radio buttons: • Use DHCP Server. This method passes more information to LAN devices, but some IPv6 systems might not support the DHCv6 client function. • Auto Config. This is the default setting. 5. (Optional) Select the Use This Interface ID check box, and specify the interface ID that you want to be used for the IPv6 address of the router's LAN interface. If you do not specify an ID here, the router generates one automatically from its MAC address. 6. Click the Apply button. IPv6 Pass Through In pass-through mode, the router works as a Layer 2 Ethernet switch with two ports (LAN and WAN Ethernet ports) for IPv6 packets. The router does not process any IPv6 header packets. To set up a pass-through IPv6 Internet connection: 1. Select Advanced > Advanced Setup > IPv6. The IPv6 screen displays. 2. In the Internet Connection Type list, select Pass Through. The screen adjusts, but no additional fields display. 3. Click the Apply button. IPv6 Fixed To set up a pass-through IPv6 Internet connection: 1. Select Advanced > Advanced Setup > IPv6. The IPv6 screen displays. 2. Select Fixed from the menu. Advanced Settings 106
-
 1
1 -
2
-
3
-
4
-
5
-
6
-
7
-
8
-
9
-
10
-
11
-
12
-
13
-
14
-
15
-
16
-
17
-
18
-
19
-
20
-
21
-
22
-
23
-
24
-
25
-
26
-
27
-
28
-
29
-
30
-
31
-
32
-
33
-
34
-
35
-
36
-
37
-
38
-
39
-
40
-
41
-
42
-
43
-
44
-
45
-
46
-
47
-
48
-
49
-
50
-
51
-
52
-
53
-
54
-
55
-
56
-
57
-
58
-
59
-
60
-
61
-
62
-
63
-
64
-
65
-
66
-
67
-
68
-
69
-
70
-
71
-
72
-
73
-
74
-
75
-
76
-
77
-
78
-
79
-
80
-
81
-
82
-
83
-
84
-
85
-
86
-
87
-
88
-
89
-
90
-
91
-
92
-
93
-
94
-
95
-
96
-
97
-
98
-
99
-
100
-
 101
101 -
 102
102 -
 103
103 -
 104
104 -
 105
105 -
 106
106 -
 107
107 -
 108
108 -
 109
109 -
 110
110 -
 111
111 -
112
-
113
-
114
-
115
-
116
-
117
-
118
-
119
-
120
-
121
-
122
-
123
-
124
-
125
-
126
-
127
-
128
-
129
 |
 |