Netgear R6250 User Manual - Page 72
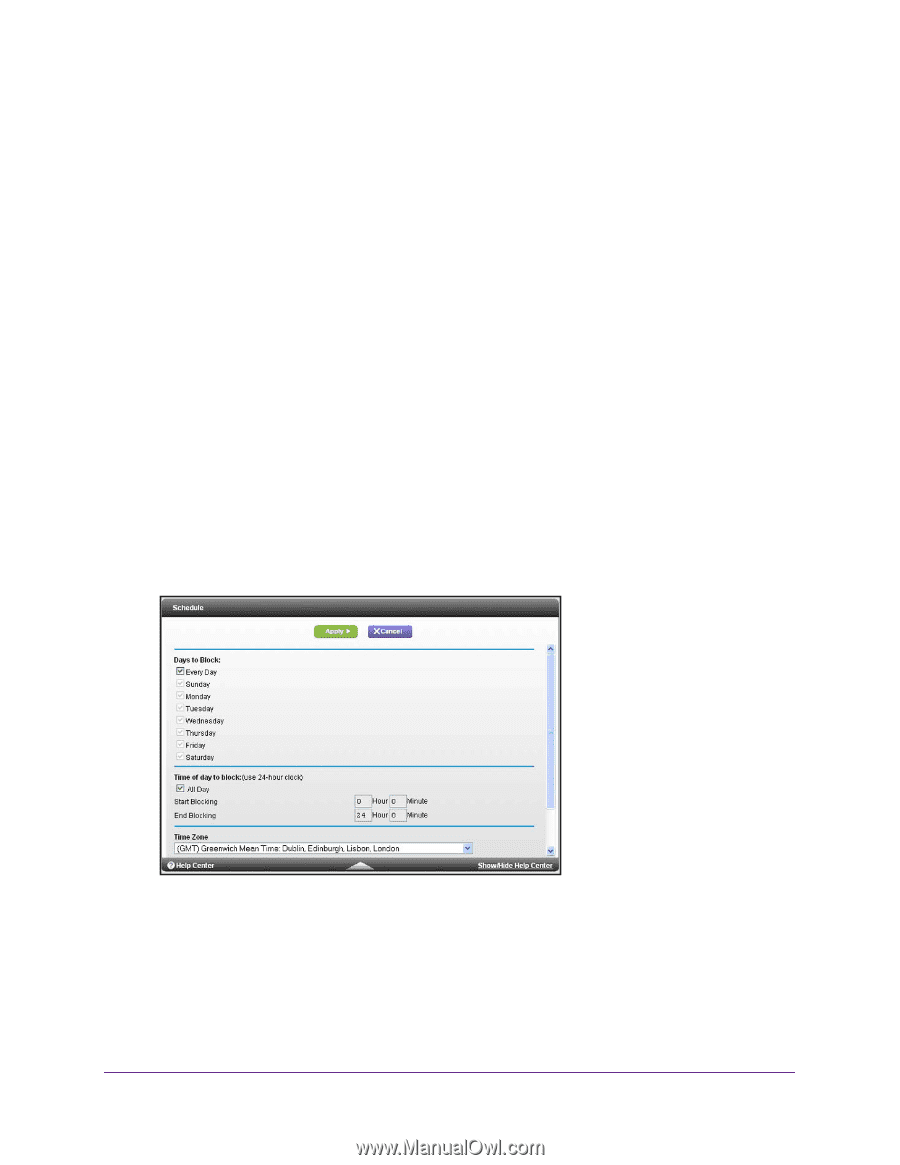
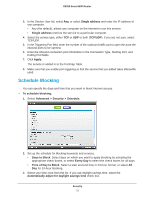
Schedule Blocking, Advanced > Security > Schedule
 |
View all Netgear R6250 manuals
Add to My Manuals
Save this manual to your list of manuals |
Page 72 highlights
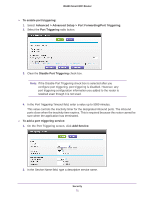
R6250 Smart WiFi Router 3. In the Service User list, select Any, or select Single address and enter the IP address of one computer. • Any (the default), allows any computer on the Internet to use this service. • Single address restricts the service to a particular computer. 4. Select the service type, either TCP or UDP or both (TCP/UDP). If you are not sure, select TCP/UDP. 5. In the Triggering Port field, enter the number of the outbound traffic port to open the ause the inbound ports to be opened. 6. Enter the inbound connection port information in the Connection Type, Starting Port, and Ending Port fields. 7. Click Apply. The service is added in to the Portmap Table. 8. Make sure that you enable port triggering so that the service that you added takes effectwillis used. Schedule Blocking You can specify the days and time that you want to block Internet access. To schedule blocking: 1. Select Advanced > Security > Schedule. 2. Set up the schedule for blocking keywords and services. • Days to Block. Select days on which you want to apply blocking by selecting the appropriate check boxes, or select Every Day to select the check boxes for all days. • Time of Day to Block. Select a start and end time in 24-hour format, or select All Day for 24-hour blocking. 3. Select your time zone from the list. If you use daylight savings time, select the Automatically adjust for daylight savings time check box. Security 72
-
 1
1 -
2
-
3
-
4
-
5
-
6
-
7
-
8
-
9
-
10
-
11
-
12
-
13
-
14
-
15
-
16
-
17
-
18
-
19
-
20
-
21
-
22
-
23
-
24
-
25
-
26
-
27
-
28
-
29
-
30
-
31
-
32
-
33
-
34
-
35
-
36
-
37
-
38
-
39
-
40
-
41
-
42
-
43
-
44
-
45
-
46
-
47
-
48
-
49
-
50
-
51
-
52
-
53
-
54
-
55
-
56
-
57
-
58
-
59
-
60
-
61
-
62
-
63
-
64
-
65
-
66
-
 67
67 -
 68
68 -
 69
69 -
 70
70 -
 71
71 -
 72
72 -
 73
73 -
 74
74 -
 75
75 -
 76
76 -
 77
77 -
78
-
79
-
80
-
81
-
82
-
83
-
84
-
85
-
86
-
87
-
88
-
89
-
90
-
91
-
92
-
93
-
94
-
95
-
96
-
97
-
98
-
99
-
100
-
101
-
102
-
103
-
104
-
105
-
106
-
107
-
108
-
109
-
110
-
111
-
112
-
113
-
114
-
115
-
116
-
117
-
118
-
119
-
120
-
121
-
122
-
123
-
124
-
125
-
126
-
127
-
128
-
129
 |
 |