Panasonic AW-HE130 Operating Instructions - Page 67
Web screen operations continued, Camera button / Color bar button CAM/BAR
 |
View all Panasonic AW-HE130 manuals
Add to My Manuals
Save this manual to your list of manuals |
Page 67 highlights
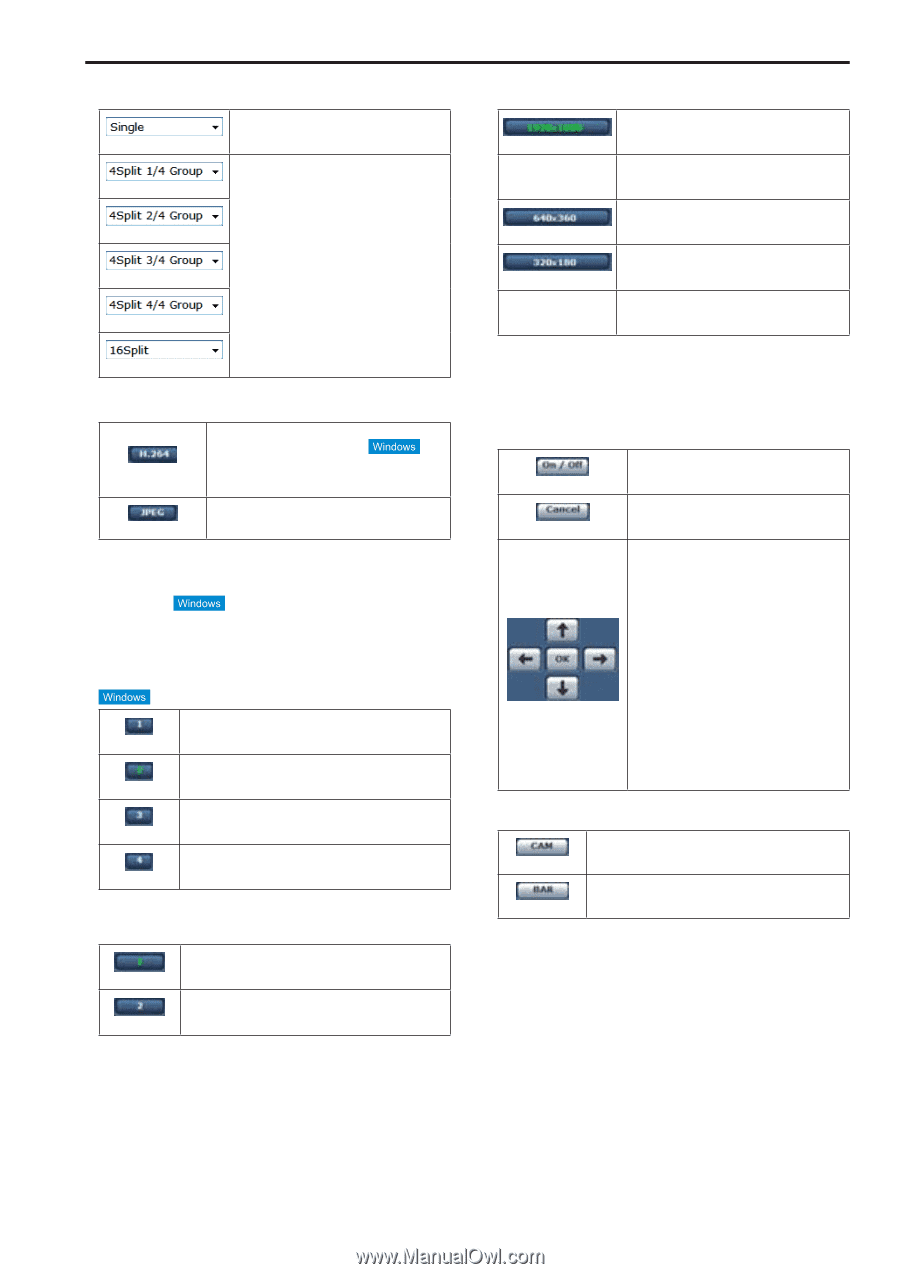
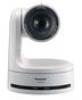
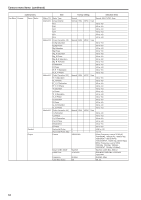
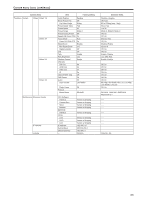
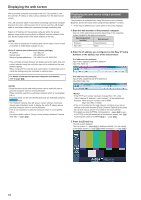
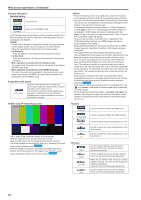
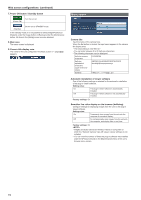
Web screen operations (continued) 1. Multi-Screen list box (Multi-screen) The Live screen display method is selected here. (Single) The IP videos of the connected camera are displayed. (4Split 1/4 Group) (4Split 2/4 Group) (4Split 3/4 Group) (4Split 4/4 Group) When the cameras for multi-screen display have been set ahead of time using the multiscreen (→page @@), it is possible to view a multiple number of IP videos on a single screen. (Multi display mode) (16Split) 2. Compression button (Compression) (H264) When selected, the text on the button turns green, and H.264 images are displayed. The [H.264] button is enabled when the "H.264 transmission" setting of [H.264 (1)] to [H.264 (4)] on the Video over IP is "On". (→page @@) (JPEG) When selected, the text on the button turns green, and JPEG images are displayed. • When [H.264 transmission] is set to "On," H.264 video will be displayed in the following cases even if the camera is set to display JPEG video. - When returning from another screen - When the screen is updated 3. Stream buttons These buttons appear only when H.264 images are displayed. When selected, the text on the button turns green, and the images in the main area appear according to the (1) settings configured for [H.264(1)]. When selected, the text on the button turns green, and the images in the main area appear according to the (2) settings configured for [H.264(2)]. When selected, the text on the button turns green, and the images in the main area appear according to the (3) settings configured for [H.264(3)]. When selected, the text on the button turns green, and the images in the main area appear according to the (4) settings configured for [H.264(4)]. 4. Image quality buttons These buttons appear only when JPEG images are displayed. When selected, images appear according to the settings configured for [Quality1] in the JPEG image (1) quality settings (→ page @@). When selected, images appear according to the settings configured for [Quality2] in the JPEG image (2) quality settings (→ page @@). 5. Image Capture Size buttons These buttons appear only when JPEG images are displayed. (1920 x 1080) When selected, the text on the button turns green, and the images in the main area appear in 1920 x 1080 size. (1280 x 720) When selected, the text on the button turns green, and the images in the main area appear in 1280 x 720 size. (640 x 360) When selected, the text on the button turns green, and the images in the main area appear in 640 x 360 size. (320 x 180) When selected, the text on the button turns green, and the images in the main area appear in 320 x 180 size. (160x90) When selected, the text on the button turns green, and the images in the main area appear in 160 x 90 size. • The resolution selected with [JPEG(1)], [JPEG(2)], and [JPEG(3)] under [JPEG] in the [Video over IP] tab will be used. • If the resolution is set to [1920x1080] or [1280x720], the image may be compressed depending on the size of the web browser window. 6. OSD Menu Operation (On / Off) (Cancel) OK) Use this to select whether the camera's onscreen displays are to be shown. It cancels the selection of the setting which is being changed. It restores the pre-change setting. Use these to perform the menu operations. The items are selected using the buttons. If a selected item has a sub menu, this sub menu is displayed by pressing the [OK] button. When the cursor is moved to any item on the bottom-level setting screen and the [OK] button is pressed, the setting of the selected item starts flashing. A setting for a regular menu item is reflected immediately if it is changed while it is still flashing. However, there are a number of menu items (Scene, Format and Initialize) whose setting is reflected only after the [OK] button has been pressed, causing the setting to stop flashing and the new setting to be entered. 7. Camera button / Color bar button (CAM/BAR) (CAM) Use this to output the camera pictures. (BAR) Use this to output the color bar signals. 67
-
 1
1 -
2
-
3
-
4
-
5
-
6
-
7
-
8
-
9
-
10
-
11
-
12
-
13
-
14
-
15
-
16
-
17
-
18
-
19
-
20
-
21
-
22
-
23
-
24
-
25
-
26
-
27
-
28
-
29
-
30
-
31
-
32
-
33
-
34
-
35
-
36
-
37
-
38
-
39
-
40
-
41
-
42
-
43
-
44
-
45
-
46
-
47
-
48
-
49
-
50
-
51
-
52
-
53
-
54
-
55
-
56
-
57
-
58
-
59
-
60
-
61
-
 62
62 -
 63
63 -
 64
64 -
 65
65 -
 66
66 -
 67
67 -
 68
68 -
 69
69 -
 70
70 -
 71
71 -
 72
72 -
73
-
74
-
75
-
76
-
77
-
78
-
79
-
80
-
81
-
82
-
83
-
84
-
85
-
86
-
87
-
88
-
89
-
90
-
91
-
92
-
93
-
94
-
95
-
96
-
97
-
98
-
99
-
100
-
101
-
102
-
103
-
104
-
105
-
106
-
107
-
108
-
109
-
110
-
111
-
112
-
113
-
114
-
115
-
116
-
117
-
118
-
119
-
120
-
121
-
122
-
123
-
124
-
125
-
126
 |
 |