Panasonic AW-HE130 Operating Instructions - Page 94
CA Certificate - Generate Certificate Signing Request, CA Certificate - CA Certificate install
 |
View all Panasonic AW-HE130 manuals
Add to My Manuals
Save this manual to your list of manuals |
Page 94 highlights
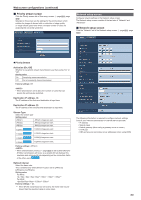
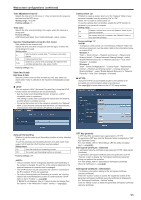
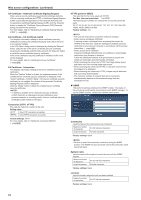
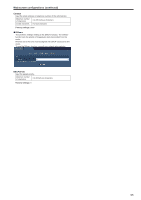
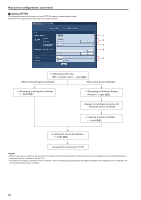
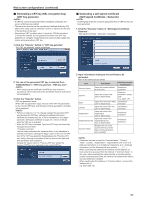
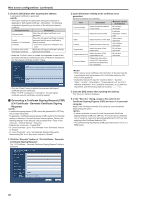
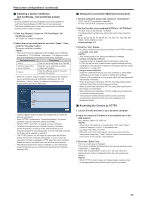
Web screen configurations (continued) CA Certificate - Generate Certificate Signing Request When using a security certificate issued by the Certificate Authority (CA) as a security certificate for HTTPS, a Certificate Signing Request (CSR) is generated for application to the Certificate Authority (CA). To generate a Certificate Signing Request (CSR), click the "Execute" button to display the "Certificate Signing Request (CSR) Generate" dialog and perform the operation. For more details, refer to "Generating a Certificate Signing Request (CSR)" (→ page@@) CA Certificate - CA Certificate install This displays information relating to server certificates (security certificates) issued by the Certificate Authority (CA), which are to be or are already installed . In the "File Open" dialog, which is displayed by clicking the "Browse" button, select the file of the server certificate (security certificate) issued by the Certificate Authority (CA) and click the "Execute" button to install the server certificate (security certificate). If the server certificate (security certificate) is installed, its file name will be displayed. For more details, refer to "Installing the Server Certificate" (→page@@). CA Certificate - Information This displays information relating to the server certificate (security certificate). When the "Confirm" button is clicked, the registered content of the installed server certificate (security certificate) is displayed in the "Server Certificate - Confirm" dialog", If the server certificate (security certificate) is not installed, the content of the generated Certificate Signing Request (CSR) is displayed. Click the "Delete" button to delete the installed server certificate (security certificate). • To delete an enabled server certificate (security certificate), confirm that there is a backup to the said certificate in your personal computer or recording media. A server certificate (security certificate) will be needed to reinstall it. Connection [HTTP, HTTPS] This sets the method to connect to the unit. Setting value: HTTP Only HTTP connection is possible. HTTPS Only HTTPS connection is possible. Factory settings: HTTP For more details, refer to "Setting the Connection Method" (→page@@). HTTPS port[1 to 65535] This sets the Port No. to be used with HTTPS. Port Nos. that can be selected 1 to 65535 The following port numbers are used by the unit so they cannot be used. 20, 21, 23, 25, 42, 53, 67, 68, 69, 80, 110, 123, 161, 162, 554, 995, 10669, 10670, 59000 to 61000 Factory settings: 443 • This unit will restart if the connection method is changed. • When using a self-signed certificate: A warning screen is displayed when accessing the camera by HTTPS for the first time. Install the self-signed certificate (security certificate) in your personal computer in accordance with the screen instructions. (→page @@) • When using a server certificate: Install the Certificate Authority (CA) root certificate or intermediate certificate in your browser in advance. Follow the Certificate Authority (CA) procedures to acquire and install root certificates and intermediate certificates. • When accessing the camera by HTTPS, the image display speed and frame rate of the moving image may reduce. • When accessing the camera by HTTPS, it may take some time for the images to be displayed. • When accessing the camera by HTTPS, images may be disturbed and sound may be interrupted. • The maximum number of cameras that can be connected simultaneously depends on the maximum image size and distribution format. zzSNMP This performs settings relating to the SNMP function. The status of the unit can be confirmed by connecting to it with SNMP manager. To use the SNMP function, consult your network administrator. Community Input the name of the community to be monitored. Maximum number of characters 0 to 32 half-size characters Invalid characters Full size characters Factory settings: blank • Be sure to enter the community name when using the SNMP function. The SNMP function cannot be used if the community name field is left blank. System name Input the name of the system to control the unit with the SNMP function. Maximum number of characters 0 to 32 half-size characters Invalid characters Full size characters Factory settings: blank Location Input the location where the unit has been installed. Maximum number of characters 0 to 32 half-size characters Factory settings: blank 94
-
 1
1 -
2
-
3
-
4
-
5
-
6
-
7
-
8
-
9
-
10
-
11
-
12
-
13
-
14
-
15
-
16
-
17
-
18
-
19
-
20
-
21
-
22
-
23
-
24
-
25
-
26
-
27
-
28
-
29
-
30
-
31
-
32
-
33
-
34
-
35
-
36
-
37
-
38
-
39
-
40
-
41
-
42
-
43
-
44
-
45
-
46
-
47
-
48
-
49
-
50
-
51
-
52
-
53
-
54
-
55
-
56
-
57
-
58
-
59
-
60
-
61
-
62
-
63
-
64
-
65
-
66
-
67
-
68
-
69
-
70
-
71
-
72
-
73
-
74
-
75
-
76
-
77
-
78
-
79
-
80
-
81
-
82
-
83
-
84
-
85
-
86
-
87
-
88
-
 89
89 -
 90
90 -
 91
91 -
 92
92 -
 93
93 -
 94
94 -
 95
95 -
 96
96 -
 97
97 -
 98
98 -
 99
99 -
100
-
101
-
102
-
103
-
104
-
105
-
106
-
107
-
108
-
109
-
110
-
111
-
112
-
113
-
114
-
115
-
116
-
117
-
118
-
119
-
120
-
121
-
122
-
123
-
124
-
125
-
126
 |
 |