Ricoh Aficio SP C730DN Manuals - Page 14
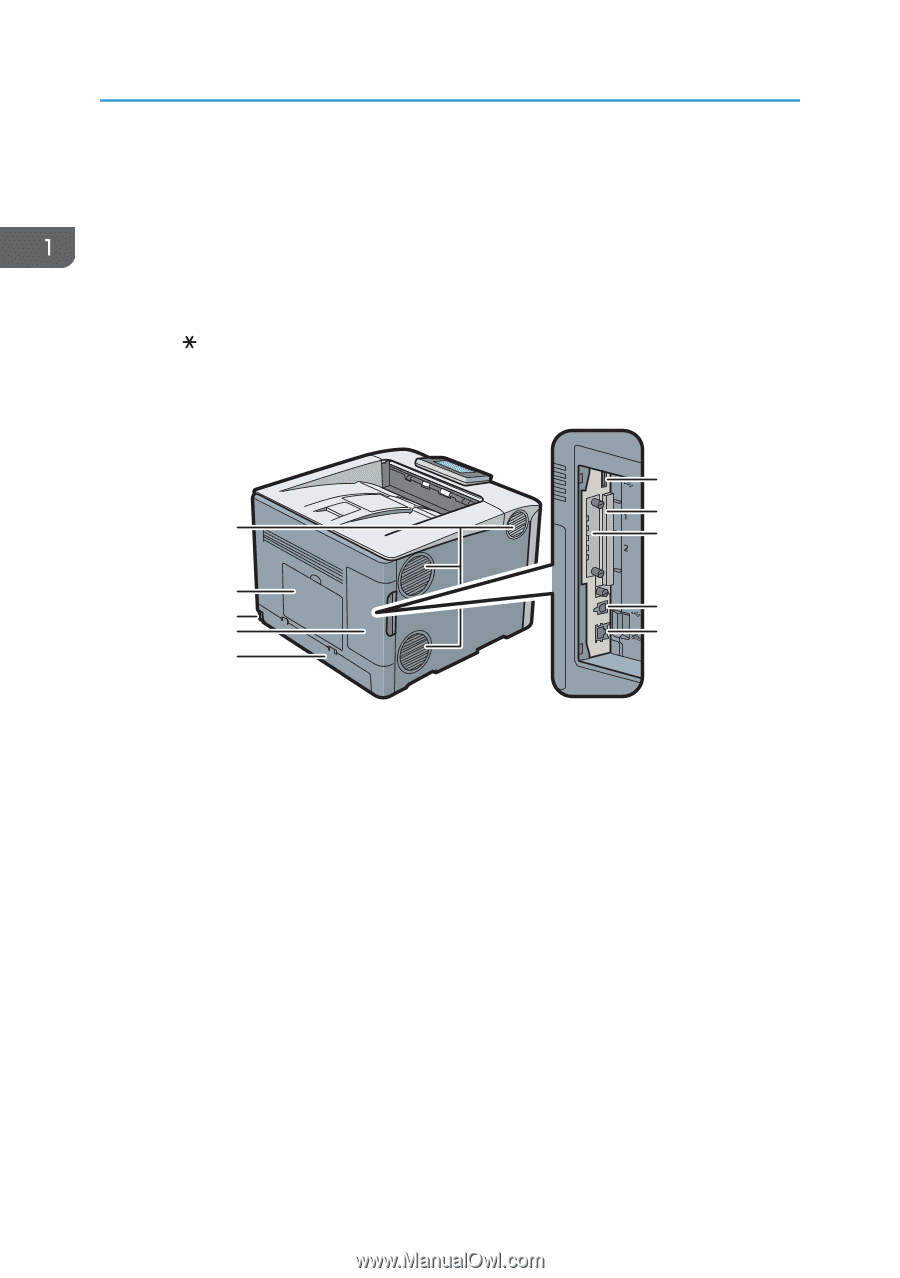
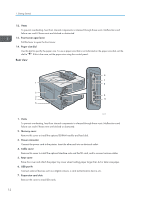
Rear view, Vents, Front cover open lever, Paper size dial, Memory cover, Power connector, Cable cover
 |
View all Ricoh Aficio SP C730DN manuals
Add to My Manuals
Save this manual to your list of manuals |
Page 14 highlights
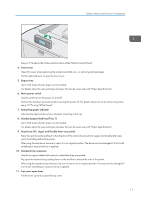
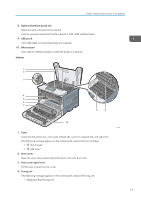
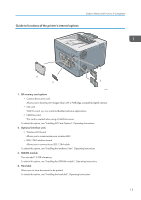
1. Getting Started 12. Vents To prevent overheating, heat from internal components is released through these vents. Malfunctions and failure can result if these vents are blocked or obstructed. 13. Front cover open lever Pull this lever to open the front cover. 14. Paper size dial Use this dial to specify the paper size. To use a paper size that is not indicated on the paper size dial, set the dial to " ". If this is the case, set the paper size using the control panel. Rear view 6 7 1 8 2 9 3 4 10 5 CSJ101 1. Vents To prevent overheating, heat from internal components is released through these vents. Malfunctions and failure can result if these vents are blocked or obstructed. 2. Memory cover Remove this cover to install the optional SDRAM module and hard disk. 3. Power connector Connect the power cord to the printer. Insert the other end into an electrical outlet. 4. Cable cover Remove this cover to install the optional interface units and the SD card, and to connect various cables. 5. Rear cover Raise this cover and attach the paper tray cover when loading paper larger than A4 or letter size paper. 6. USB port A Connect external devices such as a digital camera, a card authentication device, etc. 7. Expansion card slots Remove the cover to install SD cards. 12
-
 1
1 -
2
-
3
-
4
-
5
-
6
-
7
-
8
-
 9
9 -
 10
10 -
 11
11 -
 12
12 -
 13
13 -
 14
14 -
 15
15 -
 16
16 -
 17
17 -
 18
18 -
 19
19 -
20
-
21
-
22
-
23
-
24
-
25
-
26
-
27
-
28
-
29
-
30
-
31
-
32
-
33
-
34
-
35
-
36
-
37
-
38
-
39
-
40
-
41
-
42
-
43
-
44
-
45
-
46
-
47
-
48
-
49
-
50
-
51
-
52
-
53
-
54
-
55
-
56
-
57
-
58
-
59
-
60
-
61
-
62
-
63
-
64
-
65
-
66
-
67
-
68
-
69
-
70
-
71
-
72
-
73
-
74
-
75
-
76
-
77
-
78
-
79
-
80
-
81
-
82
-
83
-
84
-
85
-
86
-
87
-
88
-
89
-
90
-
91
-
92
-
93
-
94
-
95
-
96
-
97
-
98
-
99
-
100
 |
 |