Samsung SGH-T929 User Manual (user Manual) (ver.f5) (English) - Page 130
Send to My Album online?, Resolution, White balance, Effects, Video quality, Adjust
 |
View all Samsung SGH-T929 manuals
Add to My Manuals
Save this manual to your list of manuals |
Page 130 highlights
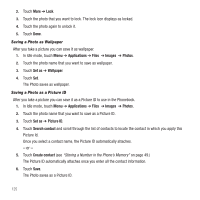
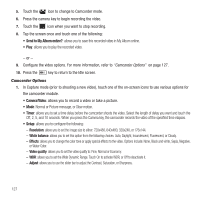
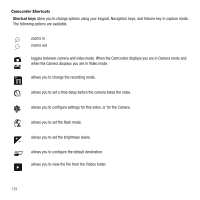
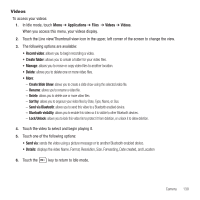
5. Touch the icon to change to Camcorder mode. 6. Press the camera key to begin recording the video. 7. Touch the icon when you want to stop recording. 8. Tap the screen once and touch one of the following: • Send to My Album online?: allows you to save this recorded video in My Album online. • Play: allows you to play the recorded video. - or - 9. Configure the video options. For more information, refer to "Camcorder Options" on page 127. 10. Press the key to return to the Idle screen. Camcorder Options 1. In Capture mode (prior to shooting a new video), touch one of the on-screen icons to use various options for the camcorder module. • Camera/Video: allows you to record a video or take a picture. • Mode: Normal or Picture message, or Slow motion. • Timer: allows you to set a time delay before the camcorder shoots the video. Select the length of delay you want and touch the Off, 2, 5, and 10 seconds. When you press the Camera key, the camcorder records the video af the specified time elapses. • Setup: allows you to configure the following: - Resolution: allows you to set the image size to either: 720x480, 640x480, 320x240, or 176x144. - White balance: allows you to set this option from the following choices: Auto, Daylight, Incandescent, Fluorescent, or Cloudy. - Effects: allows you to change the color tone or apply special effects to the video. Options include: None, Black and white, Sepia, Negative, or Water Color. - Video quality: allows you to set the video quality to: Fine, Normal or Economy. - WDR: allows you to set the Wide Dynamic Range. Touch On to activate WDR, or Off to deactivate it. - Adjust: allows you to use the slider bar to adjust the Contrast, Saturation, or Sharpness. 127
-
 1
1 -
2
-
3
-
4
-
5
-
6
-
7
-
8
-
9
-
10
-
11
-
12
-
13
-
14
-
15
-
16
-
17
-
18
-
19
-
20
-
21
-
22
-
23
-
24
-
25
-
26
-
27
-
28
-
29
-
30
-
31
-
32
-
33
-
34
-
35
-
36
-
37
-
38
-
39
-
40
-
41
-
42
-
43
-
44
-
45
-
46
-
47
-
48
-
49
-
50
-
51
-
52
-
53
-
54
-
55
-
56
-
57
-
58
-
59
-
60
-
61
-
62
-
63
-
64
-
65
-
66
-
67
-
68
-
69
-
70
-
71
-
72
-
73
-
74
-
75
-
76
-
77
-
78
-
79
-
80
-
81
-
82
-
83
-
84
-
85
-
86
-
87
-
88
-
89
-
90
-
91
-
92
-
93
-
94
-
95
-
96
-
97
-
98
-
99
-
100
-
101
-
102
-
103
-
104
-
105
-
106
-
107
-
108
-
109
-
110
-
111
-
112
-
113
-
114
-
115
-
116
-
117
-
118
-
119
-
120
-
121
-
122
-
123
-
124
-
 125
125 -
 126
126 -
 127
127 -
 128
128 -
 129
129 -
 130
130 -
 131
131 -
 132
132 -
 133
133 -
 134
134 -
 135
135 -
136
-
137
-
138
-
139
-
140
-
141
-
142
-
143
-
144
-
145
-
146
-
147
-
148
-
149
-
150
-
151
-
152
-
153
-
154
-
155
-
156
-
157
-
158
-
159
-
160
-
161
-
162
-
163
-
164
-
165
-
166
-
167
-
168
-
169
-
170
-
171
-
172
-
173
-
174
-
175
-
176
-
177
-
178
-
179
-
180
-
181
-
182
-
183
-
184
-
185
-
186
-
187
-
188
-
189
-
190
-
191
-
192
-
193
-
194
-
195
-
196
-
197
-
198
-
199
-
200
 |
 |