Sharp VL-WD450U VLWD450U|VLWD650U Operation Manual - Page 36
Zooming, Tips on Recording Positions
 |
View all Sharp VL-WD450U manuals
Add to My Manuals
Save this manual to your list of manuals |
Page 36 highlights
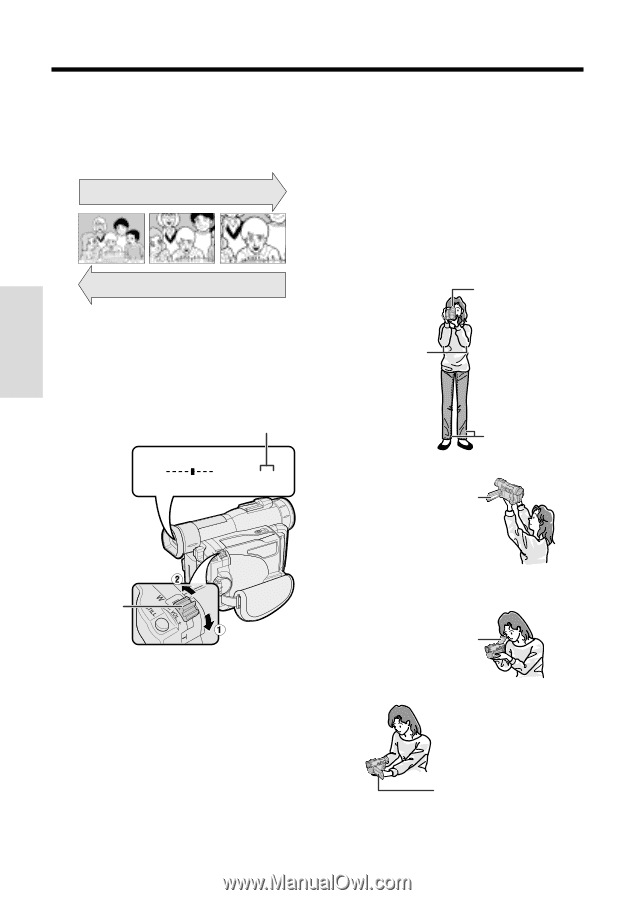
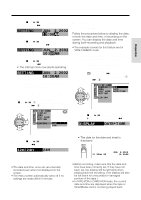
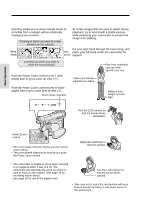
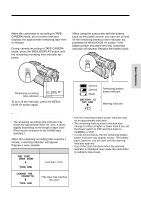
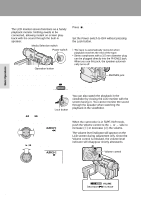
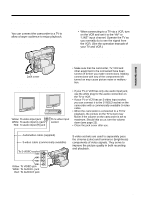
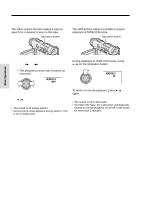
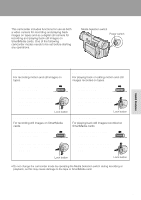
Basic Operations Camera Recording Zooming Tips on Recording Positions Zooming allows you to move visually closer to or farther from a subject without physically changing your position. Zooming in (when you want to center attention on the subject) To create images that are easy to watch during playback, try to record with a stable posture while steadying your camcorder to prevent the image from shaking. Holding the camcorder Wide angle Put your right hand through the hand strap, and Tele- place your left hand under the camcorder for photo support. Zooming out (when you want to show the surroundings) To zoom in Push the Power Zoom control to the T (telephoto) side to get a close-up view (1). To zoom out Push the Power Zoom control to the W (wide angle) side to get a wide field of view (2). Zoom range indicator Basic posture Place your elbows against your sides. Place the viewfinder eyecup firmly against your eye. Balance your weight on both legs. W T Z OOM 3 Shooting from a high angle Turn the LCD monitor so that the screen faces downward. Basic Operations Power Zoom control • The zoom range indicator shows you the current zoom setting. • The zoom speed depends on how far you push the Power Zoom control. Shooting from a low angle Using the viewfinder Raise the viewfinder to view the subject. Using the LCD monitor Notes: • The camcorder is unable to focus when zooming in on subjects within 6 feet (1.8 m). The camcorder will automatically zoom out until it is able to focus on the subject. (See page 43 for recording macro shots.) • See page 32 for use of the digital zoom. 21 Turn the LCD monitor so that the screen faces upward. Note: • Take care not to touch the microphone with your fingers during recording. It will cause noise on the audio track.
-
 1
1 -
2
-
3
-
4
-
5
-
6
-
7
-
8
-
9
-
10
-
11
-
12
-
13
-
14
-
15
-
16
-
17
-
18
-
19
-
20
-
21
-
22
-
23
-
24
-
25
-
26
-
27
-
28
-
29
-
30
-
 31
31 -
 32
32 -
 33
33 -
 34
34 -
 35
35 -
 36
36 -
 37
37 -
 38
38 -
 39
39 -
 40
40 -
 41
41 -
42
-
43
-
44
-
45
-
46
-
47
-
48
-
49
-
50
-
51
-
52
-
53
-
54
-
55
-
56
-
57
-
58
-
59
-
60
-
61
-
62
-
63
-
64
-
65
-
66
-
67
-
68
-
69
-
70
-
71
-
72
-
73
-
74
-
75
-
76
-
77
-
78
-
79
-
80
-
81
-
82
-
83
-
84
-
85
-
86
-
87
-
88
-
89
-
90
-
91
-
92
-
93
-
94
-
95
-
96
-
97
-
98
-
99
-
100
-
101
-
102
-
103
-
104
-
105
-
106
-
107
-
108
-
109
-
110
-
111
-
112
-
113
-
114
-
115
-
116
-
117
-
118
-
119
-
120
 |
 |