Sharp VL-WD450U VLWD450U|VLWD650U Operation Manual - Page 84
Advanced Features, Playback, Audio Dubbing
 |
View all Sharp VL-WD450U manuals
Add to My Manuals
Save this manual to your list of manuals |
Page 84 highlights
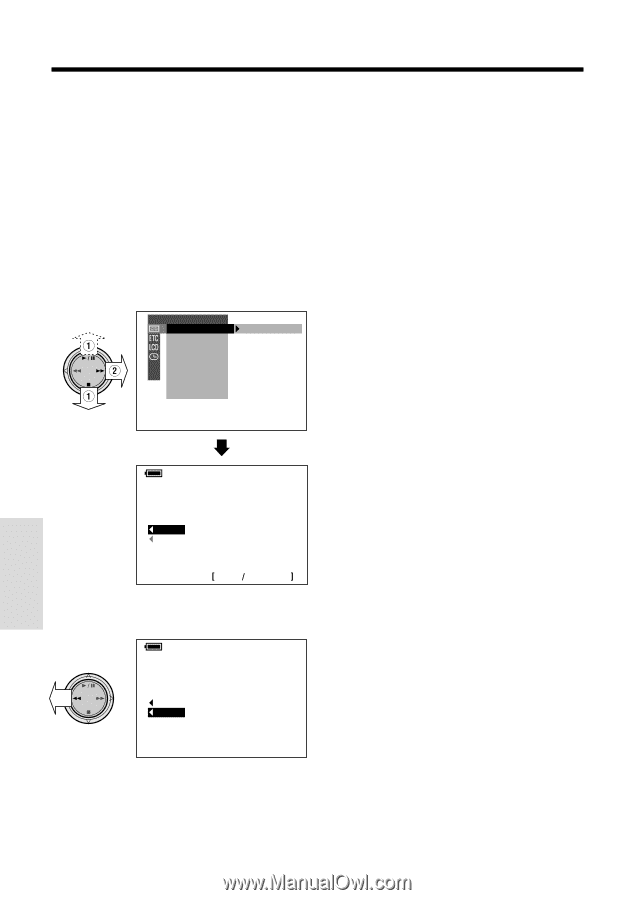
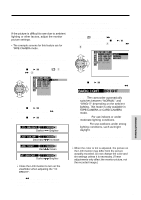
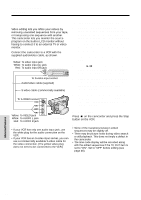
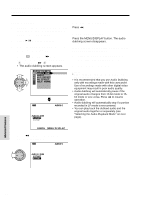
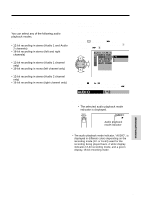
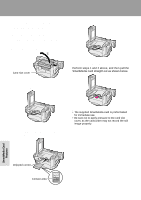
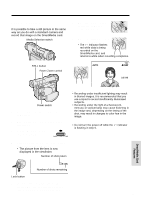
Advanced Features Playback Audio Dubbing 1 Play back the recorded Mini DV cassette and locate the tape position where you wish to start audio dubbing. 2 Press y to pause playback. 3 Press the MENU/DISPLAY button until the menu screen appears. 4 Select V, then press r on the Operation button. Select "AUDIO DUB" (1), then press r (2). • The audio dubbing screen appears. PLAYBACK SET AUD I O DUB AUD I O P I C. EFFECT PB EFFECT MULTI F RAME AUD I O DUB START S T OP AUDIO1+2 To pause audio dubbing Press e. To quit audio dubbing Press the MENU/DISPLAY button. The audio dubbing screen disappears. If you wish to change the dubbed audio or dub additional scenes 1 Press the MENU/DISPLAY button to turn off the audio dubbing screen. 2 Repeat steps 1 to 5 above. Notes: • Audio dubbing cannot be used with record- ings made in LP mode. • It is recommended that you use Audio Dubbing only with recordings made with this camcorder. Use of recordings made with other digital video equipment may result in poor audio quality. • Audio dubbing will automatically pause if the original audio changes from 12-bit mode to 16bit mode or vice versa. Press e to resume operation. • Audio dubbing will automatically stop if a portion recorded in LP mode is encountered. • You can play back the dubbed audio and the original audio together or separately (see "Selecting the Audio Playback Mode" on next page). CANC E L MENU D I SP L AY 5 Press e to begin audio dubbing. Record your narration. AUDIO1+2 AUD I O DUB START S T OP Advanced Features 69
-
 1
1 -
2
-
3
-
4
-
5
-
6
-
7
-
8
-
9
-
10
-
11
-
12
-
13
-
14
-
15
-
16
-
17
-
18
-
19
-
20
-
21
-
22
-
23
-
24
-
25
-
26
-
27
-
28
-
29
-
30
-
31
-
32
-
33
-
34
-
35
-
36
-
37
-
38
-
39
-
40
-
41
-
42
-
43
-
44
-
45
-
46
-
47
-
48
-
49
-
50
-
51
-
52
-
53
-
54
-
55
-
56
-
57
-
58
-
59
-
60
-
61
-
62
-
63
-
64
-
65
-
66
-
67
-
68
-
69
-
70
-
71
-
72
-
73
-
74
-
75
-
76
-
77
-
78
-
 79
79 -
 80
80 -
 81
81 -
 82
82 -
 83
83 -
 84
84 -
 85
85 -
 86
86 -
 87
87 -
 88
88 -
 89
89 -
90
-
91
-
92
-
93
-
94
-
95
-
96
-
97
-
98
-
99
-
100
-
101
-
102
-
103
-
104
-
105
-
106
-
107
-
108
-
109
-
110
-
111
-
112
-
113
-
114
-
115
-
116
-
117
-
118
-
119
-
120
 |
 |